

mwo_achenbach
-
Posts
52 -
Joined
-
Last visited
Posts posted by mwo_achenbach
-
-
Hallo Leute!
Ich teste gerade PTE 8.0 BETA 6 und möchte einen Audioclip exact plazieren.
Wie funktioniert "Customize Audio Clip" "Project Options" "link to slide" ???
Scheint bei mir nicht zu klappen!
Gruß
Manfred
-
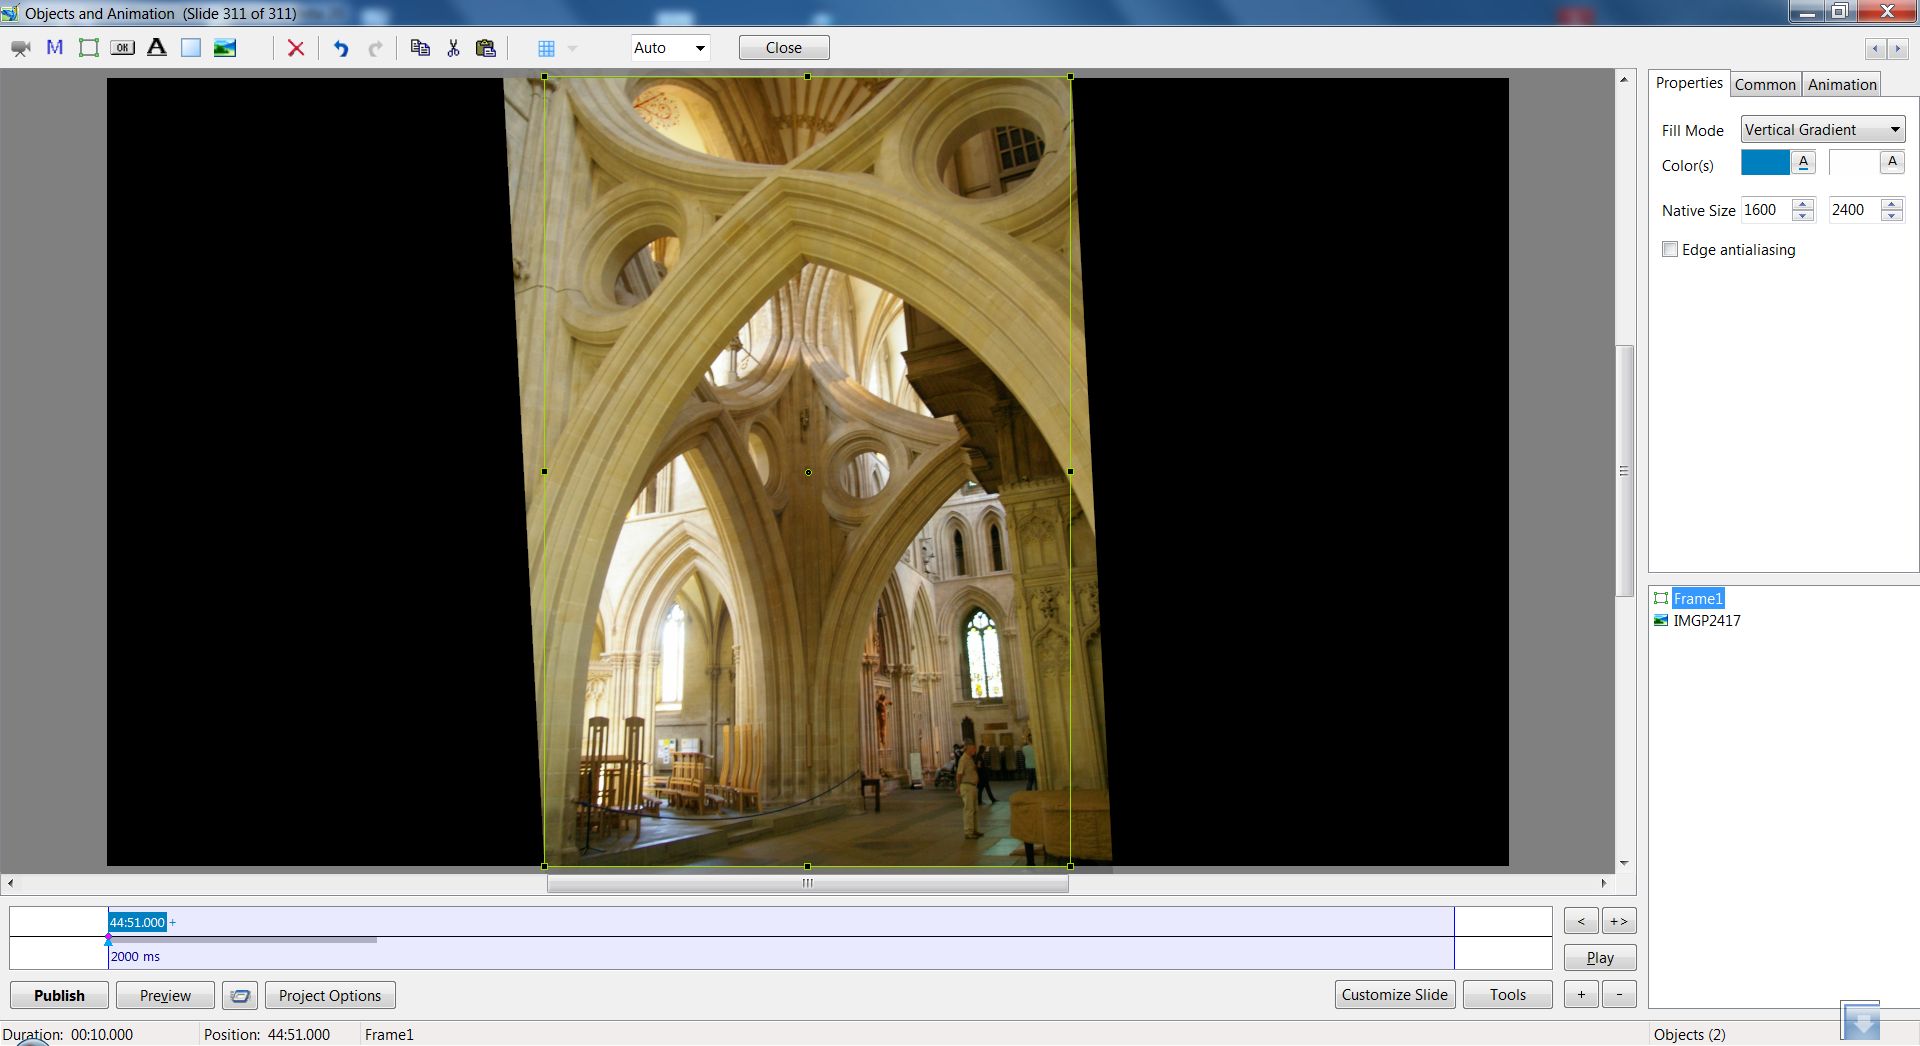
Methinks that you need to use a MASK to do what you want.
A mask will hold back the portion outside of your frame.
Are we, perhaps, looking at a portrait format image that has been rotated to "correct" verticals?
DG
Many thanks.
You are right I can solve my problem among other things with a frame (mask).
Mandfred
-
If by Frame you mean an object that forms the frame, then you can select everything except the Frame object by doing that in the O&A window using Ctrl+click to select each of the other objects, by name, into a collection. Once they are selected you can then do Copy and Paste actions.
Or you can Copy and Paste the entire Slide and then use the O&A window to remove the Frame object.
regards
Peter
Many thanks for your reply.
Manfred
-
Hello!
Perhaps it is a stupid question or it is explained anywhere.
How can i use (copy) only the part inside the frame?
Thanks for your help
Manfred
-
Hello!
I am looking for a program which can use the PTE-command 'Rename Image File' for all slides.
For example slide names: name_C, name_A, name_X to 001 name_C, 002 name_A, 003 name_X and so on
Many thank for help
mwo_achenbach
There are many tools to rename a large amount of files (slides). That's not my problem.
The slides (of my example) have complex Objects and Animations and are members of of a slideshow.
My solutions was changing one slide after the other by hand with 'Rename Image File'.
Now I am look for a scipt or batchtool to automate the process.
Sorry the first describtion of my problem was bad.
mwo_achenbach
-
Many thanks for your reply!
Manfred
Manfred:
You could use PROJECT OPTIONS > ADVANCED > MOUSE BUTTONS > Left - pause > Right - next slide
That will let you use a mouse to control, and with a wireless mouse, the control could be done from a distance
-
Hello Tom!
Many thanks. With your tipp all problems were gone!
Sincerely
Manfred
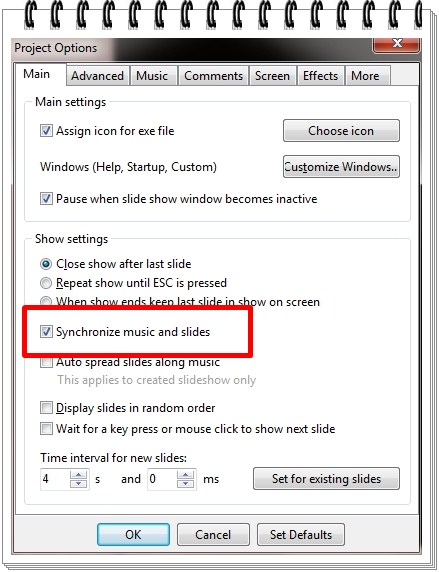
If you want to pause your slideshow and the music at the same time just make sure the synchronize music and slides option is checked.
Tom
-
Hello fh1805!
Many thanks for your prompt response!
"Permit control ..." was checked. But I am not interested in using the keyboard.
Sincerely
Manfred
Manfre,
Stop and Pause - yes. Loop - don't know, but doubt it.
Just ensure that you have ticked "Permit control of show using keyboard" in Project Options...Advance tab. The spacebar will toggle Pause/Play and the arrow keys will let you move backward/forwards and, I think, will retain synchronization.
regards,
Peter
-
Hello!
I created a slideshow with a complex background music (audacity). Is it possible stop/pause/loop for spoken comments without disturbing the synchronization?
Who can help?
Many thanks.
Manfred
-
Not sure what you mean Manfred?
Have you tried right click & save as???
Yachtsman1
Hello Yachtsman1,
many thanks for your immediate reply.
Please apologise my bad english.
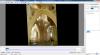
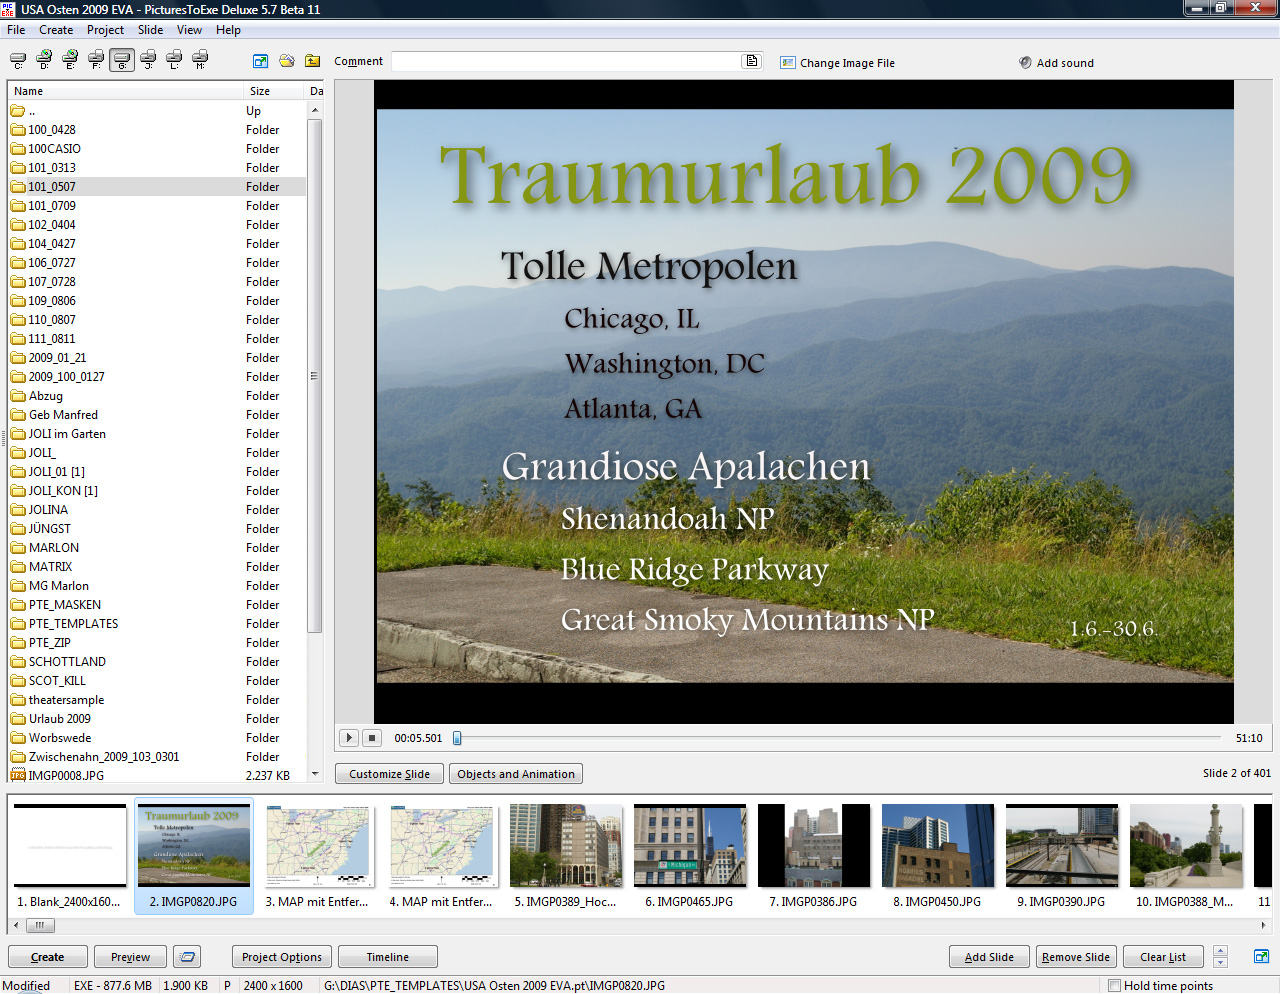
I'd like to show you an example:
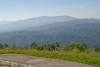
The origanal picture is imgp0820.jpg (see atachment1).
After modifying (Objects and Animation) you can see the "end product" (as screenshot).
I'd like to save the picture in the rectangle as .jpg
-
Hello!
Who can help me to save the end product (the slide which I can see running a slideshow) as .jpg
after modifying a picture with pan, zoom, rotate and additional comments?
Many thanks
Manfred
-
Hello Yachtsman1 and Tom95521!
Many thanks for your replies.
When I changed some customizing features the spook disappeared.
I believe it doesn't make sense to find the reason of my problem!
Yours sincerely
Manfred
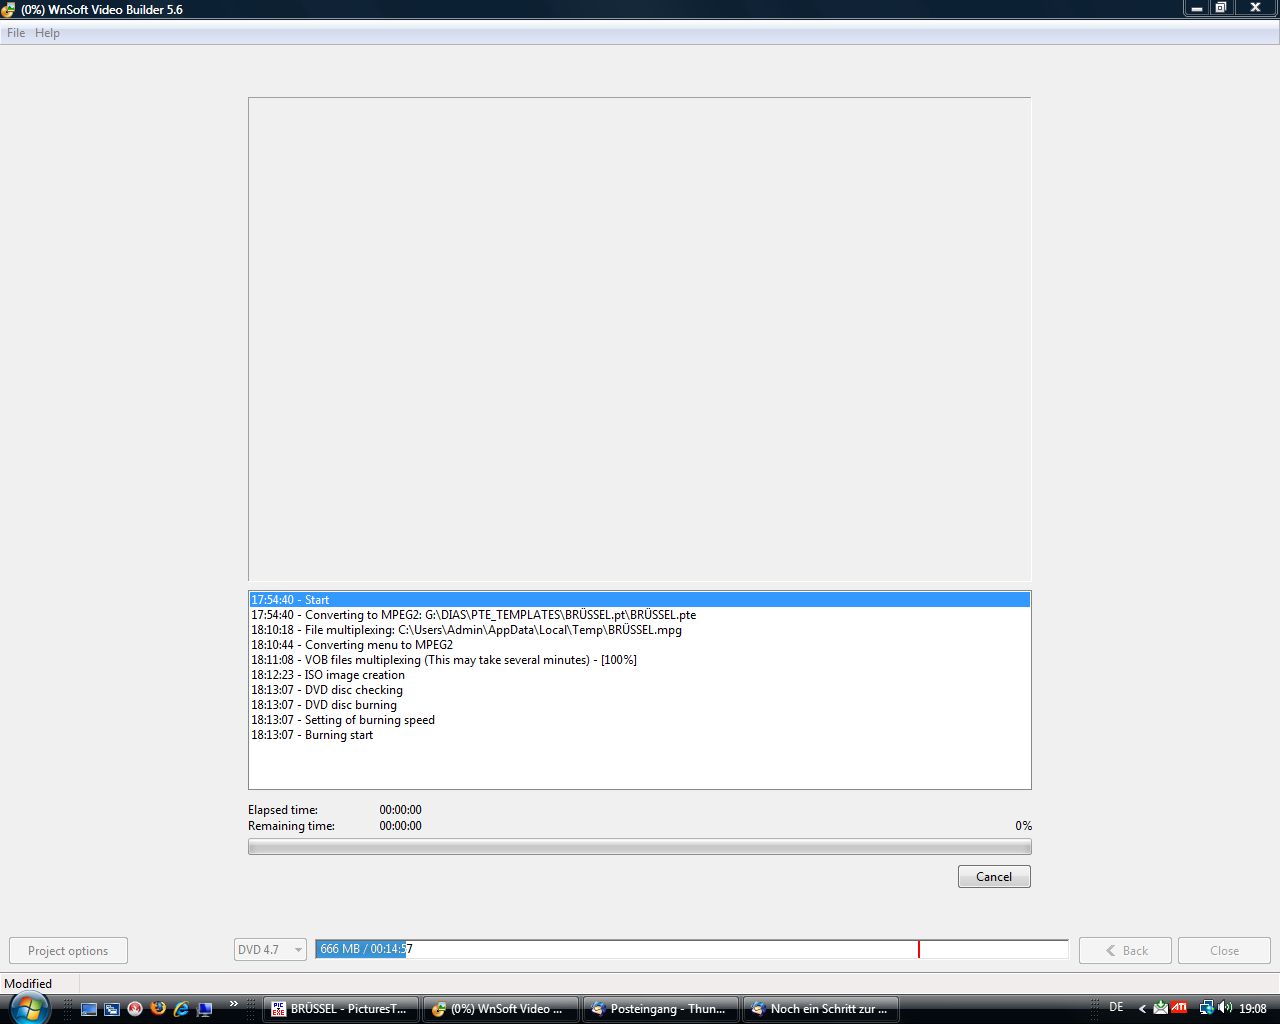
Hi Manfred,Since it has worked before have you changed anything? Maybe the brand of DVD media you are using? Since the .iso image appears to have been created you might try another disc burner program and use the .iso file. If that works then you will know it's the DVD burner engine in Videobuilder.
Tom
-
Hello!
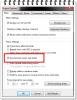
I want to burn a DVD Video disc. Two days ago it was succesfull. But after modifying the slide show burning does not start!
A screenshot will show the problem.
Can anyone help? Who has an idea what is wrong?
Many thanks!
Manfred
-
Manfred,
Im not om a PC that can load your doc file ... but I can provide you the normal routine to edit settings or makes changes to multiple slides from the Customize Slide.
From within your Slide List:
1-Select the Slides with your mouse you wish to make the changes while pressing and holding the keyboard CTRL key.
2-Once Slides are selected ... release the keyboard CTRL key.
3-Press Customize Slide button.
4-From the Main tab select within the timing dropdown box - Show Next Slide after Indicated Time
5-Enter your new Display Slide timing value.
6-Press OK button .
**Now all the slides you have personally selected will have the new Slide Timing.
Hello nobeefstu!
Many thanks for your reply. I am not interested in changing the time of all slides.
I am only interested in changing those slides where “Use customized setting for this slide” is not crossed! These slides have an customized value of time, which can not be changed.
All other slides have an default value; for example 15,0. This is the value I want to change!
Many thanks
Manfred
-
Hello!
I have an old slideshow with a lot of slides. Most of the slides are customized like slide #8 (appendix)..
Is it possible to change Display slide for (sec.) 15 0 to an other value for example (7 0) for all slides which look like #8?
I believe that 15 0 was an default value specified by me (project options?) in an older version.
Best wishes
Manfred
-
Hi,
I have problems to tranfer my template (24 MB).
Tomorrow I will shrink my slides and start a new transmission.
Manfred
Manfred,Thanks, I've sent you PM message via forum. Please read it.
-
Hi Colin!
Thanks for your answer.
The show was running days before without problems.
I "bettered" it -and now I have lots of problems!
Manfred
Could you give some details of your computer - memory size, graphics card processor unit, cpu speed? Your problem might be software, or it might be that your computer is not up to the requirements of PTE v.5.Our old camera club machine, a laptop with only on-board Intel graphics could not even start a PTE show, throwing an error I can't now remember.
Colin
-
Hello Ken,
thanks for your mail.
Canada is huge! So my show has 450 slides!
It was running days before without problems.
Manfred
ARE ALL THE PICTS -- the same size as your sample - 1.36 mb?you say you have narrowed it down to 5 -- if you resize them will show play?
how many picts in the show?
did you try running show without music?
ken
-
Hello admin1!
Many thanks for your readiness to help.
<Kanada 2007> is a slide show with 450 slides with music and sound.
The size of the original template is 679.249.854
14 days ago it was running without problems . But when a made some
changes the problems occured.
I narrowed the show to 16 slides. The described error message occurs
near slide 13.
I hope that you can reproduse the message.
Attached your find the backup in ZIP.
Many thanks
Manfred
Manfred,Does it happens with all slideshows you created? Will slideshow work if create new simple show with only several images and no music?
Please send me sources files of your project in ZIP archive.
(In PicturesToExe, open main menu | File | then click "Create backup in ZIP").
I'll try to reproduce this problem.
-
Help! Help!
The starting sequence of my Canada Show will not run!
I reduced the problem to 5 slides.
Attached you will find the error message and a small template with 5 slides to show the problem.
Many thanks.
Manfred

-
Hi,Al,
thanks for your answer. I hope you had a good trip! My trip to Canada starts in 3 days.
I tried to explain my prototyp more precisely. But now I have a new problem. I can open a PTE-file with Word, Wordpad and EXCEL, but not with your Adjustor v.5-4!
Can you help me. It is a strange effect!
Manfred
Hi, Manfred,I just noticed your message, and don't remember if I replied to it or not.
I'm not quite sure what you want Adjustor to do for you - it's just a spreadsheet model that depends entirely on the data input to it by the user, so I doubt if it would be able to resolve music times, especially if selections are not ending where you think they should. Adjustor will probably just "think" the same as you do, so may not be of any use in this case. Adjustor deals only with the timing of the slides and transitions, and identifies objects, but not the actual times of the music. You may have to check the music selections in a sound editor to determine what is really happening.
Please let me know if I am misinterpreting your request. Sorry for the late reply, but, as Ken said, I was on vacation when your request was posted and was out of internet contact in the north-eastern part of Canada for most of the time.
-
Hi Lin,
many thanks for your detailed step-by-step explanation. Now I have got it.
It is indeed very simple if you understand how to set in the layers.
Without your help I would mull over till this day.
Yours
Manfred
Hi Manfred,There are a couple or more "roadmap" demos - one done by the Dom and one which I did and perhaps others.
Essentially they are all done in an identical fashion. First you scan the map or copy the jpg image of the map you want to use. This jpg becomes the bottom layer or bottom "object" on the obects list. Next you open Photoshop or other software which has the ability to create PNG files. You then click on File, New, set transparent as the file type and make the file size equal to the dimensions of the JPG of the map. Next you open the map jpg do a "select-all" then "edit" "copy". This puts your map image on the clipboard. Next close the jpg file of the map. The transparency will still be open and look like a checkerboard. This checkerboard appearance means you have a transparent layer.
Next you do an "edit" "paste" which will paste the jpg image of the map over the transparency. Then you choose the "eraser" tool and a brush size which approximates the width of the road or roads you wish to demonstrate travel on. You take this brush and follow the path you wish to highlight on your map and as you brush over the road it will disappear and that portion will be replaced with the checkerboard pattern.
What you have done is "cut" a transparent path in the map. When you are finished you save the map as a PNG file.
Next you open PTE and put the JPG of the map on the slide list then open Objects and Animations. Next add the PNG map then select the PNG file and do CTRL PgUP to put it on the top layer. The image will now look just like the JPG map because the JPG map "road" is showing through the transparet "hole" along the route. You have just overlaid the transparent route map over the jpg map and because the road is cut out on the transparency, the underlying printed road on the jpg map shows through and it appears identical to the jpg map. No one would know that there are really two maps, one on top of the other. The only portion of the jpg map which actually shows is that part which is revealed by the "cut-out" portion of the PNG map lying above.
Next you create a car, a boat, a motorcycle, airplane or whatever PNG object you choose to travel along the path. This is created in the same way you created the PNG map. You make a transparent image in Photoshop, copy-paste the object and use the eraser tool to remove everything except what you want to show the "crop" the object to the smallest rectangle containing the object and save as a PNG.
To indicate travel along the path, any object which has color and small size can be used. I used a colored rectangle which you can automatically create with the "rectangle" feature of PTE or just make a small colored rectangle in photoshop. Again, a small PNG object works fine as would a small jpg object.
The essence is that "any" object which you place on a layer "between" the jpg map and the png map will show through the cutout area. So you simply move the object along the road visually by dragging it and using keypoints whenever you want it to stop and start.
That's really all there is to the basic roadmap animation. You can embelish it by making duplicates of bridges, etc., and placing these above the real features so you can make objects pass beneath, etc., but the important thing to understand is how the essence of this animation works.
Just imagine having two identical maps. you cut out the road with an Xacto knife and when you lay the one with the cutout on top of the one which has not been altered it appears just like there is no cut-out, but there really is. So if you were to slide a piece of colored paper between the two maps and move it along the path of the road, what you would see is that colored piece of paper showing the exact path taken by the cut-out. This is what you are essentially doing electronically.
Best regards,
Lin
-
Hello Lin!
Many thanks for your many examples and excellent tutorials. I am enthused at all times when I am studying your shows and techniques.
But the TheDom-RoadMap is too artistic for me. I understand that you combine to effects. Left to Right and Top to Bottom and you use two maps. One without and one with your route.
I use Street Atlas USA 2007; where it is simple to create these two maps.
But I do not understand the use of the rectangles. This is beyond my comprehension!
Please show me step by step what you did.
Many thanks. I am curios about it!
Yours sincerely
Manfred
-
Hi Ken!
Many thanks for your information.
Manfred
Al may be a while replying - he is on a tripken

Link to slide
in Deutsch
Posted
Hallo Lin!
Many thanks for your immediate response. Up now I have got the time to work with PTE again and to study your explanation.
Yours sincerely
Manfred