Craig
-
Posts
52 -
Joined
-
Last visited
Everything posted by Craig
-
Hi. In the attached sample project, I want to use a different photo inside of each letter (thanks to Dave for the .png letters!). I can move the image in the final letter ("O") so that the desired portion of the image is visible. However, I am not able to move the images in the other four letters: every time I try to move them, the "O" image (the lizard) moves instead. What do I need to do to manipulate each letter's image separately? Thanks! -Craig Multiple Masks test project_Apr10-2017_14-50-02.zip
-
Dave and Lin- Many, many thanks for the help and advice both of you provided on rotating text (in Dave’s post) and Lin’s updated tutorials (especially items 55 and 56). Through using and adapting your styles and templates, not only have I learned how to rotate text, but I also (re)learned some useful PTE tips and tricks, particularly as they apply to V9. I have a lot more to learn regarding text rotation (spacing and sizing the characters, incorporating more backgrounds and various other facets), but you have gotten me off to a great start. This is a great user community. Thanks again for your help. -Craig
-
Dave- I love this rotating text style but am having trouble conceptualizing how to add more letters. I see that with each of the five letters in your example, you decrease the Y rotation by 15 degrees, but I can't figure out how to position additional letters. Sliding the red cursor line in O&A, as you suggested to George, provides a terrific overview of all the moving parts, but I am still trying to figure out how to adapt this for more text. Any chance you can steer me in the right direction? Your PTE styles and transitions, along with your invaluable advice, are godsends to relative newcomers like me. Thanks! -Craig
-
Hello, I just purchased the V9 upgrade and received the following error message when entering in the new license activation key: "The license key entered for this product is incorrect or the key is damaged." I have uninstalled and reinstalled V9 but get the same message. Do I also need to uninstall all 22 V9 beta versions before the new key will work properly? Thanks. -Craig
-
Thanks, Dave and smithrg! Smithrg, I really the way you spun your photos into an engaging family history with photos, maps and text, and would love to do similar with my own family history if time ever allows! As for your question, Dave, about whether I want to tell a story or make it totally interactive, I'm of two minds about this: part of me wants to make it totally interactive so that viewers can navigate back and forth, but part of me wants to make it viewable as a video, since so many people these days may be viewing it on a mobile device or tablet. Speaking of mobile devices, I view my family tree as an interactive fan chart on my phone using the KinsMap app, which provides absolutely amazing visualizations. I think that making some kind of fan chart (similar to the KinsMap fan charts) with PTE would be the icing on the cake, and it would also suit PTE's horizontal format. Thanks again. -Craig
-
Hello...has anyone used PTE to depict a family tree or a family history? I think a creative PTE family tree visualization would be a terrific way of bringing old photos to life. There was a short thread on this forum almost a decade ago about this topic and I wonder if anyone has come up with any new ideas or approaches since then. Thanks for any thoughts on this. -Craig
-
Okay, Dave...no problem. Thanks for the clarification, and for all your great work on so many styles right up to the new styles in Version 9!
-
Thanks, Dave, but I am hoping to show the display of the puzzle pieces themselves for a couple seconds before the edges of the puzzle pieces disappear into the picture. After the final puzzle piece appears, the pieces rapidly dissolve into the main picture, and I want to hold the image of the edges of the puzzle pieces for another second or two. Increasing the Slide Duration doesn't seem to change the length of time the pieces of the puzzle display. I think maybe it could have something to do with the timing of the items in the mask container.
-
Hi Dave- In the Jigsaw Puzzle style, is it possible to have the pieces of the puzzle remain visible on the screen for a couple seconds before the edges dissolve into the final picture? Is this something we can control through one of the settings? Thanks! -Craig
-
Thanks, Lin...I'll play around with these settings as you suggest...I thought it might have to do with opacity. This software has amazing capabilities and I appreciate the hints and advice.
-
Hi...is it possible to fade a style in and out over a single video clip? For example, I'd like to add a "rain" style midway through a short video clip and gradually fade it in (and out) of the clip. Right now, when I add a rain style midway through my video clip (by choosing "time range"), it starts abruptly and then ends abruptly at the end of the designated time. It doesn't look natural. How can I fade my rainstorm into a video clip and then fade it out within the same frame? I suspect I am overlooking an elementary step here and appreciate any tips. Thanks. -Craig
-
Thanks so much, Barry and Jean-Cyprien. Barry, as you suggested, page curls provide a nice effect in visually connoting a sense of passing from one era to another (along with the sepia quality of the older photo, as you pointed out). I am experimenting with the curl-related options to accentuate the transition. Jean-Cyprien, I appreciated your demonstration example, and the montages on the golem13.fr website were wonderful...they provide terrific inspiration and I hope to emulate some of those effects. Thanks again! -Craig
-
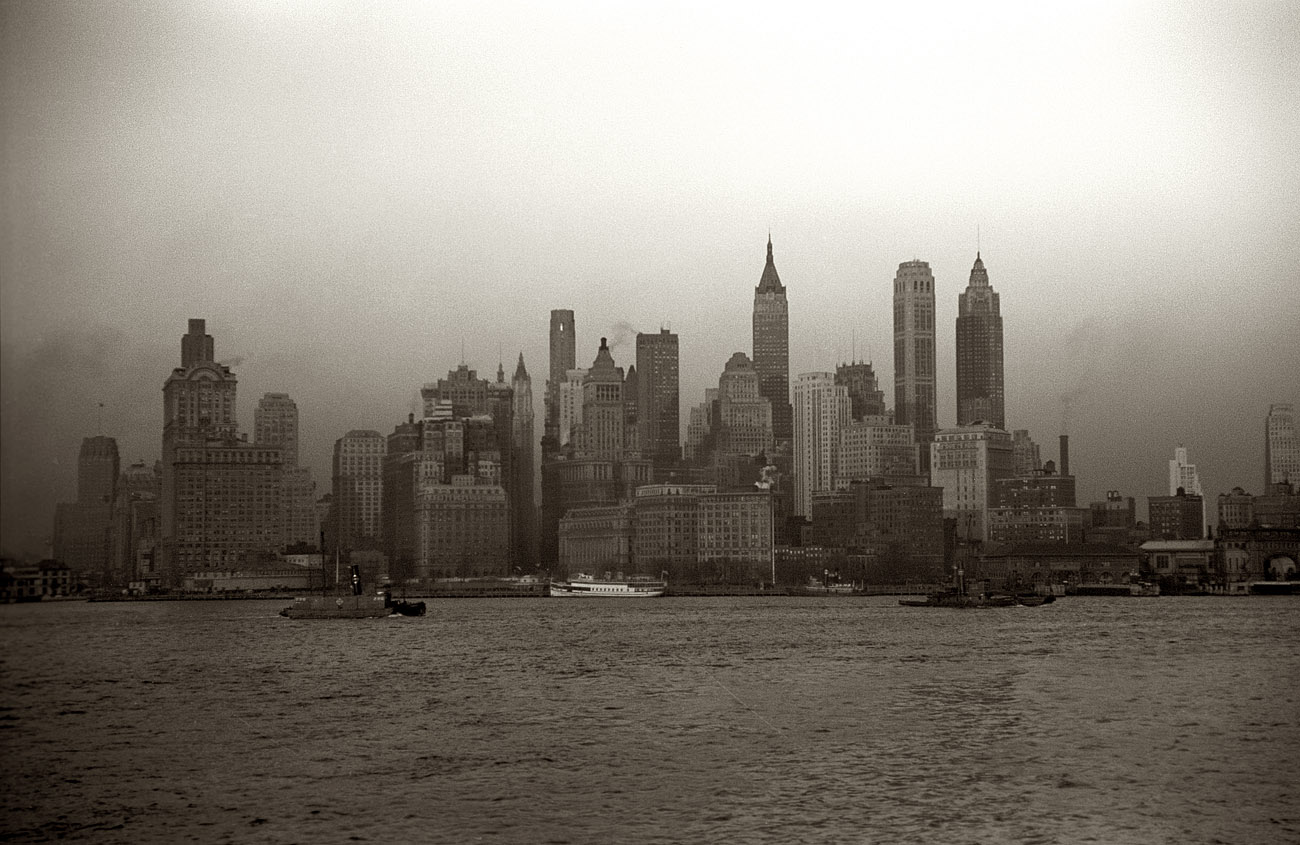
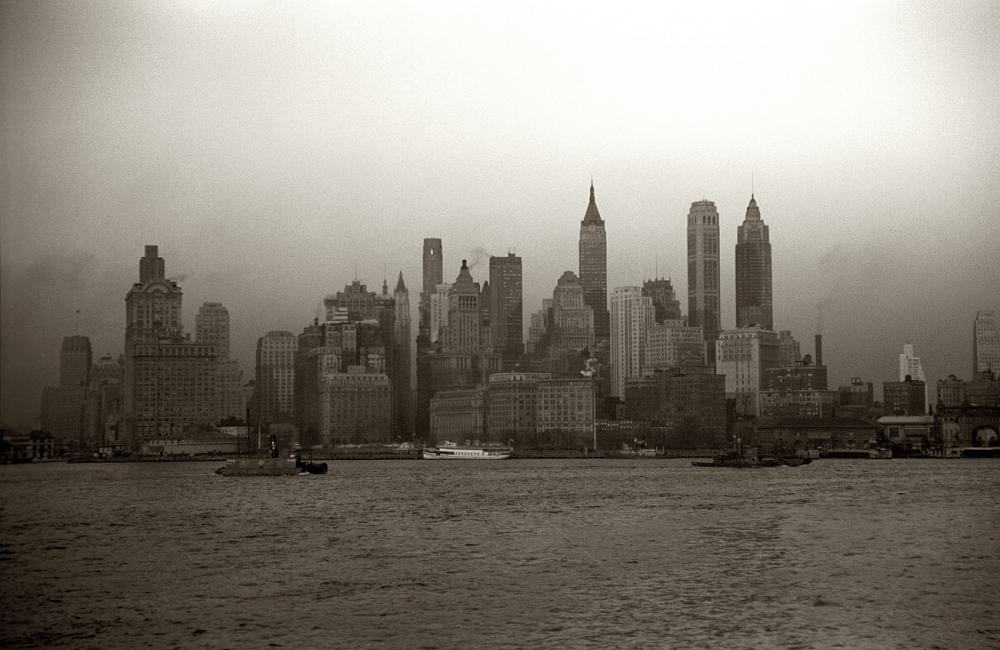
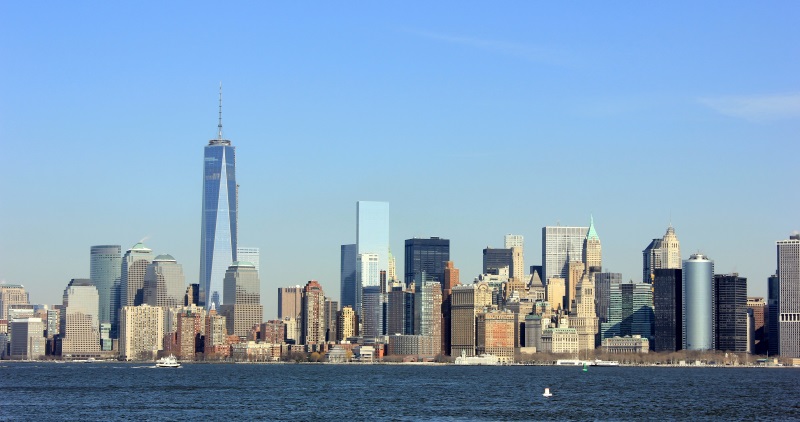
I'm looking for a creative way of showing the passage of time using two or more photos of the same subject taken at different periods of time. For example, I would like to illustrate the evolution of the New York skyline based on these two photos. Would a very slow, gradual transition be most appropriate, or is there a mask effect that might help illustrate the passage of 70 years in these photos? Thanks for any ideas and examples of how you have depicted the passage of time in your slides. -Craig
-
Beautiful. Thanks for this and for so many of your other great styles that you share with us, Dave. I also like how you create new categories for your styles. This helps make it easier to keep track of styles. In a similar manner, I'd like to add various custom styles to pre-existing categories. For example, I'd like to add some of Tom's Title Bars to the pre-existing "Captions" style category so all captions and titles can be in one place. I can add Tom's titles to other custom categories but can't figure out how to add to the pre-existing categories. Is this possible with PTE 8.0.20? Thanks. -Craig
-
In the PTE Slide View window, is it possible to determine at a glance if a style has been applied to one or more slides, or must one right-click into the Slide Style menu for each slide? I have been mixing various styles in my projects and would like to identify specific slides to which styles have not been applied. Thanks. -Craig
-
Thanks, Lin. Your presentation makes a great case why people should invest in PTE and provides a nice summation of PTE's features and unmatched flexibility. As Jean-Cyprien noted, even beginners can create amazing styles. I can attest to the veracity of his statement: just hours after downloading PTE for the first time late last month, my first project was a Rubik's cube using his own PTE style. I was thrilled at the ease of creating such a stunning project in such a short time using my own photos! Now, less than a month since my initial foray into PTE, I am already capable of creating many of the effects featured in your presentation and I hope to master them all soon...top of my list are the water effects shown in your video at 0:42 and 6:48. My progress with PTE so far would not have been possible without the patient help that you and others in this forum have provided to me. I will continue to review forum members' posts (past present and future) and consume tutorials...and no doubt will continue pestering you and other forum members for help on various aspects of PTE. Having learned how to use so many different styles, masks, frames, animations and other features of PTE, my challenge now is to integrate all of these powerful tools into compelling presentations, such as those posted in this forum and in the French PTE websites. All the best. -Craig
-
I want to echo jak101's gratitude for these most attractive and helpful styles, Dave. These are a godsend to newcomers. Thank you!
-
Linda, that happens to me, too. I found that after importing a style, I just close the window and then exit PTE. Then, re-open PTE and navigate to the style you just downloaded, and apply it and it will work well. At least that's been my experience so far...
-
Terrific...this is most helpful information, Dave. I'll make sure to use the "Cover Slide" mode! I appreciate your thoughts on a Portrait AR style, as I often have to deal with portrait-sized photos that will simply not display properly when rendered in landscape format. I hope to figure out how to mix portrait and landscape images in one slide as I ascend the proverbial learning curve. Thanks again.
-
Thanks for sharing your terrific styles over the years, Dave. They have been most helpful to me in recent weeks as I learn PTE. Using your carousel932_169 style as an example, I like how photos of slightly different aspect ratios display with even borders as if they were all cropped exactly to the same size. You said that it requires formatting the master frame in each slide. Is there any tutorial or other explanation of how best to format master frame(s) so that all nine images appear to be of the same aspect ratio? Also, could this technique be applied to vertical images, either on the same slides or in separate slides? Thanks! -Craig
-
Dom, I like all of the styles and templates shown on your YouTube channel. Of course, you know how I like your vacation style, but I also liked your wooden chest box, the "10 slides" style and "frame pictures 3D wall" style. Thanks for your work in bringing these back, and all the best. -Craig
-
This pack of styles will be most welcomed and will certainly help newcomers to PTE like me (as I pleaded here last week), as well as professionals such as wedding photographers, as Lin mentioned. Thanks!
-
Lin, your advice was invaluable. I had neglected to add the B&W layer in the mask container, which is why my image kept showing through the entire (transparent) image to my great frustration. Your sample was invaluable and I learned an important lesson in Masks 101! Now, I look forward to proceeding further in my experience with PTE, particularly as we await the new beta version. Thanks so much! -Craig
-
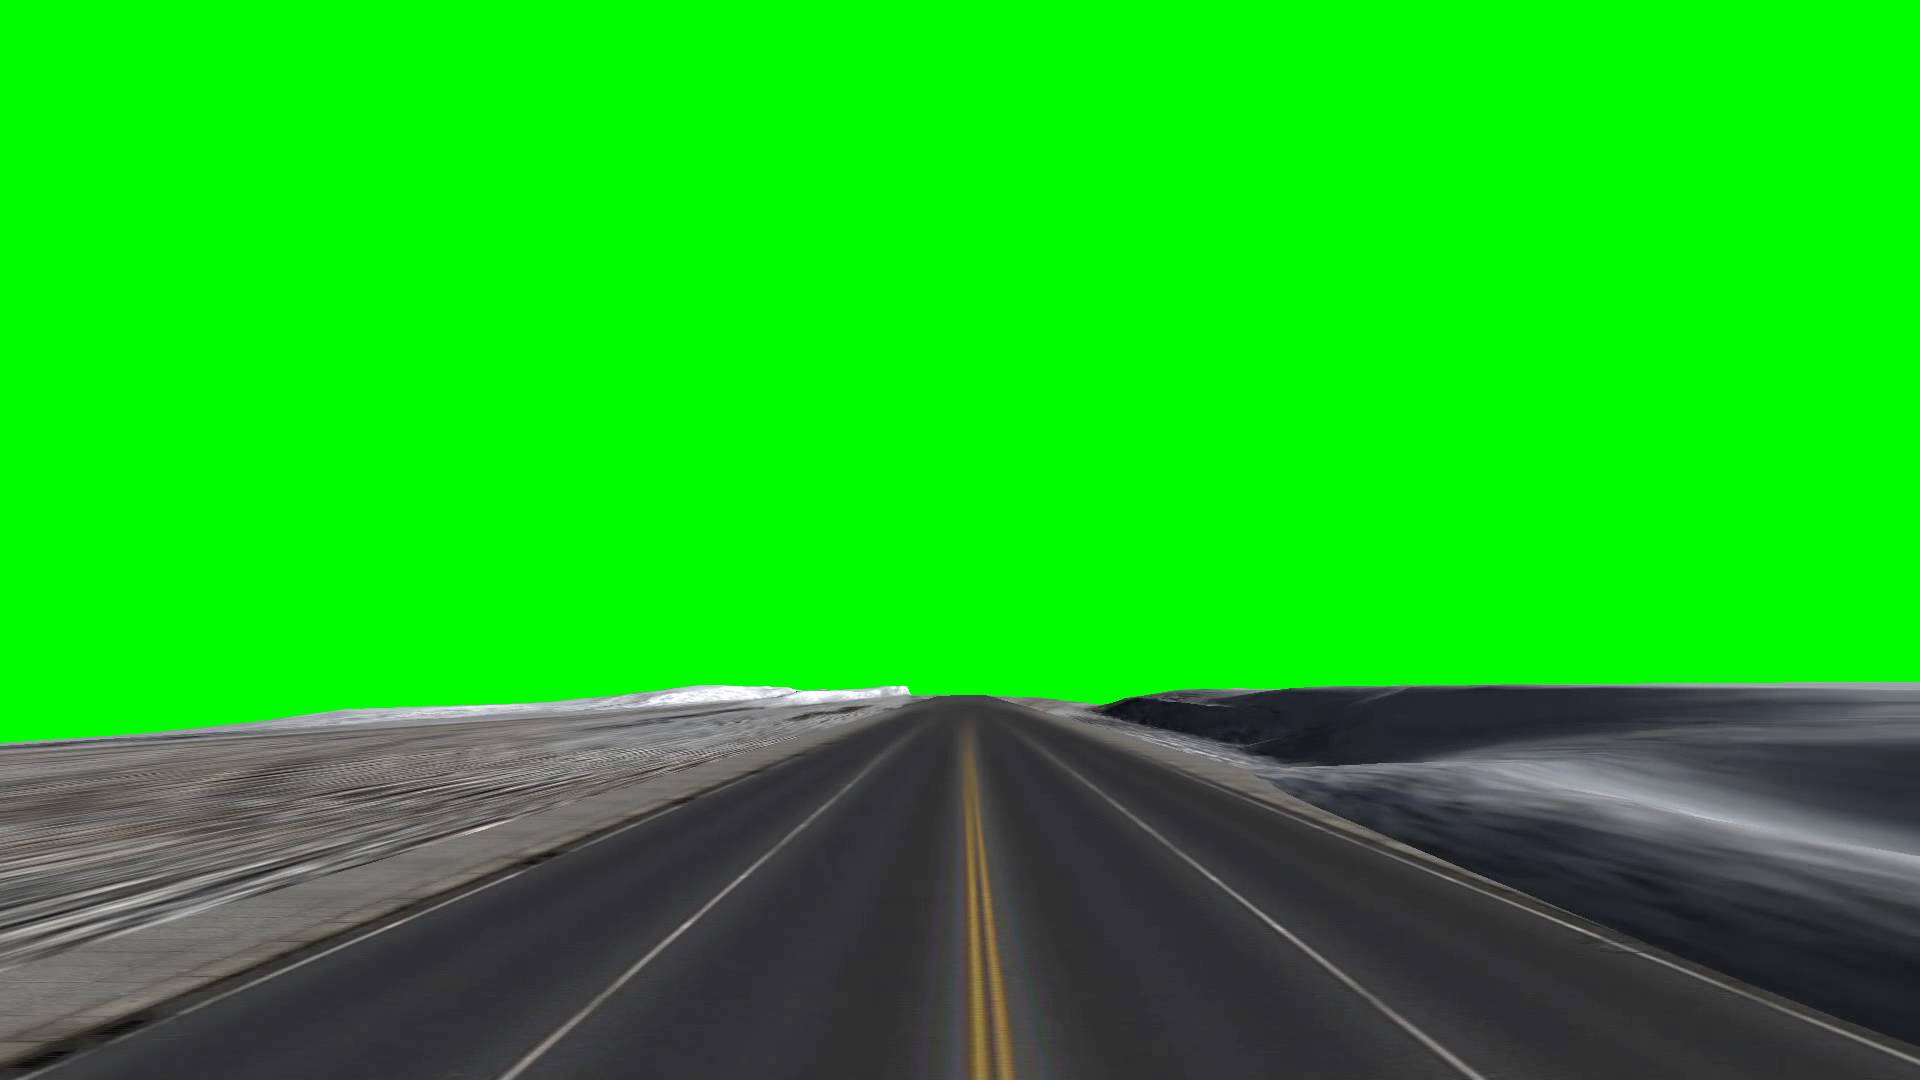
Thanks so much, Lin. Yes, as you said, I also suspect this is a misunderstanding of how to set up my mask. What I would like is simply to be able to place a single image where the bright green is located and perhaps to pan and zoom toward that image to create the effect of driving down the road. If I could learn the solution to this question, I think I could apply the principle to various other effects in PTE. Does this help answer your question about what I am trying to achieve? Thanks again...I appreciate your help! -Craig
-
Can I use the attached green screen jpeg as a mask in PTE? I am able to use image editors (such as GIMP) to replace the bright green with pure white, but then my own images do not show through the pure white to serve as background. I must be overlooking a simple solution and appreciate any thoughts. Thanks. -Craig