Lin Evans
-
Posts
8,206 -
Joined
-
Last visited
-
Days Won
12
Everything posted by Lin Evans
-
Hey Ken, I'm checking it out - thanks! I've already purchased the mouse but this sounds like a great alternative solution for those of us who need a bit of help - LOL Lin
-
-
I've been struggling lately with how to improve my on-line tutorial. One of the issues not only for others but for me as well is that it's exceedingly difficult to read small text and difficult to see the screen captures. There are limits as to how large I can make them and still have reasonable formatting. I use MicroSoft Publisher for several reasons (it's certainly Not the best available tool) including the fact that I can make printable documents as well as html code in one operation. So how to deal with the relatively tiny print, etc.? In my own copy - perhaps in all copies of Publisher there is a bug which prevents the "view/text size" feature from working properly. When an image is between the text blocks the first one responds and creates nice large text, but everything on the same page below the image block is unaffected. Perhaps this has been corrected in later versions and I'll upgrade this week, but in case it isn't I've found a great solution for all us with less than 20 year old eyes. Microsoft is making some new "Mice" with a small switch on the left side under your right thumb (for those who are right handed). When you click this switch an adjustable real time "magnifying" glass appears which can easily be adjusted for both frame size and magnification amount. It's a danged NICE feature folks. I've been able to read things on my notebook computer which formerly had be running around looking for my +2 readers to see. This mouse comes in several flavors including a small version for notebooks and is available both in wireless and wired USB formats. Have a look next time you are in one of the computer stores and if you are having difficulties this could change you life! Lin
-
Another suggestion for Igor and the development crew
Lin Evans replied to Lin Evans's topic in General Discussion
Hi Al, Yes, I was looking at a very nice presentation made with PhotoDex's ProShow Producer which had what is apparently a "feature" (because I've seen it before in other presentations) where something which resembles a black mask with rectangular cut-outs in about a 3:5 ratio was used with 12 images being displayed simultaneously and "dancing" back and forth between the individual frames. I decided to play around and attempt to duplicate this thinking that the mask could be saved as a PNG then used whenever one wanted to play with smaller images. This, of course, entailed bringing in 12 separate images on 12 layers and that's where I began to see the value of being able to multi-select images for import. In PSP and PSG you have thumbnail which you can select to bring in new "objects" or images. I certainly don't want to see that in the Objects view in P2E because it exacts a "HUGE" toll on resources in those programs and takes a month of Sunday's when you open the programs to get through building the thumbnails. But it sure would be great to be able to multi-select the files from the browser - great time saver I think... Lin -
Another suggestion for Igor and the development crew
Lin Evans replied to Lin Evans's topic in General Discussion
Hi Dave, No need for them to be grouped just because they are selected at the same time. You simply go outside the rectangles by using a small percentage such as 10% view then add files which puts each in their own separate layers. Having the ability to multiple select simply puts them in a queue and imports them exactly a you would if you selected them one at a time from the same position. They would appear underneath each other on the same "level" (no child/parent relationship) on the objects list. On the other hand if you "wanted" them grouped, you would just create a rectangle and add them from within that enclosure and they would then have a relationship to the rectangle as a "group" - the bottom line is that there is no need for "mutual exclusivity" - it's not an "either or" situation, just a convenient way of adding multiple files without having to repeat the keystrokes over and again. Lin -
Forgive me if this has already been covered or if there is already a "solution" I'm unaware of. Just a thought for the future.... I find in some cases I want to add several files (objects) to the objects list. It would be ever so helpful if there were a way to say hold down the CTRL key and select several objects at once rather than having to repeat the process. In experimenting, I was adding twelve separate objects and it was quite time consuming to keep repeating the process. I tried using "shift" "ctrl" "alt" etc., but there didn't seem to be any way of selecting multiple objects and I had to resort to doing them sequentially. Best regards, Lin
-
Hi Bill, You should "never" feel intimidated about posting your shows. We are all "students" of both this presentation slideshow topic and this program and here we all feel that we should strive to help each other learn as much as possible. No matter how long some may have been at it, we all can learn more and improve our presentations. Constructive criticism is always welcomed and that's the mechanism by which we all improve so put that show up there dude! Best regards, Lin
-
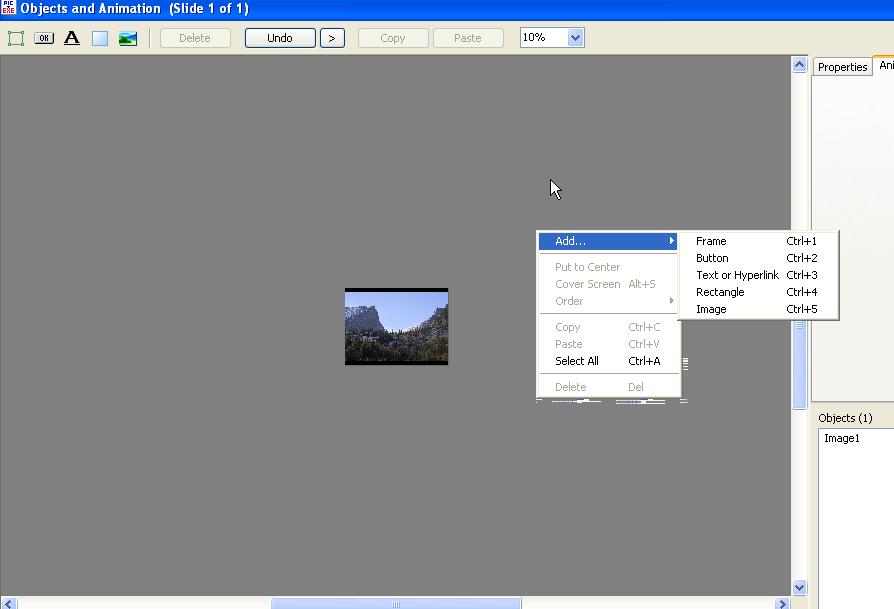
Hi Bill, Let me give you another way to do this. First, change the view to something very low in percentage such as 10%. Now you can actually "see" where you are inserting things (objects). Forget about clicking in or on the "Objects" list, just right click in the grey area completely outside any bounded rectangle up in the grey area surrounding the postage stamp sized image. As a sample, just put in any object in the conventional way that you have been doing. Then change the view as seen in my two samples to 10% and right click out in the grey area choose your file and it will go into its own layer underneath the present object. If you accidentally click inside "any" rectangle shown on the screen, you will be inserting the object under or attached to the content of that other object. So what you want to do is go totally "outside" all the rectangles in the "grey" area to do this. Doing it this way will obviate any parent/child relationship and you won't have to delete, copy, paste, etc. Lin


-
Ability for viewer to turn down or off music
Lin Evans replied to Charley's topic in General Discussion
That would be definitely a non-essential since the user "should" have control of their own sound via the Windows features. The vast majority of newer computers have a volume control and off-on for sound as an intergral part of the system and built into their keyboards. Those which don't "should" have an icon with Volume and Mute on the lower right of the screen among the numerous icons which show what's presently running so if running in a Window they will have access. Having volume and such on a slideshow is generally limited to Active X or Flash presentations running inside a "player". For an executable show it's not usually a problem but adding this as a "feature" seems counterproductive to me. Best regards, Lin -
That's a great work-around until Igor implements a grid pattern. It's one of the things I've always relied on in ProShow Gold to help me align some of the transition effects I like to use between slides such as an extreme zoom in on a critter's eye followed by a very similar and precisely matched eye on the following slide which then zooms out to reveal a different animal. Sort of a "seen through the eye" effect.... Also one of the very nice features in PSG is the ability to match following slides to the identical zoom and position without manually copying down the "numbers" and inserting them by hand. This helps when you use two identical slides and want to "continue" an effect across time. It's especially helpful when you don't have non-linear zoom so if you want to pan part of an image, stop then reverse the pan it avoids the abrupt ending by allowing a transfer fade where the present slide fades out while the next on simultaneously fades in. When the two slides are identical, the effect is simply a lingering "stop" for the duration of the two transitions and the viewer isn't aware that a slide has actually ended and another begun. This is perhaps less important for P2E because you can actually have more than one slide on the same timeline, but when you wish to transend the timing with "part" of a frame it's of significant value. Best regards, Lin
-
At present the zoom is linear, but I believe Igor will implement a non linear option eventually. To get around the perception of non linear (even though it is absolutely linear at present) you can insert additional keypoints and change the amount of zoom between them keeping the overall percentage identical but varying the percentage which happens between the keypoints. For example, lets say you wanted to slow down the last three seconds of a twenty second zoom. You insert a keypoint at 17 seconds and change the percentage of zoom at that point to a different value than it shows as a linear zoom. Then the rest of the zoom between the second and last keypoints will happen either faster or slower relative to the value you choose for the intermediary keypoint. Lin
-
Real Time sample of theDom's clock idea....
Lin Evans replied to Lin Evans's topic in General Discussion
Hi John, Yes, as Al pointed out, there has been a good deal of discussion. If you have PhotoShop, just take your map (either scan or do screen capture) into PhotoShop and duplicate it and save with a slightly different name. Use "select all" on the duplicate then "edit" "copy" to put the image on the clipboard. Click on "File" - "New" and set the dimensions and dpi identical to the original and set the file type to "transparent". Next do "Edit" "Paste" to put the copy on the layer above the transparency. Next select an appropriate brush size and use the "Eraser" to follow the route and "erase" the actual "road" leaving the checkerboard transparency showing through. Save this without further alteration as a PNG file. Next create a rectangular colored and opaque screen long enough to cover the entire route and save it under a file name which you will be able to identify as your road color. Bring all three onto your page in p2e as separate objects, or you can group the two maps to avoid accidentally moving their positions. Put the original map on the bottom layer (so it appears first on the list of objects) and go to the Properties tab and rename it so you can keep track of which "image" is which. Put the cut-out on the top layer (so it appears immediately underneath the original map on the objects list and rename it as above so you know which is which. Next set your timing for the display to the length of actual time you want to achieve the entire "road trip" and use the "Order" feature (right click on your red layer then move the cursor over "order" and left click on your choice) to move the red layer between the two maps. You will know when it's in the right place because you will immediately see the existing "road' change colors and usually become thicker assuming you chose a slightly larger brush size to do the cut-out than your original road. As a reminder - when the original map lies on the bottom layer and the "cutout" is overlayed, it will appear as if nothing has happened because the portion which was cut out is overlaying precisely the original. This means that the original shows through the cut out portion. But when you place the red layer between the two (think contents of a sandwich between two pieces of bread) then you reveal the path of the "cut out" portion of the top layer. By moving the red rectangle (set the view to a very low percentage so you can see what you are doing) you effect the "moving" route. If you set the original keypoint to zero with a single keypoint at the end of the time line, and the red layer clear off the "map" at the top of the route then the movement begins immediately and proceeds in a linear fashion until the end of the slide. You can, of course use transparency changes on the red layer to make the road appear and disappear as you wish. I did this on my sample to prevent over writing the road designations so it appears that the red line went "underneath" rather than over the route designators. You have complete control over each layer so you can "stop" the progression of the route at any point then start it up again by manipulating its relationship to the timeline. Remember,, however that time doesn't stop just because you stop the progression of the route display. So if you want to "pause" the route progression for something else to happen, you must make the overall time alloted to the slide sufficient to cover this and compensate to keep the progression speed constant by using additional keypoints along the timeline for the red layer. In my sample I wanted a linear progression and wanted to keep it simple so I didn't have to dink around with the clock as well as the road so I simply set two keypoints at zero and sixty seconds for the red layer and synchronized the clock to an overall display lasting 60 seconds in "real time" calibrated to 4.5 hours in simulated time. The best way to learn this is to actually do it and play with it until you get a feel for the relationships. Best regards, Lin -
Real Time sample of theDom's clock idea....
Lin Evans replied to Lin Evans's topic in General Discussion
HA! I know "exactly" why- LOL Next time you stay, wait until no one's looking and pull it off the wall and look in the back. You'll find three batteries. Two are in a "set" and one by itself. Just pull out one of the "set" and the squawking will cease. Slip it back in when you leave and they will never know the difference Best regards, Lin -
Real Time sample of theDom's clock idea....
Lin Evans replied to Lin Evans's topic in General Discussion
Hey Ken, I just put some of the great ideas from JD, Al and theDom together. Many years ago I owned a software development company and served as VP of Engineering, so implementation of the capabilities of the tools comes fairly easy for me. The real strengths I think are in the creative aspects which others seem to have a facility for. That's the great thing about this forum - we have both creative people and people who have a facility with the tools and that combination produces a whole which is greater than the sum of its parts. At the top we have a great development team who provide us all with these fantastic tools which lets us explore the depths of possibilities we could only dream of a short while back. Best regards, Lin -
Real Time sample of theDom's clock idea....
Lin Evans replied to Lin Evans's topic in General Discussion
LOL - actually it's a real clock which I photographed then copied the hands in PhotoShop and made PNG's from them and cloned off the hands on the clock body leaving just the center "mount" where the rotation takes place and made a PNG out of that too. Great suggestion - I implemented it. I was originally trying rather than a controlled loop a stall at the top and a fall through but it wasn't working very smoothly. I think using "center" for the rotation works better as you suggested.... I also reversed the layers on the opening text credits so the darker text passes in front of the red rather than the other way around. It just seems more aesthetically correct.... Thanks again for not only the center suggestion for the loop, but for the original clock idea - great one! Best regards, Lin -
Hi Guys, Just playing around and decided that it would be nice to have a clock which really matched the movement of the roadmap in real (simulated) time. In this example the clock actually reflects the elapsed time and approximate (within a couple minutes) time for a trip from Denver, Colorado to Cimarron, New Mexico. The actual distance for this example is 296 miles and at 65 miles per hour average the time it takes will be four hours 30 minutes plus or minus a couple minutes. As the map simulation advances the clock time accurately portrays the time at any given position within the accuracy possible in a map drawing. Assuming a 12:00 noon start, one arrives in Cimarron at about 4:30 pm if they maintain 65 mph. zipped executable: http://www.lin-evans.net/p2e/denvertocimarron.zip For those in the US - have a great holiday this weekend.... (it's our Memorial Day - commemoration of those members of the armed forces killed in wars). Lin
-
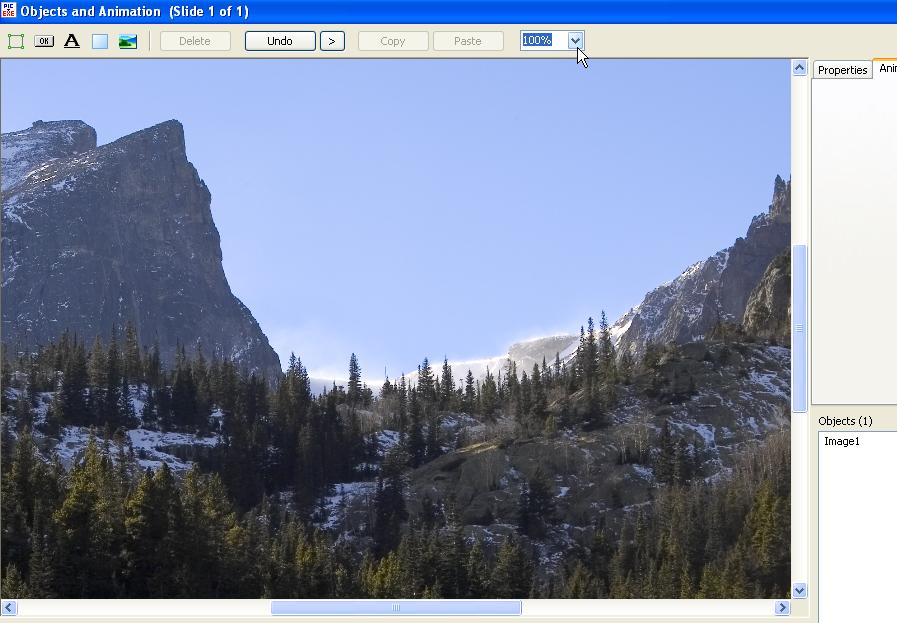
Hi Ron, Just go to the "Properties" tab from the Objects and Animation tab and change the name from "Image1", etc., to reflect something meaningful - even the real file name. Best regards, Lin
-
Hi Robert, I really enjoyed the mood and aesthetics of this which very well matched the beautiful nature of the Utah landscape to the the background music. There was one point where I'm not certain, thinking back, whether I would keep the abrupt stop, however. Consistency can be alluring whether expressed as perpetual slow pans and zooms or simply stills with appropriate transitions. Change can certainly be used as an aesthetic "punctuation," but I'm still certain whether I like it in that particular place. One of the things which Igor will implement in the release, I think, is the rather nice feature of linear acceleration and deceleration so that it will be possible to have smoother transitions from movement to stills without the apparent "jerk" presently requiring one to necessarily overlap fades between frame changes. There are times when it would be really nice to smoothly pause motion and freeze on a particular frame then "slowly" resume the motion. I've found that I can use opacity levels and gaussian blur as a "masking" mechanism, but it would be nice to not have resort to this to effect smoother changes in the transition from still to movement and back. Very nice presentation! Best regards, Lin
-
See Jean-Pierre's (JPD) tutorial on Objects - go here: http://www.picturestoexe.com/forums/index....&hl=Jean-Pierre Lin
-
Actually, I can't take any credit for any of these great ideas - TheDom came up with the very innovative idea and Al Robbins took it one step further. I only implemented it as I had learned from their examples. I don't have a lot of "creative" talent when it comes to these innovations, but rather a well developed sense of implementation. When someone with creative talent comes up with and idea that we can all learn from such as your very smooth implementation of the "drop letters" I'm always amazed because my mind just doesn't work that way - I wish it did! Best regards, Lin
-
Cool!! I like it. Lin
-
Let me expand a little on Al's suggestion. In case you haven't done this before, here's how you proceed. Open a new file in PhotoShop and be sure you have it set for Transparency rather than "white" or "background color". You should see a checkerboard pattern if the file is set to transparency. Choose the "text" tool and set your opacity to 100%, choose your font size and color then type in your letter, word or sentence, etc. If you wish to apply special effects to the text such as drop shadows, etc., highlight the text then bring up your "Layers" box and click on the small round icon (add a layer style) located at the bottom left of the group of icons. You can experiment and see the effects you can create with the text. Once you have it looking like you want then crop excess "checkerboard" away and save it as a PNG file. This file then can be used as an "object" and can be manipulated just as any other "image" with all effects possible with the graphical engine. Lin
-
Hi Ron, Definitely "easier" if the road goes somewhat in a straight direction, but as I explained on the other post, you "can" work around the turns by either using several smaller "road" rectangles or a red "dot" (or square) slightly larger than the width of the road which can negotiate the turns to be followed by a red rectangle to "keep" the paint while the dot is moved to subsequent problem areas. Best regards, Lin
-
Hi Ron, Actually, you are correct that having multiple changes in direction "may" need additional layers of "road" but it's not really all that difficult to do. Unless there is a rather abrupt and reasonably lengthy change in direction, a single layer between the main map and the png route "cut out" will suffice. Depending on the individual circumstances either two or more small rectangles or a transparent mask with a red "dot" slightly larger than the cutout width of the road will work nicely to make the "turns". If you remember TheDom's early little red airplane was "followed" by the red layer so it appeared that it was a single red line streaming out behind the airplane. The airplane was on the top layer with the red "road" rectangle one layer beneath. You could do it that way, but easier, I think, to use a red "dot" to lead the sharp turns then on the time line after the red dot paints the turn you bring up a red rectangle to "keep" the road paint while the dot goes on to the next place it's needed. It's not as elegant as doing it with a single red layer on a road which has a primary direction, but is a way of getting around the issues of making abrupt changes of direction smoothly. Best regards, Lin
-
Hi Al, I see that now that I've looked at the code. I actually created a similar roadmap (posted on the p2e link) and did use a couple black rectangles to mask the red to prevent splash over at the bottom and top of my screen. I probably should have just been more careful in the construction of the red layer but threw it together pretty quickly so didn't resize but just made it the same as the maps. Had I not ended up so near the bottom border it wouldn't have needed any masking but I ran the red over a tad so just used a black opaque bar in a layer over the edge at the bottom and a large black rectangle with a transparent rectangular center to mask the other edges. I think as long as there are no 90 degree or greater turns, the feathered edge works great. I suppose it would be just as easy to do about a 10 pixel feather all the way around the rectangle. It's more difficult to "map" the little red circle idea, but it does give some flexibility for making really tight turns. Very nice job you did on that by the way! Best regards, Lin