Hawk
-
Posts
392 -
Joined
-
Last visited
Everything posted by Hawk
-
Hi Peter With Yahoo Briefcase if the folder you placed the file into is checked as " Public "anyone should be able to enter and download. By any chance is it marked as " Private "?, this requires ID. contacts
-
Dougall If you go back to the above link - the statement made in Post #1 was corrected in Post #3 idc: Give beta 9 a try when released, as Igor states ( a temp solution )
-
Bob My reason for asking was that another member had the same error message. http://www.picturestoexe.com/forums/index....dule+PTEPreview But unfortunatly he did not reply to Al's remarks, therefore we did not know the outcome. As Igor has answered - a definate video card problem. Soon I hope ! good luck.
-
Hi Bob also welcome to the forum. Is this a first time try with ver 5 beta ?. Can you create a new small show and preview OK.
-
Dougall Not sure if this relates to your specific problem or not. http://www.picturestoexe.com/forums/index....5&hl=washed
-
Hi Maureen Here is the original post, I revised the other day as original explanation was only 1 image. Now includes a group of images. http://www.picturestoexe.com/forums/index....amp;#entry31206 This is only a temp work around. Igor: Thank Igor
-
foto1 - version 4.48 In the “Object Editor” when you create a Button or Hyperlink with an action link “ go to slide # “ make sure you click OK You must then also click OK at top of Object and Editor screen. Otherwise it will not be saved. Not sure if this is your problem or not, but I have overlooked this many times. As to: I am a little confused here, do I assume you cannot see your hyperlink TEXT ?
-
Hello Peter & Jean, thanks for getting back to us. The menu background image size in Video Builder are 1024 x 576, and you say looked ok – full screen I assume. Therefore I am surprised the images in your presentation did not appear the same using 1024 x 576. ( full screen ) Correct me if I misunderstand you but you mentioned you resized your pictures, there is a difference with cropping them to 1024 x 576. ( I am sure you are aware ) You may also want to try a small test cropping at 1920 x 1080, but should not make any difference at least it does not here with NTSC. I usually keep the safe TV zone in mind along with loosing some of the image when taking pictures specially if I know I am going to do a DVD. My Nikon shoots photos at 2272 x 1704. Using Photoshop Elements as my main graphic editor I set the crop size to 1024 px x 576 px – or 1920 px x 1080 px, yes you will loose some of the image but should be able to crop about 70%. Shows full screen on 16:9 TV and letterbox on 4:3 TV, and computer monitor. Here is a interesting URL. http://www.darkwood.demon.co.uk/PC/Image%2...opped_image.htm I believe that if your images are close in size to 16:9 ratio, Video Builder will adjust but if too far out there may be slight distortuion. Small NOTE: ( ver 5 beta ) When creating your show in PTE make sure TV safe Zone is checked ( located in O & A - tools ), also turn on in Video Builder - menu section - in Edit at top, or right click mouse. You may also want to try adjusting your images in PTE - O & A ( after thought on my part ) Possibly Al, Ken or someone especially in the PAL region might want to jump in with any suggestions.
-
Hi Mike Not sure if you want to add more images or remove some. I reduced the number of images to 28 using just the forward section of the album and not the reverse by doing the following. I deleted images 51 to 98. ( added my own 28 images cropped at w382 x 542h ) and saved / named them as instructed in the readme file. ( Image 01.jpg – Images 02.jpg etc. ) and let them overwrite existing images. Also I added a few seconds to last slide # 50, and in Project Options – Close show after last slide. 28 Images run time – 3 minutes 15 seconds If you wish to add more, sorry I have not got that far. By the way JPD, I burned to DVD and results looked great.
-
JPD Thank you ever so much for sharing your working project files with us.
-
Hello Jean & Peter NTSC zone – Canada (here) Sometime ago when we first started burning DVD’s for 16:9 widescreen we tested with good quality images full size from our digital camera and cropped to 1920 x 1080. All test shows were viewed on a 42” Plasma 16:9 ( at this time burned with Nero Vision ) We were very impressed. With the introduction of PTE’s Video Builder, and some different ways of thinking we lately have been using 1024 x 576 image. We found with testing that there was no distortion and correct ratio and quality equal to the 1920 x 1080. The 1024 x 576 image size I believe is PAL, however Video Builder (maybe through it’s magic) produces a NTSC perfect. Our other reason for using 1024 x 576 is a faster encoding time with smaller image size. Not certain what zone you are in, but looking at the time in your post I am surmising PAL. If so and you get a chance, would you try the following to do a small test show. Small show – (6 – 10 images) Cropped at 1024 x 576 (good quality sharp images) PTE settings – Project options – Screen section (aspect ration of slide) - choose 16:9 Create the small show. Click – FILE – SAVE AS - Saves to a .PTE file. Click at bottom of main screen PTE – (Video) – (choose Create DVD disc) - Opens Video Builder Locate and Drag in your saved .PTE file to lower bottom section. Click - Project Options (bottom left) - Choose – TV system (PAL) Menu Aspect Ratio (16:9) – leave all others at default. Next – edit your menu – Next – Burn a DVD disc. It’s a little tricky for us in the NTSC zone to give advise to others in the PAL zone, as we cannot see the end results. There are many variables in this DVD jungle and if the above does not work as you would expect, we could always try something else. The best way is to start at a starting point and work from there. As Al has mention – Good Quality Images – Close Ratio, are main factors as Video Builder renders to the normal video size PAL 720x576 – NTSC 720 x 480 and has the smarts to adjust with exceptional quality output. We would appreciate any feedback. (Hoping to hear back.)
-

Cannot disable "Quick (no transition effect)" on 8u
Hawk replied to Allogagaw's topic in General Discussion
Allogagaw Glad to see you got it working the way you want. Ver 5. Beta 8U The “ Quick “ no Transitions check box that you are used to seeing in 4.48 is in the “ Customize “ box. If you use this, also go to “ Main “ section in same box and set “ Display Time for (sec) You can customize slides with “ Quick “ no Transitions After reading your post over again, I see that you were creating your presentation with transition effects. Just a note of interest. If you wish the majority of your slides to have “No” transitions To enable all slides with “ Quick “ no transitions. Project Options – Effect – uncheck (Enable Transition Effects) Project Options – Main – at bottom set the “ Time Interval for new Slides “ (example 2 sec) Click – “ Set for Existing Slides “ – will do all slides at 2 sec or what ever time you choose with quick no transitions. You can then reverse the procedure and customize the individual slides you wish, for any transitions effect and display time. -------------------------- Added Mark PTE will not assign a “ Quick “ no transition effect, this has to be done manually. Yes if your images were very large and transitions short your show would run irregular and would give you the quick no transition appearance. Sound advise Fred -
JPD Well you have done it again! – Fantastic effect. I am overwhelmed with the creations that are being achieved with this great program. Looking forward also to a template of this effect, as I am sure I would use it often. Sharing your talented creations with us all, much appreciated.
-
thedom I run IE7 browser and when I connect to your site I get the message that it wants to run the Add-On Quicktime from Apple – do you want to allow to “ Run Active X “ In regards to Silvia’s problem not being able to connect, would “ Run Active X “ have anything to do with it ? Or possible too high “Security Setting “ “ Rain “ Demo - No doubt an exceptional effect. Looking forward to your tutorial, as I would very much like to see what “ Rain “ & “Snow “ effects look like when burned to DVD and played back on TV.
-
Robert In the path you mention, Application Data ( folder ) is normally a System Hidden Folder. You may want to check – C:\ Documents and Settings (Folder) – at the top. Tools – Folder Options In the box that opens – click at top – View, scroll down to “ Hidden files and folders “ See if “ Do not show hidden files and folders “ is checked. If so check “ Show hidden files and folders “ - click "Apply" Give it another shot Added: Robert the only .PTE files that are stored in this location are the "Templates" .PTE's ( by default ) The location of your Template files can be changed in the " Manage Templates Window "
-
Hi Robert Elements You can Batch Crop in Elements using File – Process Multiple Slides. However if you check “ Constain Proportion “ you will end up with what you have now 1024 x 685. If you uncheck then they will naturally be out of proportion. As to “ Save for web “ you will on a file size 3872 x 2592 likely get a message to the effect “ Image exceeds the size – Save for Web – was designed for. Even if you “ Preceed “ I see no way of doing a “ Batch “ If you do not get an answer in regards to Irfanview You may want to look at “ BreezeBrowser ver 2.13 “ I took a couple of my original camera images 2272 x 1704 and cropped to your size 3872 x 2592. BreezeBrowser did crop them to 1024 x 768, with a setting change. I have e-mailed you the samples. If you care to send me a couple of your images, by all means do so. I will resize with BreezeBrowser and return them to you to check.
-
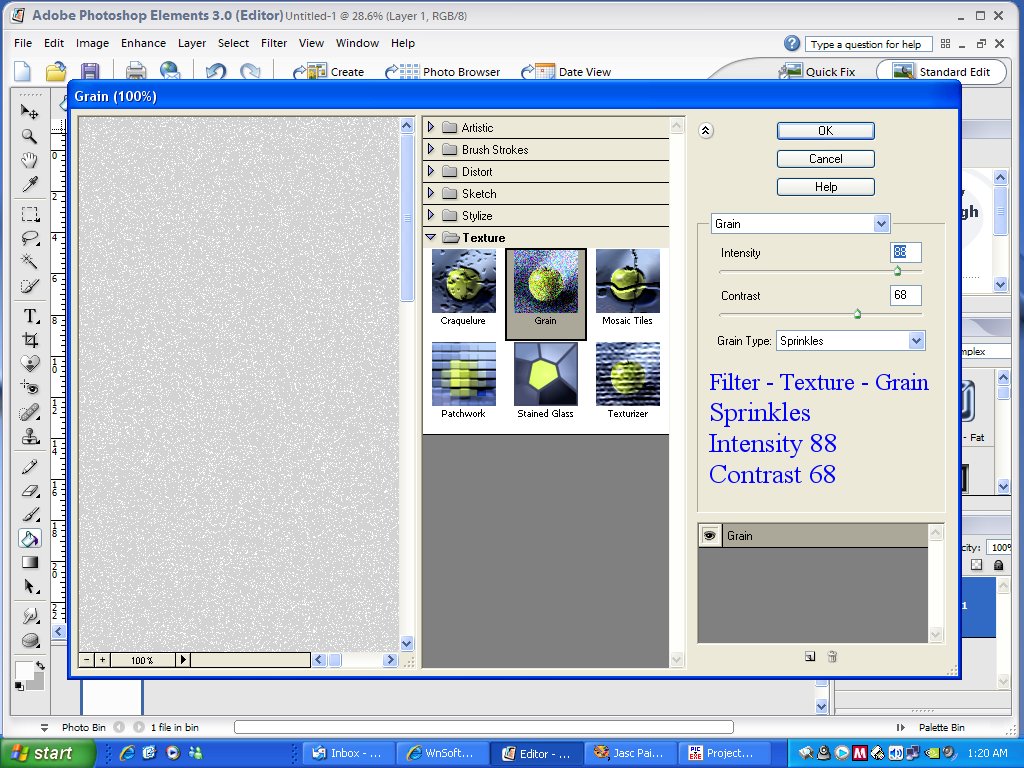
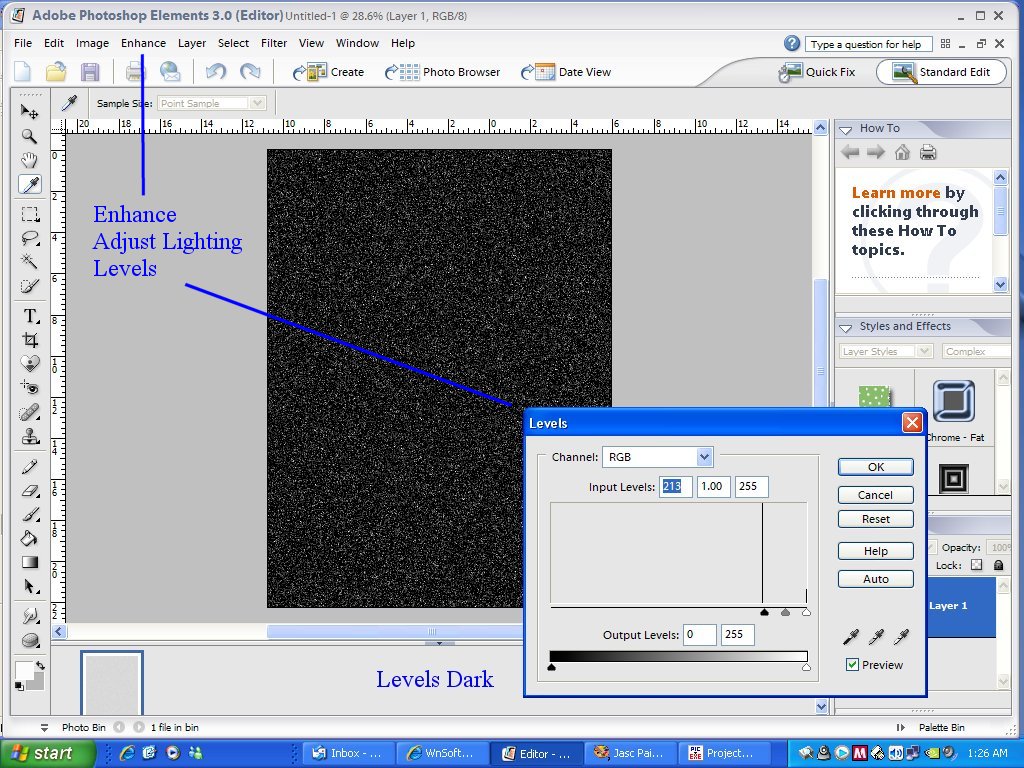
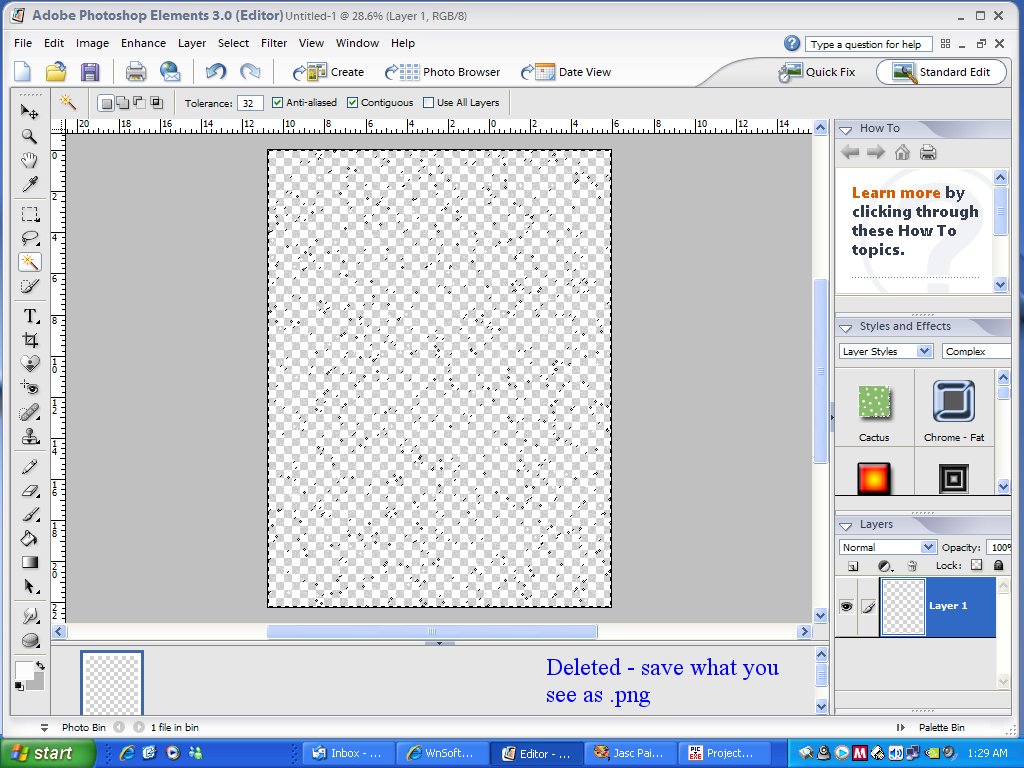
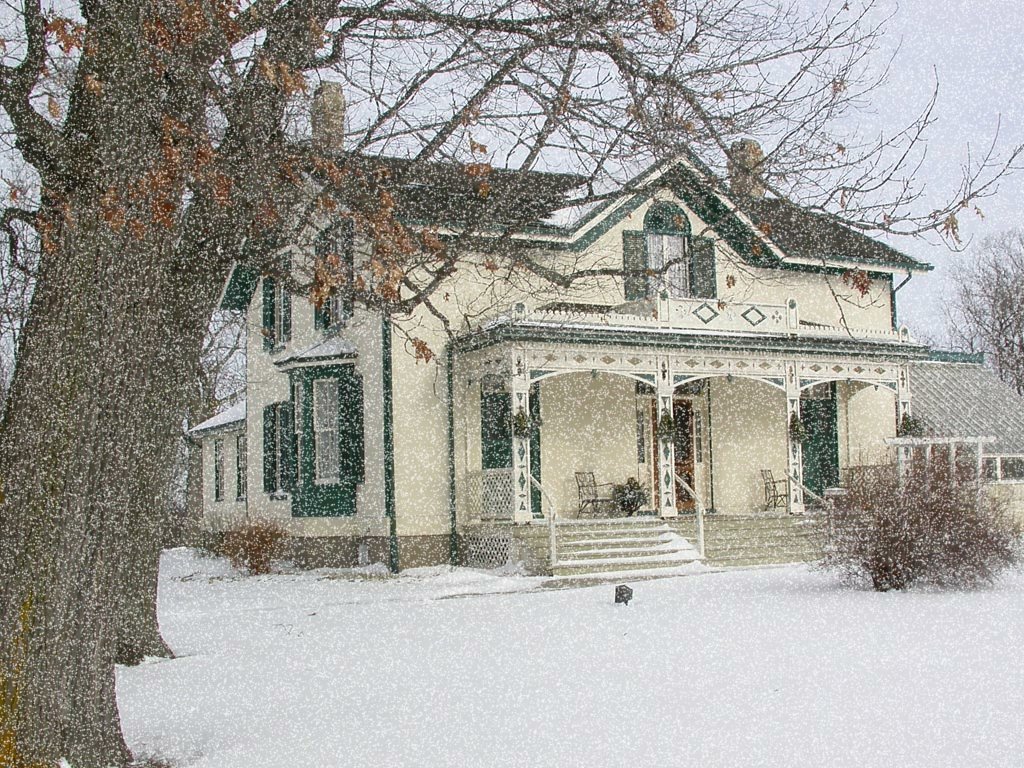
Hi Lin Your snow Effect using Photoshop Elements 3 After many attempts following your .PDF tutorial the other day I gave up, as when I got to the section – “ Select Color Range “ Elements 3 does not have this function. We downloaded your “ Flash “ tutorial and after viewing it, got my wheels turning again and thought we would give it another try. In the past I have somewhat found a work around for Elements following your Adobe Photoshop explanation. Any user using Elements having the same problem may want to try the following. ( or set me straight if I have missed something ) Follow Lins explanation to the point of choosing “ Filter “ and choose “ Texture – “ Grain “ - " Sprinkles " Using “ Levels “ – darken Pick the “ Magic Wand “ and click inside the “ Black “ section. Now hit “ Delete Key “ Once deleted, save what you see on screen as a .PNG Once again Lin thank you very much for another nice tutorial and putting me on the right path, using Elements. Results - I think we are ready for lesson two !

-
Can someone tell me if the Edit function is working?
Hawk replied to Lin Evans's topic in General Discussion
Ok LIn - simple fix I hope. let us know results. - mystery! -
Can someone tell me if the Edit function is working?
Hawk replied to Lin Evans's topic in General Discussion
On the right hand side of your topic Under - ADD REPLY - NEW TOPIC First post. -
Can someone tell me if the Edit function is working?
Hawk replied to Lin Evans's topic in General Discussion
Lin Under "Options" - "Display Mode" Wonder if you toggle between "Outline Mode " & " Standard Mode " - something may kick in ? Just a thought. -
Can someone tell me if the Edit function is working?
Hawk replied to Lin Evans's topic in General Discussion
Hi Lin Just to verify Ken's post, within the last hour I edited my post - " Full Edit " in a thread by Nathan. Also have the " Quick Edit " working OK. -
Hi Nathan When you extract the .zip file it gives you a folder within a folder. Make sure Elements is closed down. Drag or copy and paste only the folder with the 4 files in it, into your Photoshop Elements / Plug-in folder. Start up Elements. Check at the bottom of the "Filter" section and see if it is listed as " optikVerveLabs " Let us know how you make out. This is a very nice plug-in which we have used with Elements 3 now for some time. In Elements 3 - possible the same in 5 Under "Edit " section - Preferences - section " Plug-Ins & Scratch Disk " you can also designate an " Additional Plug-Ins Folder " from other graphic programs, if Photoshop supports them.
-
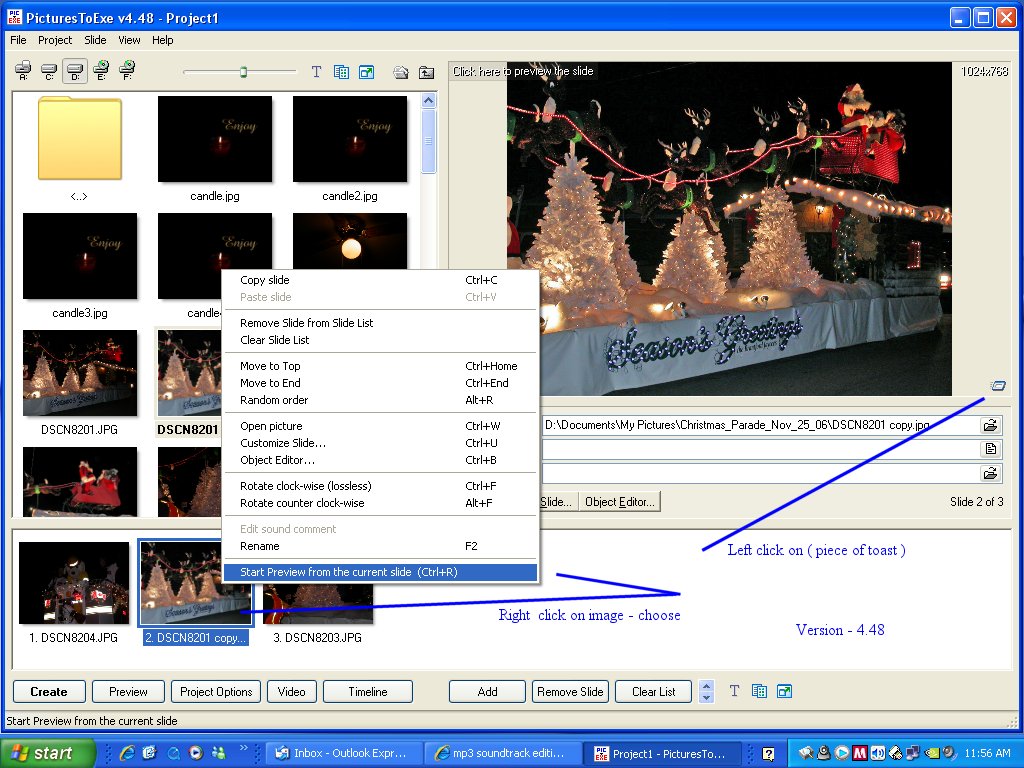
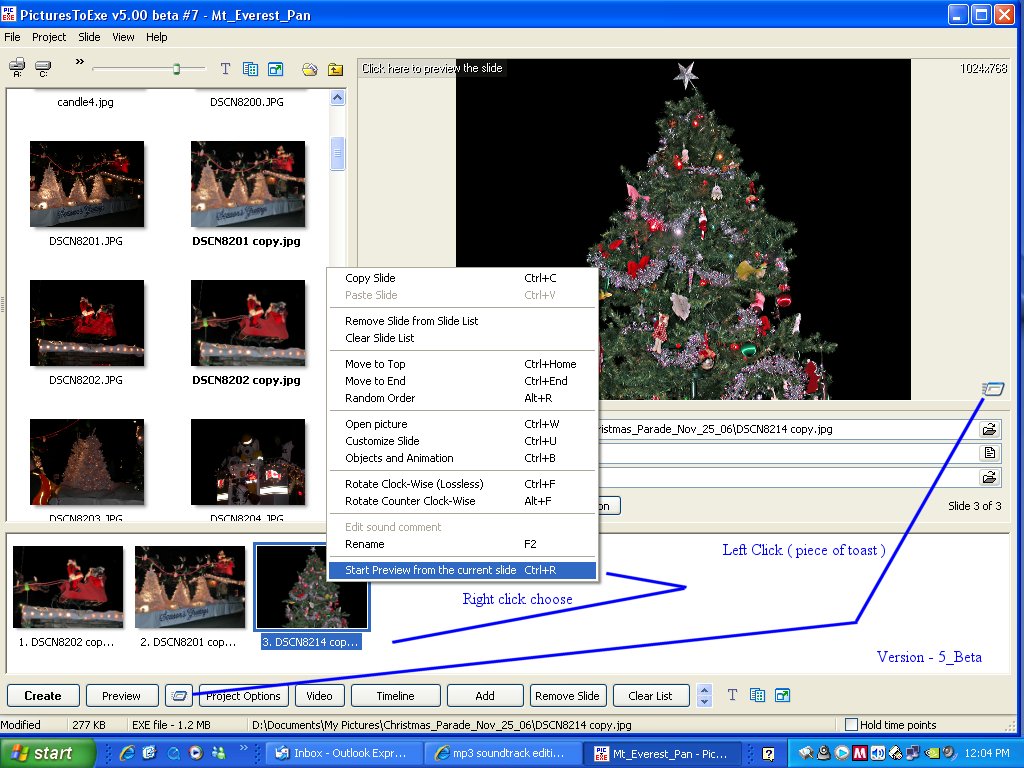
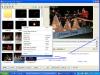
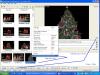
Hi Stan - Welcome to the forum. To answer your one question. Couple of screen shots - just click on thumbnail, 2 different versions 4.48 & 5 Beta The preview will start 1 slide before the one you choose. Version 4.48 ------------------------------------------------------------- Version 5 Version 5 - Objects and Animation screen
-
Royo When creating a show specifically for DVD In ver 5 are you using the “Show Safe TV Zone” feature? Objects and Animation – Tools – Show Safe TV Zone. (Guidelines) Ver 4:48 it is located in the Object Editor – top part of screen. “Show TV Safe Zone”
-
Hello Bubba I think this is what you are looking for. Topic started by JPD. See - Post #5 http://www.picturestoexe.com/forums/index....amp;#entry31206