All Activity
- Past hour
-
RCRA started following Where to start and AV Clubs in UK
-
There is a section in the Forum headed AV Events and Festivals, last posting was Dec 2021. The RPS has an Interactive map which shows that the two nearest Clubs to me ( In Nottingham) are in Sheffield and Leicester. I haven't been to the photography show for a few years, but from memory videography rather than slideshow creation was represented. (Presumably driven by camera manufacturers wanting to sell equipment). Are there any events or organisation I can join that promote or have as their primary purpose AV creation? I investigated the Sheffield connection and it is a subset of their camera club, which wraps up from now until September, as is the practice of many clubs in the UK. The group's founder is no longer with us and the page of the main camera club's website informs us that they meet at members home and it is prerequisite to be a main club member. It is looking to me that AV is an extremely niche hobby! Ray Andrews
-
Thanks Jill, Synchronise was not ticked. I always add the music track when I have randomised all the images and attach the audio file to the first image. I have just set "loop the audio" and will see how that works. Thanks again for comments.
- Today
-
Thanks to you both, I've been at this for 10 hrs and am throwing in the towel for today. I will crack on bright eyed and bushy tailed tomorrow. My name is Ray, RCRA are my initials . Jill - "Ok to do this is easy" - closest emoji I could find to a wry look of puzzlement! Dave - "that other Slide Show software" - I haven't used any other software apart from Pro show producer, which I bought, used once and abandoned as it was pre-retirement. Not sure where "placeholder" even came from, but it seemed like the right word to help explain my aim. I look forward to following up on both your answers tomorrow - thanks again Ray PS: just thought of another related question, but I believe it would be better put in the general forum so as to keep this thread from widening
-
RCRA - Do you have a first name? It will make it easier Firstly, you will not find such things as "Placeholder" in the Online Help (OH). It is not really a PTE AV concept. It applies more to that other Slide Show software. To search the OH you would probably do well to look at this page - https://docs.pteavstudio.com/en-us/11.0/searchtips/main The other page which seeks to help you use PTE AV terminology is here - https://docs.pteavstudio.com/en-us/11.0/main-window_1/terminology Also look at the rest of the MAIN WINDOW sections. The OH is not really a "HOW TO" as such, it seeks to acquaint the user with the various different sections of the Software. For your question about the three images set at differing angles you need to know how to add images, to use the Zoom, Pan and Rotate controls and then how to use the Key Frames to be able to animate your images. I would also suggest that a firm grounding in the use of the FRAMING control would help to be able to zoom your images within a frame. https://docs.pteavstudio.com/en-us/11.0/how_to_v9/framing?s[]=framing DG
-
Ok to do this is easy - There is no specific name to the Technique. Basically - as it will be better for you to do it yourself rather than have exact step by step instructions. Add your background image to the SlideList (the slides along the bottom in the main window) Click on that image & then Click O&A (Objects & Animation) This where almost everything is done. You will see your background image & this should be highlighted in the Object Panel (bottom right) Click off this & click in a blank area below it, so it is no longer selected (the grab handles around the image will dissapear) Click Add Image - Menu bar top left - picture of an image - hover over each icon & you will see what it is Navigate to find the portrait image you want to add, select it & click Open This image will now appear on top of the background image Using the grab handles rotate & size it how you want. (or you can use the Animation Tab to change the Rotate, Zoom (Size) & Position properties In the Properties Tab of O&A you can also add a Border, choosing it's colour & width Once again click off this Image (object) in the Object Panel so that nothing is highlighted & repeat the steps to add another image as required. In the Objects Panel each image name should appear one on top of the other - like Layers in Photoshop You can adjust the Opacity of each item in the Animation Tab by changing the value in Opacity if you want to. If you want to change the order of the images so that a different one is on top, then simply drag the Object Name up or down If the Object Names appear indented one below the other, then you didn't click off & deselect an Object before you added the next one. Simply click & drag the name to move it in the Object List. Hope this helps. As I said just play & see what happens. Jill
-
"I know it is difficult to ask the right questions as at this stage you don't know, what you don't know!" - Too right! as Donald Rumsfeld said there are Known Unknowns as well as Unknown unknowns! OK so what I am presently trying to do is to show the same image twice or maybe three times slightly rotated, on a slide that has a fairly nondescript background. The idea is shown in this YT clip (which just showcases the technique but is not a tutorial that shows how it is done) . When I first came to this about a month ago I watched a dozen or so of Barry's excellent videos. In one I'm sure he demonstrated how you have one image file but copy and place it several times within one slide (in effect if I understand it of just having a layout in the program that uses the same image file in more than one placeholder position). Would you be so kind as to tell me what this technique is called so I can try to find it in the online help? I have searched back through my history, but try as I might, without settling down to severaI hours of re-watching I cannot locate the one I need and hoped I'd be able to create the effect from the online help thank you
-
I must admit I have never had any success with the Search function. There is a list of contents in the Online Help https://docs.pteavstudio.com/ I know it is difficult to ask the right questions as at this stage you don't know, what you don't know! As to aspect ratio it depends what you are trying to achieve with your shows. Do you simply want to show your individual images to some music, or are you trying to tell a story. If it is simply to showcase your images, then don't worry too much about aspect ratio, composition etc. If you are trying to make a pleasing show that has a narrative and one image blends into the next, then it is best to have all of your images the same size. Otherwise the viewer will be looking at the edges rather than the content. You can easily adjust sizes in O&A (Objects & Animation) simply drag the image using the grab handles to the size & position you want. It is the opposite of Photoshop in that it will keep the aspect ratio. To change & just adjust in one dimension then Hold Down Shift as you drag. PTE does an excellent job of upsizing if the original aspect ratio is not what you want. You are looking to line up horizons, angles, shapes so that they flow from one to another. To rotate an image put the cursor just outside a corner grab handle so you get a bent arrow & drag. To flip it is easier to use the Rotate X or Rotate Y modifier & set it to 180. Most of PTE is very intuitive (unlike Photoshop) and you are not affecting the actual image by making any changes. Everything is virtual. So just play in O&A changing different things until you get used to what each thing does. There is always the Undo button & unlike Photoshop it is not limited to a set number. Or just close the Project & don't Save. Don't worry about Terminology or Technique at this stage, just practice. Most of all have fun & enjoy experimenting. And come back & ask if you need help. No question is a silly one. Jill
-
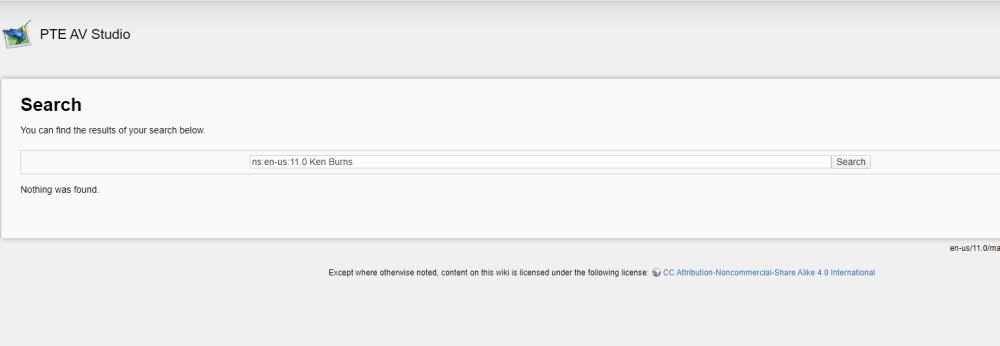
OK, after a month in which my NAS drive with 65,000 images died and had to be replaced, I'm back on the case. As a camera club member I have been used to cropping images during post processing to any size that removes distracting elements and helps simplify the composition concentrating the attention to what I am trying to show the viewer. We run 5 print competitions per annum, so apertures in the mount can be cut to suit any aspect ratio that I end up with. My first take away is that I will bear in mind the 16:9 aspect ratio and where possible produce a virtual copy in LR that is more slideshow friendly! I am currently exploring what the various options look like and adding them all into a slideshow so that I can compare them and try to understand what works and what doesn't. When cropping an image that was intended to be viewed in a 9:16 aspect ratio you get something entirely different if cropped to 16:9. I am exporting the slides and pasting them into an annotated document so that I can refer back to this process and the various options, in the future, hopefully at some point I will become familiar enough to just intuitively know without having to check my notes. (It's taken me 5 years to understand the basics of LR & PS already). I am also at the point where not knowing the terminology means I struggle to search for the help I am seeking. For example I have seen a Barry Beckham video in which he adds the same portrait image of a dog rotated and overlaid to fill the frame, but not knowing what the technique is called means I cannot find it again. Barry's website is full of valuable links, but at the moment they are inaccessible due to me not knowing what I should be looking for or where. I have to say that I had almost the same problem with LR & PS albeit using the Adobe classroom in a book indexes). Even when using the search term Ken Burns with the "PTE AV Studio 11" folder highlighted in Yellow, yielded "No results". I must be getting something wrong somewhere My question is: Is there an index somewhere that can assist me to locate the help files and videos that will get me moving on my journey?
-
Try unticking 'Synchronise Sound Track & Slides' in Project Options Advanced Tab. If your Slides are randomised the sound file may be stopping. Also in Audio Tab you could try ticking 'Loop The Soundtrack' This will ensure it will play all the way through. Jill
-
Update insofar as I have added an .m4a file linked to the first slide and set the volume to one. So technically there is an audio file in the show even if it only lasts for 4 minutes and the show runs for 66 minutes...... Published show as mp4 file and played on a LG TV set and got a similar message that "this video does not contain audio". What am I doing wrong? I am assuming that as there is an audio track shown under project options and it is linked to the first slide this is all I need to do to get the audio incorporated? The first two slides are in a fixed order but the remaining 1000 images are "randomised" via Alt-R if that makes any difference.
- Yesterday
-
Twan joined the community
-
Thanks Dave, Will try adding a muted sound track and see what happens.
-
davegee started following "Sound track not supported" message
-
Might be wrong but I think it is because there is NO soundtrack? A muted sound track might be the answer in this case. DG
-
Dewcal started following "Sound track not supported" message
-
I have a 1000+ image show (mp4) that has each image on screen for a couple of seconds before they fade into the next one which works well. There is no sound / music included as it is designed to play silently as background at a music gig. Last time I played it on a Samsung TV, when the show opened, there was a message displayed by the TV that "the sound track was not supported" or similar wording. What do I need to do to avoid this message? Thanks for any help.
- Last week
-
Thanks for this demonstation. Glad that V11 was useful for this task.
-

Free Music / SFX Resource - Over 2000 Tracks
Eric Matyas replied to Eric Matyas's topic in General Discussion
Happy May Earthlings! I had another very busy month, but here's a brand new track for you on my Fantasy 13 page: "TROUBLE IN DREAMLAND" https://soundimage.org/fantasy-13/ As always, it's 100% free to use with attribution, like my thousands of other tracks. Enjoy! :-) -
Sometimes we want to show two (full-screen) images at the same time by blending them together. With analogue slides we had the additive blending on the screen. In PTE we can put image 1 on top of image 2, and we can set the opacity of image 1 to 50% (alpha-blending). This is indeed an addition, but only with half the colour values. This is the reason why the results of this kind of blending often show a lack of contrast. Since version 11 PTE we can use the feature of "Nested Color Filters", the value of which I noticed only recently. In the situation above, it allows us to overcome the restictions of alpha-blending, and we can create additive blends in which the images have higher proportions than just 50%. An application is shown in the attached project: KerzePlusLaterne.zip A bit more sophisticated methods have been applied to create the following video (texts in German):
- 1 reply
-
- 2
-

-

-
Dave, Many thanks for both a very prompt and beautifully simple reply - works without issue. If only everything in life was that simple!! Thanks again.
-
davegee started following Add video file to project
-
Make a copy of your .vob file and change its extension (.vob) to .mp4 in Windows Explorer. You can then add it to your show. DG
-
Dewcal started following Add video file to project
-
I have been asked to include a "VOB" video file into a show and am wondering how I can achieve this? This format is not shown in the "approved" video format list and would appreciate advice as to how / if I can convert this file to a useable format. I know there are online "converters" available, but I have have a paltry 0.8Mbps upload speed so would be very slow!! Many thanks for any help with such a "simple" query!
-
Thanks Jill and Rosemary yes tedious at present.
-
I am hoping that the text module will be updated in the next PTE release. It is cumbersome to have to copy and paste text slides especially when there are lots of text slides in the show. Rosemary
-

The Time Machine---A Slideshow project with free Styles.
Alex55 replied to Alex55's topic in Styles & Templates
Kieron, Xenofex2, Appreciate your comments. Best Alex -

The Time Machine---A Slideshow project with free Styles.
Xenofex2 replied to Alex55's topic in Styles & Templates
Like it! Brilliant. Thankyou. -

The Time Machine---A Slideshow project with free Styles.
nelson replied to Alex55's topic in Styles & Templates
Excellent as always, Kieron -

The Time Machine---A Slideshow project with free Styles.
Alex55 replied to Alex55's topic in Styles & Templates
SeismicGuy, petitsaxo Thank you guys for the comments. Alex


