davegee
-
Posts
9,348 -
Joined
-
Days Won
59
Everything posted by davegee
-
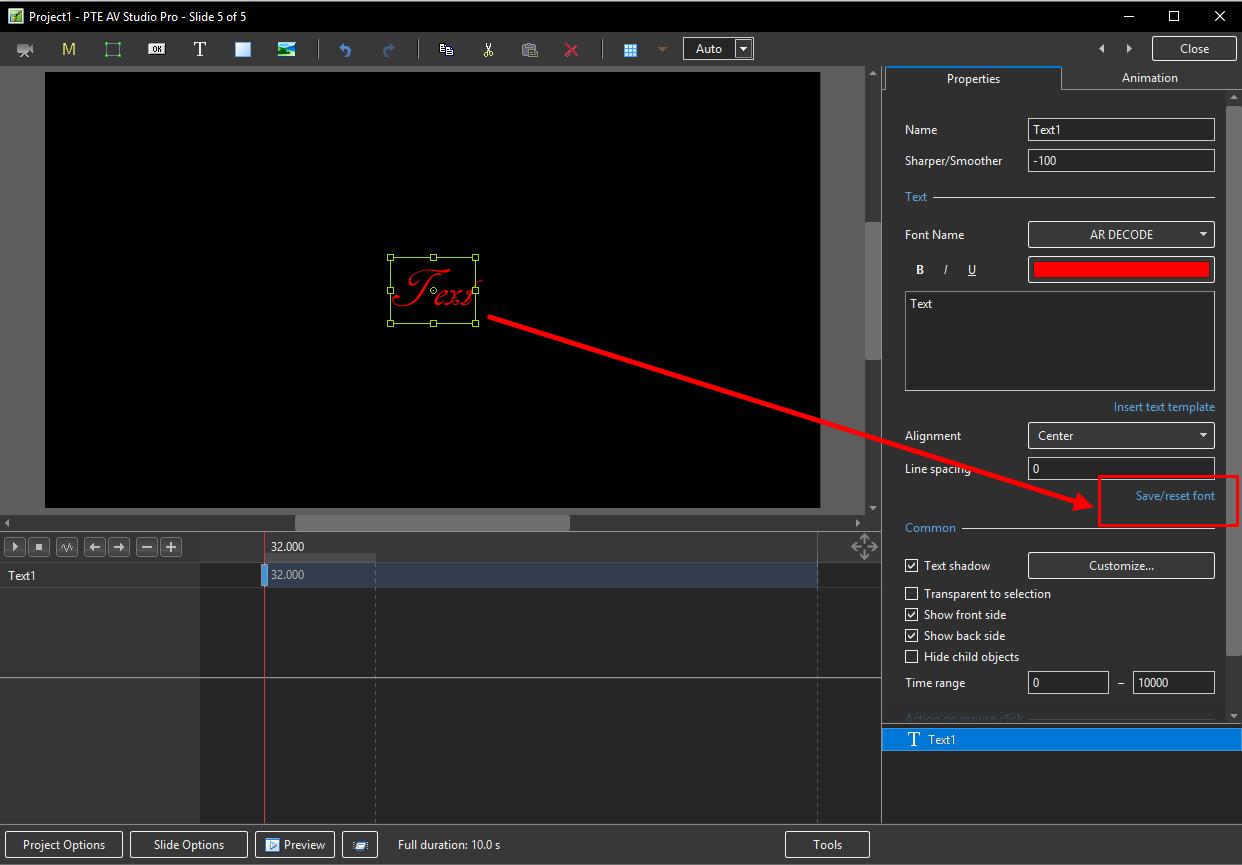
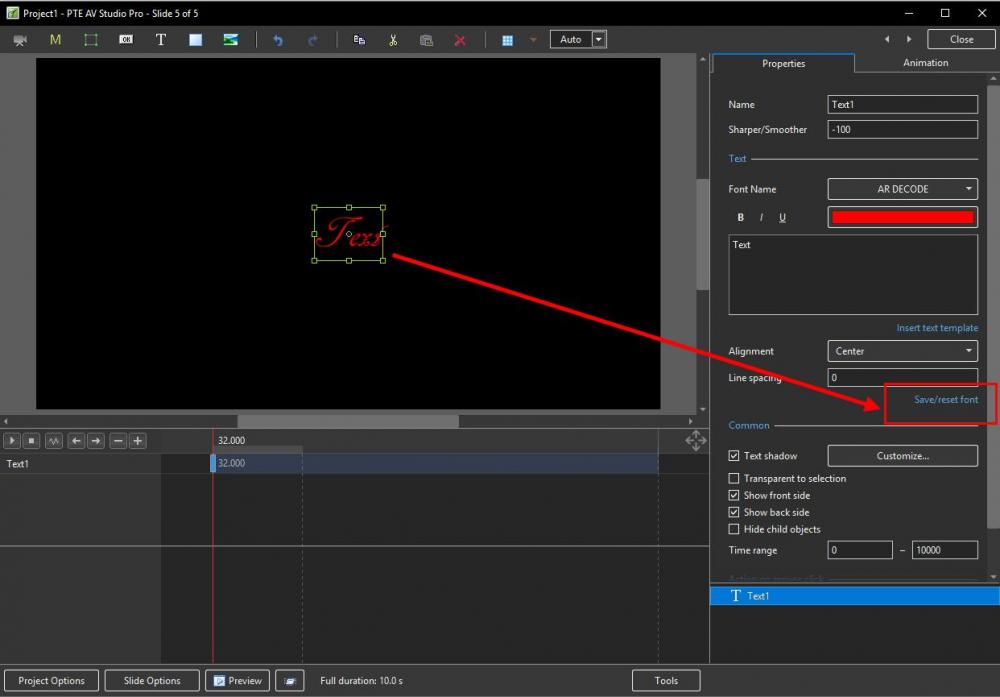
When you enter your first text box click on "Save / Reset Font". https://docs.picturestoexe.com/en-us/10.0/how_to_v10/add_text?s[]=font DG
-
https://downloadcenter.nikonimglib.com/en/index.html Read instructions carefully - remove lens when updating. NX-D is also updated. DG
-
Andrew, It has been suggested that "you/he" could use the new facilities afforded by Version 10 to make an MP4. That mp4 could then be inserted directly into a Version 9 project (after converting) and then a 32 bit EXE can be made which is compatible with your equipment. Obviously, you would lose any "manual operations" but for a "normal" show it might work. A bit messy perhaps (or not) but it would give you time to update your equipment and give you a little breathing space? The mp4 is the equal of an exe in these circumstances. Anyone who says any different should take it up with Barry. Give it a try? DG
-
Exactly! DG
-
Using the same logic as above, I have always turned all items ON in Toolbars in the Preferences /Toolbars Menu. I have suggested this several times. DG
-
Just type: PTE DG
-
Preferences / System / External Editors and choose Corel for Graphic Editor. then: Highlight the Image in the File List (or in O&A) - Ctr+W or Right Click/Edit File. https://docs.picturestoexe.com/en-us/10.0/project_settings_1/preferences DG
-
Gary, Just consider this. You have made your show at glorious 1920x1080 resolution. Now you want play it at less than full screen on a 1920x1080 tv. Let's just clutch a figure out of the air and say that your show will now become 1280x720. Is that what you want? If so why not make the show at 1280x720 and present it on a black 1920x1080 bg at original size? It is a much simpler solution. Whichever way you look at it, if you resize your show so that it only takes up a percentage of the 1920x1080 tv screen you are going to be watching a lower resolution show. DG
-
Maybe it is me, but I still do not understand what Gary is trying to do? if VLC were used what parameter would be used to limit the size? It would have to be determined by the user and not the author. If Gary wants to fix the percentage of screen used he can already do this. But it cannot be varied by the user. Is the user capable of setting up VLC ? DG.
-
Thanks Lin, perhaps I should have been a little more specific. Last time I checked SONY do not do anything smaller than 43inch which is too big for my needs. If they do anything smaller it is not available over here. 40 would be my limit but it would also have to be Sony. Not interested in any other makers. DG
-
If you use VLC or similar in some way then it amounts to the same thing! By changing the size of the "window" you are, in effect, downsizing the original mp4 to a dimension which is acceptable to the viewing distance from the tv i.e. Interpolation downwards. You are losing "resolution" - if that is what you want you might just as well use "framing" and place a window in the middle of the slide. It is the same thing. I agree about larger TV screens - there is absolutely no point unless you increase the viewing distance and/or get a 4k tv. If I could find a 4k tv in a 32-40inch package I would upgrade immediately but they do not seem to exist (yet). DG
-
Did you purchase a key for Version 10 when you were using the old pc? If so, it worked on your old pc? DG
-
Once again, IF we are talking about a 1920x1080 tv, then what is happening is that the SAME 1920x1080 pixels must be bigger pixels for bigger screens. The mp4 is NOT being stretched, it is using the same number of pixels albeit bigger pixels. If you want to use less of the screen then it has to use LESS pixels. It is only when your 1920x1080 pixels show is being shown on a 4k screen that "stretching" takes place - one original pixel would be represented by FOUR pixels on the 4k screen when it is fit to the screen.
-
I'm a little confused by your request. If these larger TV sets are 1920x1080 and you want the show to use only a part of the area available then downsizing (interpolation) will be involved. Interpolation of any kind (up or down) should be avoided even though PTE handles it very well. DG
-
Gary, are you prepared to make two versions? one for the 1920x1080 tv and another for the higher res tv? If so, add the 1920x1080 mp4 to a 3840x2160 project and set its zoom to original size. The 1920x1080 mp4 will then play at its correct size on a background of your choice ( on the higher res tv). DG
-
Physical size of the TV should have nothing to do with it. Are you comparing a 1920x1080 TV with a 3840x2160 TV? When you say "stretched", are they distorted or just up-scaled? Have you investigated publishing at 3840x2160 and trying that on TV's of different size (resolution/pixel dimensions)? DG
-
Are you using the "Separate Audio from Video" command in the right click menu (in the Timeline)? Does the Audio show as an Audio Track in the Timeline? I suggest that you make the video or a similar short video available for Igor (and/or anyone else) to try The "Separate Audio from Video" command works OK for me and, if not wanted, can be deleted from the Timeline. The Mute also works. So, possibly, it has something to do with the video clip? DG
-
The lack of Flash probably partly accounts for the increase in Battery Life (in their calculations). Also the current trend from Nikon is to get away from their CLS Flash Control and into Unified Flash. I can live without the built in flash in my Z6 and still use my CLS Flashes so I do not see that as a big problem. Perhaps they are hoping that it will persuade people to upgrade to their new SB-5000/500 flashes. They are comparing the D750 to the Z6/7 so I do not think there is enough reason for me to upgrade. I will be putting an order in for the new 70-200 f2.8 S Lens on Thursday morning if all goes according to plan. DG
-
Interesting comparison of Specifications of the Nikon D750 and the new Nikon D780 at Photographylife: https://photographylife.com/nikon-d750-vs-d780 DG
-
BTW, Since Version 10 you can Save Font and Colour etc attributes for a project via the link at the bottom of the Text Box. See below. https://docs.picturestoexe.com/en-us/10.0/how_to_v10/add_text#add_a_text_object
-
Laszlo, I have only today asked Igor to post a thread giving users up to date info on this. The whole team are working 24/7 on the MAC version and it is quite a challenge, but hopefully he will be able to give some information from time to time. DG
-
You could try playing with Customised Shadow styles to produce a Pseudo Stroke Line? Not perfect, but it might satisfy your needs temporarily until Igor can get around to improving Text in the next versions. Apply this Style to a blank Slide: Text Stroke.ptestyle DG Lin beat me to it.
-
I think that Lin possibly meant "Stroke" DG
-
Fade the Opacity of an Object In and Out: https://docs.picturestoexe.com/en-us/10.0/how_to_v10/fadeopacity Add a Text Object / Text Template, Adjust size of Font, Justification, Line Spacing etc: https://docs.picturestoexe.com/en-us/10.0/how_to_v10/add_text Create a Template for a New Project etc: https://docs.picturestoexe.com/en-us/10.0/how_to_v10/create_template Create a Custom Transition: https://docs.picturestoexe.com/en-us/10.0/how_to_v10/customtransitions Split an Audio Clip: https://docs.picturestoexe.com/en-us/10.0/how_to_v10/split_audio Create a Simple Pan: https://docs.picturestoexe.com/en-us/10.0/how_to_v9/simplepan
-

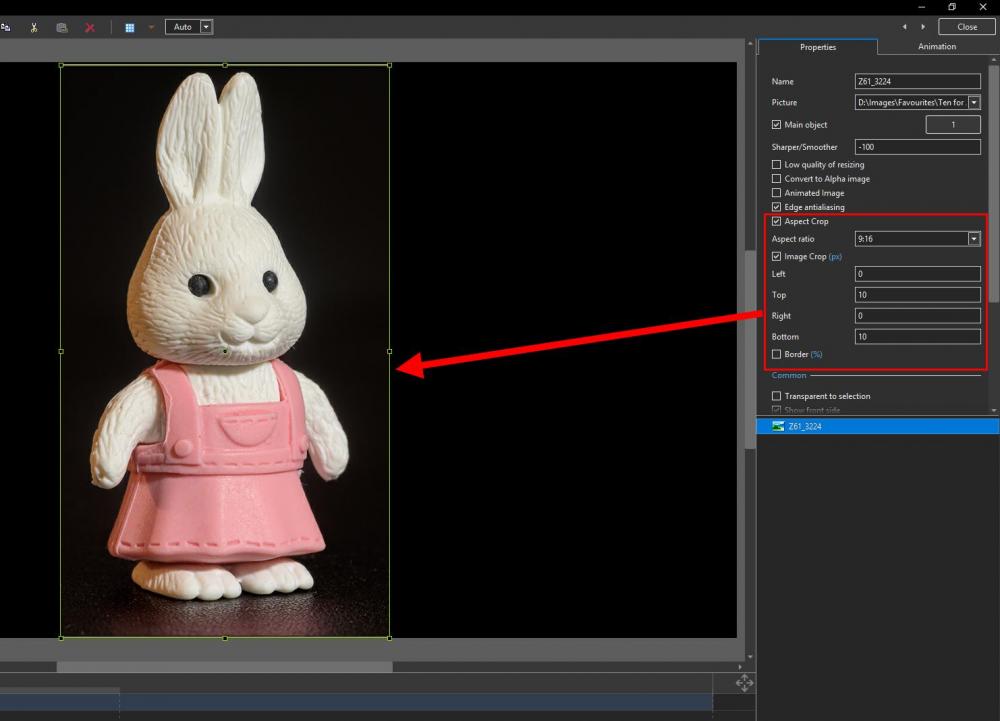
Properties tab -> (Aspect Crop)
davegee replied to stranger2156's topic in Suggestions for Next Versions
No problem,