Search the Community
Showing results for 'ASPECT RATIO'.
-
Two Simple Panorama Styles which work with any Aspect Ratio Project (16:9; 16:10; 3:2; 4:3) and any size of Panorama without adjustment. Styles for beginners: https://docs.pteavstudio.com/en-us/11.0/how_to_v11/styles1 Simple full screen panorama: Pano.ptestyle Simple panorama in a frame with background: Simple Pano with Frame.ptestyle DG
-
I must admit I have never had any success with the Search function. There is a list of contents in the Online Help https://docs.pteavstudio.com/ I know it is difficult to ask the right questions as at this stage you don't know, what you don't know! As to aspect ratio it depends what you are trying to achieve with your shows. Do you simply want to show your individual images to some music, or are you trying to tell a story. If it is simply to showcase your images, then don't worry too much about aspect ratio, composition etc. If you are trying to make a pleasing show that has a narrative and one image blends into the next, then it is best to have all of your images the same size. Otherwise the viewer will be looking at the edges rather than the content. You can easily adjust sizes in O&A (Objects & Animation) simply drag the image using the grab handles to the size & position you want. It is the opposite of Photoshop in that it will keep the aspect ratio. To change & just adjust in one dimension then Hold Down Shift as you drag. PTE does an excellent job of upsizing if the original aspect ratio is not what you want. You are looking to line up horizons, angles, shapes so that they flow from one to another. To rotate an image put the cursor just outside a corner grab handle so you get a bent arrow & drag. To flip it is easier to use the Rotate X or Rotate Y modifier & set it to 180. Most of PTE is very intuitive (unlike Photoshop) and you are not affecting the actual image by making any changes. Everything is virtual. So just play in O&A changing different things until you get used to what each thing does. There is always the Undo button & unlike Photoshop it is not limited to a set number. Or just close the Project & don't Save. Don't worry about Terminology or Technique at this stage, just practice. Most of all have fun & enjoy experimenting. And come back & ask if you need help. No question is a silly one. Jill
-
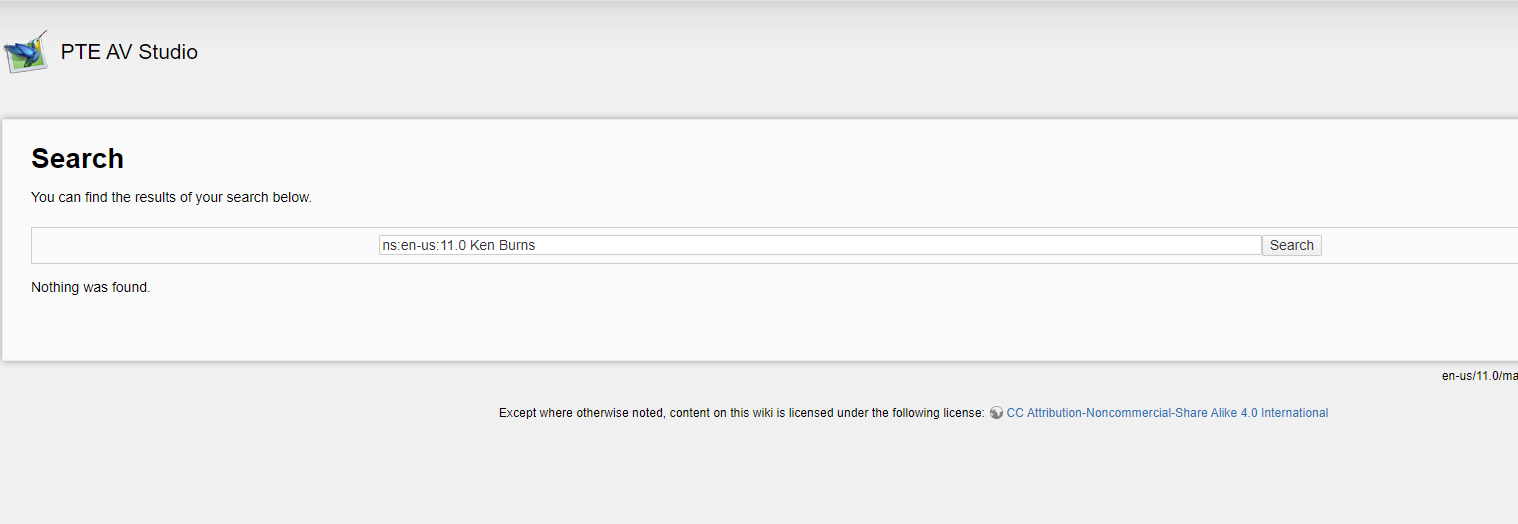
OK, after a month in which my NAS drive with 65,000 images died and had to be replaced, I'm back on the case. As a camera club member I have been used to cropping images during post processing to any size that removes distracting elements and helps simplify the composition concentrating the attention to what I am trying to show the viewer. We run 5 print competitions per annum, so apertures in the mount can be cut to suit any aspect ratio that I end up with. My first take away is that I will bear in mind the 16:9 aspect ratio and where possible produce a virtual copy in LR that is more slideshow friendly! I am currently exploring what the various options look like and adding them all into a slideshow so that I can compare them and try to understand what works and what doesn't. When cropping an image that was intended to be viewed in a 9:16 aspect ratio you get something entirely different if cropped to 16:9. I am exporting the slides and pasting them into an annotated document so that I can refer back to this process and the various options, in the future, hopefully at some point I will become familiar enough to just intuitively know without having to check my notes. (It's taken me 5 years to understand the basics of LR & PS already). I am also at the point where not knowing the terminology means I struggle to search for the help I am seeking. For example I have seen a Barry Beckham video in which he adds the same portrait image of a dog rotated and overlaid to fill the frame, but not knowing what the technique is called means I cannot find it again. Barry's website is full of valuable links, but at the moment they are inaccessible due to me not knowing what I should be looking for or where. I have to say that I had almost the same problem with LR & PS albeit using the Adobe classroom in a book indexes). Even when using the search term Ken Burns with the "PTE AV Studio 11" folder highlighted in Yellow, yielded "No results". I must be getting something wrong somewhere My question is: Is there an index somewhere that can assist me to locate the help files and videos that will get me moving on my journey?

-
The Blur mode "Gauss Extended" works well, but there may be situations in which you may want to blur an image while the edges remain sharp. The attached project shows a kind of solution, even if it looks a bit cumbersome. In order to use this method you may start the project, open slide 2, and replace one instance of the included Main object 1 by one of your own images (any aspect ratio); finally you may copy the whole thing to your own projects. You may create a style from slide 2, which has the disadvantage to loose the objects' names. Blur_with_sharp_edges.zip
-
 H all. This looks like some great AV software - very little of the overly glitzy stuff, and it looks like good professional looking output judging by some of the samples. I'm just trying it out - my first attempt crops the photos into 16:9 aspect ratio which I see from the help page is defined in Project Options https://docs.pteavstudio.com/en-us/9.0/project_settings_1/project I understand I can change it to 3:2 to suit the APS-C sensor I have. However, if I leave it optimised for 16:9 TV screen - is there a way that I can at least choose the position of the slide & hence the cropping that happens ? Some images used will be portrait 2:3 , so I definitely don't want those to be automatically cropped. best regards & thanks, Aidan.
 -
Try the Style Basic - "Simple Border". You can set the Image size, border size and background size. You can choose your own variation and apply it. You can then create your own style from the applied style. In the Properties Tab of Objects and Animation you can apply the border inside the image without changing the Aspect Ratio of the Image. https://docs.pteavstudio.com/en-us/11.0/objectsandanimation_1/properties_tab?s[]=border#image_crop_and_border DG
-
1920x1080 for a 16:9 ratio Jill
-
Mark, on my 1920x1080 display there were grey bars at each side - due to the fact that you were sending a 16:10 ratio image & I was receiving it & displaying on a 16:9. Some AV's were losing part of the image, text was displaying outside the frame or missing part of it. Some seemed to be stretched vertically - had a black band at the top but not the bottom, although the actual image didn't appear stretched. Also when the on screen display flashed up at the start it was showing - display at 90% or words to that effect. So I don't think it was displaying the full picture By using VLC player you shouldn't get any of these problems. However your 16:10 display will always show grey bars at the side on a 16:9 screen. If other people didn't see these it will be because their screen ratio was most likely 16:10 Hope this helps Jill
-
Hi Igor, i will try the previous version and get back to you. I must stress this is not a big problem, or even a small problem. Just an anomaly. As the Macbook does not have 1920x1080, I used the nearest 16:10 and it was it go over Zoom, I went for 1728x1117. Internal display, which is set under 'Better Display' to Notch, ProMotion, 10 bit, +HDPI ( I have no idea what any of that means!) an Update Update on getting a PTE 'exe' or 'pteav' file to run as a menu on a Mac. Our LAVG Zoom 3-club exchange went well on Friday evening. My Mac cannot produce 1920x1080 (16:9) as it has a default ratio of 16:10. The nearest I could achieve was 1728x1117 pixels (16:10). However, I noticed a few anomalies and others noticed a few annoyances. The anomalies were that my (paid for) mp4 player, Movist Pro, tended to stretch two of the mp4s when I was in full-screen mode. Interestingly, some folks using Windows saw borders, some grey some black, whilst other Windows users didn't. Mac users didn't. This would suggest that some Windows users may need to look at their setup. These bars were an annoyance to some. Another annoyance was the appearance of the mouse pointer, which had disappeared for me, but not it would seem across Zoom. I was told that VLC would automatically hide the mouse cursor, so I have installed it as my default player and it does work better. I noticed no difference in image quality, which was the alleged selling point of Movist Pro. Sometimes the menu would run the mp4 (Movist Pro) open in full screen and stop at the end, and when I closed Movist Pro, it would return to the menu. But, sometimes it opened on a different virtual screen and I had to intervene to get it to display. Then when I closed it at the end, it refused to return to the menu and again I had to intervene and return to the virtual screen with the menu. Why it would sometimes work and sometimes not, is beyond me. In the past, my approach of just using Finder and playing the mp4s from a list simply worked every time. Another simple approach is to create a VLC playlist and play from there. But, a nice menu system does look much more professional. And for competitions and festivals, essential. After seeking advice it seems the only way to get around this is to create an 'exe' or 'pteav' in PTE AV Studio from all the supplied mp4 and then use 'Run Slideshow with return'. I may try this as an experiment, but as PTE AV Player falls over every time it is run for the first time from Finder, yet opens fine when I use the 'reopen' button, I am not too sure. I would like to thank Adrian White, Derrick Holliday and Jill K. Bunting for their advice and support
-
Hi Jill, I was thinking of reaching out to you. But, you have been so helpful over the years that I didn't want to be a burden, and of course, I know you do not use a Mac. I sent out a few posts to various Facebook groups asking for a Zoom test. My friend from Exeter, Derrick Holliday answered almost immediately (and I then wiped all the FB requests.) What I discovered with a test with Derrick, over Zoom was No sound output, speaker. Zoom thinks my Yeti mic is a speaker, this has to be manually changed to my 'Macbook Speakers' in Zoom Settings|Audio, every time I start. No sound input, mic. Zoom defaults to Boom 3D. I have to quit the Boom3D app. This has to be changed to my 'Yeti Mic', in Zoom eSettings|Audio, every time I start. The 16:10 MacBook screen ratio does not work well with 16:9 1920x1080. My Macbook offers (with 'Notch', 'ProMotion', '10bit' and 'HiDPI') offers 3456x2234px 2056x1359px 1728x1117px You found my Zoom screen recording at 2056x1359px to be rather large, so I have moved down to 1728x1117px Not all MP4's received are at 1920x1028 @ 60fps. Indeed there can be many different settings. This is identified by MovistPro on start-up, which will reflect the details for a few seconds on starting the mp4 video file. If I were to do this again, I might follow Derrick's suggestion of creating a new PTE project for each mp4. Create a blank 1st and last and then save it as a pteav file. This approach allows you to create a menu system that will always come back, after playing each pteav file. But when go have 14 mp4s, this is a lot of work. For 65 at a festival !!! I have it all working now. See you on Friday
-
A rather simple style for arbitrary images and aspect ratios. Unrolling_image_with_blur.ptestyle
-
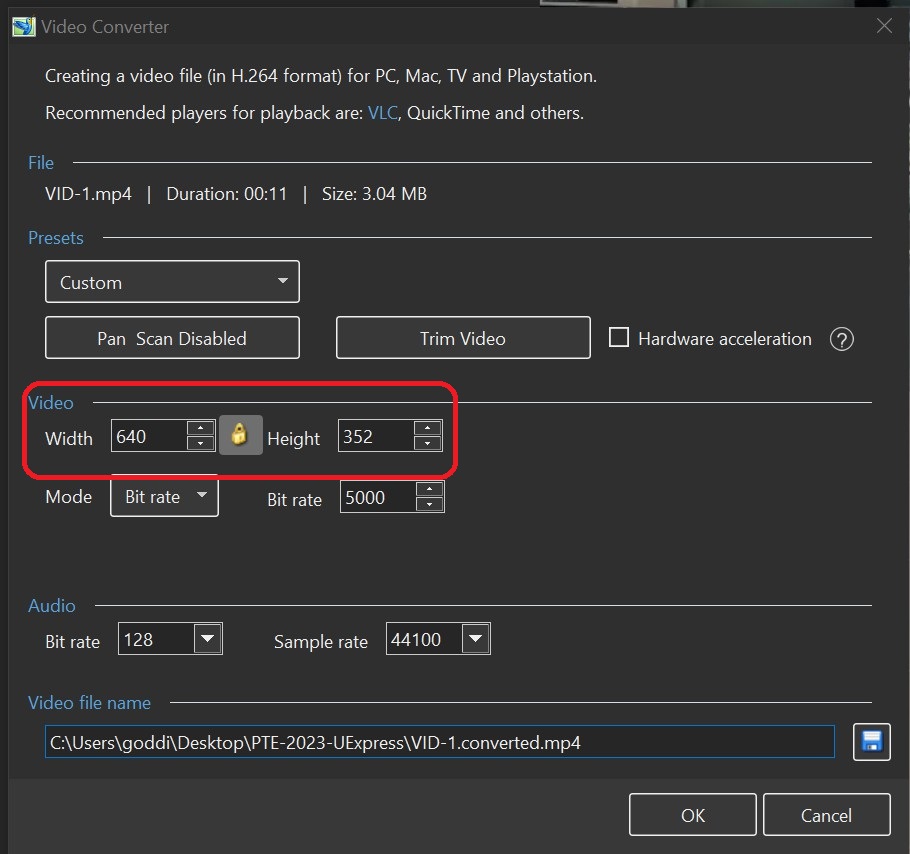
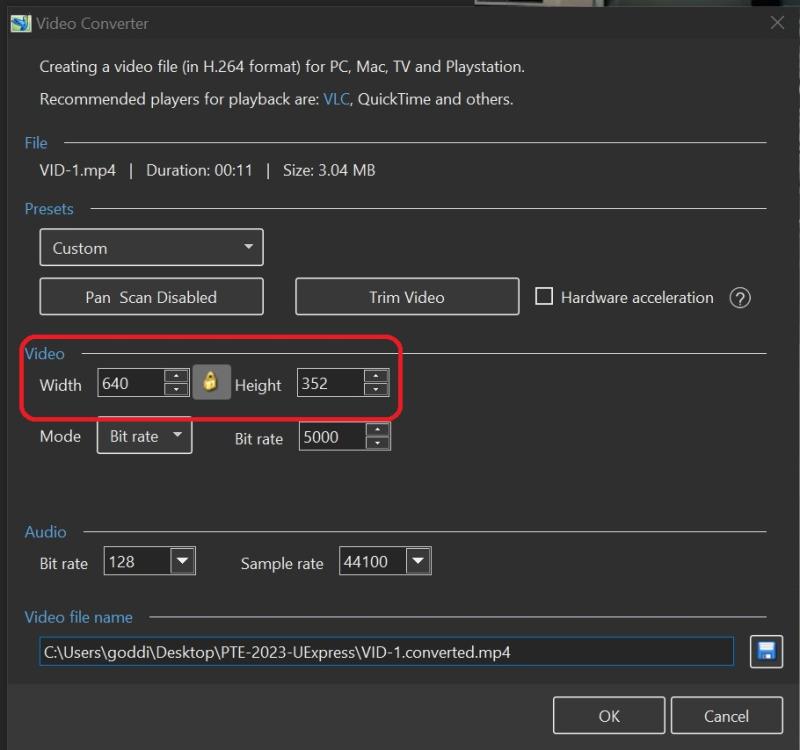
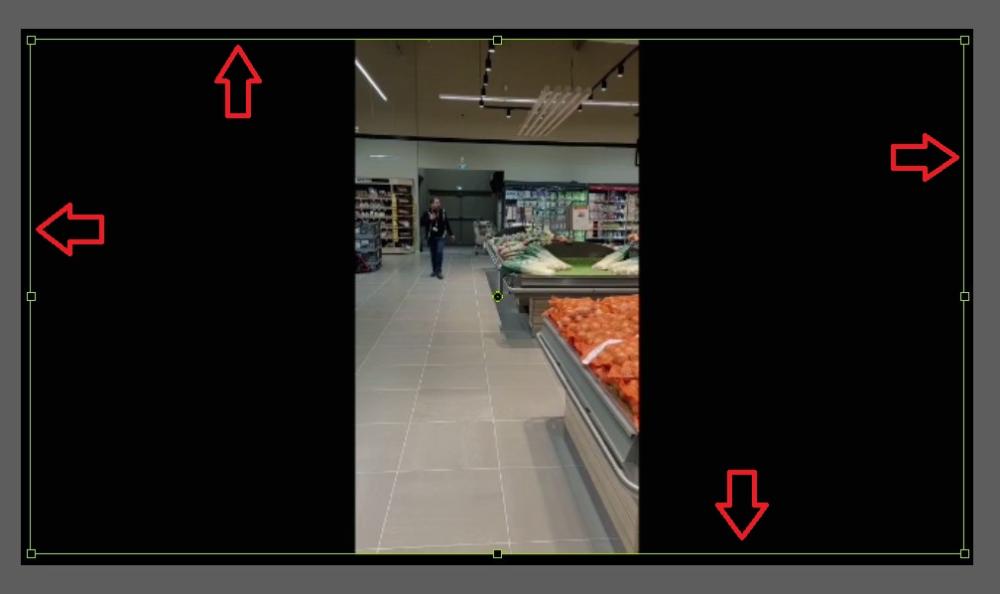
Greetings, When I Convert/Trim a portrait image (640x352), it does not retain its aspect ratio. In O&A, it becomes like a 16x9 aspect ratio. I'm using V11.0.1 Build 4 Gary
-
Here's a reminder of the method of applying Borders Inside of an Image within PTE and without changing the Aspect Ratio of the Image. 1. Apply your border and determine the width that you require (in pixels). 2. In "Image Crop" apply the same value to each of the Top, Bottom, Left and Right of the Image. 3. If you decide to change the Border Width remember to change the value in the Image Crop settings. Drag an image into the Slide list (16:9 Project) and apply the following Style. Examine the resulting four slides in O&A and observe the settings in the Properties and Animation Tabs. Borders.ptestyle DG
- 1 reply
-
- 2
-

-

-
 The aspect ratio defined in Project / Project options can vary from one project to another. I often use 16/9, but also 16/10 so that I do not need to crop too much my photos which have a native aspect ratio of 4/3 = 16/12. When export slides to Images, it would be nice if the current project ratio was used for the resulting image. Presently this is not updated when using this new (and most useful) feature. It can be manually input, for sure, but then this value "sticks" for the next project where it may not be correct.
 -
Been digging through our archives again & came across this show. It was created about 2008 using our original Nikon camera. It was originally shot in 4-3 aspect ratio, then 16-9 became the norm, so the images were stretched & cropped to suit. Consequently some of the vibrancy of the originals was lost, but it's still watchable on TV. Rosy. The Cathedral at Ripon
-
 Usually we add to a project photos shot in 3:2 or 4:3 aspect ratio. By default, the project in PTE AV Studio has a slide aspect ratio of 16:9, and we see black bars around the images on a 16:9 monitor. There are 4 options to make the images fill the entire slide (screen): A. Click the Project Options button > Defaults tab. Tick the "Cover" option. Click the OK button. Now all new images added to the Slide List or Timeline will occupy the entire slide (screen) without additional black bars. This method requires the Pro version of PTE AV Studio. B. Select one or more slides and click the Styles & Themes button. Browse Image Category > Image - Cover Style. Click the "Apply" button. Please note that this style will remove all additional objects (text captions) from the affected slides. C. Select one slide. Click the Objects and Animation button. Click your main image (usually the one selected by default) and press Alt+S (Option+S on Mac). You can quickly switches between slides staying in the Objects and animation editor. Press F11/F12 or arrows buttons at the top-right corner of this window. D. Select one slide. Click the Objects and Animation button. Click your main image. On the Properties tab, tick the Aspect Crop checkbox. And select "16:9" from the drop-down menu. Or choose any other aspect ratio you want.
 -
 Viewers Question - Download Here
 -
Hi Barry, Thanks, yet again, for your input. I was aware and indeed have been using the PNG process but was looking to see if a style wouldn't do the job more slickly. The aspect I hadn't thought of was using a "temporary" border/frame file as you have demonstrated, rather than a "stock" file. It certainly provides more flexibility for changing multiple slides. Regards John
-
Greetings, I like to have all of my images set using 'Aspect Crop/Aspect ratio 16:9'. But I have to do it slide-by-slide in O&A. I know I could create a Style but if other parameters have already been set, they will be overwritten. Is there a way to do a global setting for the Aspect Crop? I was wondering if creating a 'Template' could do this but I'm not sure how to use it with only this function, if possible. Gary
-
 Hi everybody. This is multipurpose Template. 20 photos(aspect ratio 3x4, 4x3,16x9) that are indexed to facilitate replacement and removed from the compositions under the splitter, that is, the photo can be changed without opening the composition. Font "South Australia". Transitions are regular. I wish you all good health and creative success. Download link: https://disk.yandex.ru/d/2RkKir4QfKTzkg
 -
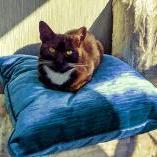
The mask was created for a 16:9 Aspect Ratio show. Just a few photos and a video of our cats playing. Thanks, Tom Zoom In.pteeff
-
Greetings, I initially posted this in Igor's mention of the Quick Style. Buy maybe it would be better here in Suggestions. I've just finished a project, spending many hours applying several animations individually to many video clips. I didn't want the duration of each slide to be changed if I created a Style with these animations to be applied to other video clips. So I manually applied Aspect Ratio and Borders to each video clip, one by one, so each one would retain its duration. I had totally forgot about the Quick Style. It would be nice, since it is a 'Style', that it also be put into the 'Style and Theme' menu, to reside at the top of the list. I would have looked for it there or it would have caught my attention since it is really a 'Style' option. Great improvement but hard to remember where to look for it. Gary
-

Quick Style. How to mute sound for a series of video clips
goddi replied to Igor's topic in General Discussion
Greetings, I've just finished a project, spending many hours applying several animations individually to many video clips. I didn't want the duration of each slide to be changed if I created a Style with these animations to be applied to other video clips. So I manually applied Aspect Ratio and Borders to each video clip, one by one, so each one would retain its duration. I had totally forgot about the Quick Style. It would be nice, since it is a 'Style', that it also be put into the 'Style and Theme' menu, to reside at the top of the list. I would have looked for it there or it would have caught my attention since it is really a 'Style' option. Great improvement but hard to remember where to look for it. Gary -
Which Aspect Ratio do you MOSTLY use for your shows? DG
-
PTE AV Studio crashes on Apple Silicon under macOS 14 Sonoma [SOLVED]
Almark replied to tom95521's topic in Troubleshooting
Latest Somona, the latest PTE AV Studio Pro for Mac When I publish to mp4, in this case to a custom ratio of 1920 x 960, PTE crashes, but the window that is creating the mp4 remains. It often appears to stop working, as if it has frozen, but it is actually finished.