goddi
-
Posts
3,596 -
Joined
-
Last visited
-
Days Won
27
Everything posted by goddi
-
==================================== Eric, I have Video Pad, too. However, I just tried to do what I think you are talking about but I don't quite see how. I have a regular DVD movie that I tried to extract to an AVI. When I do an 'Add Media' and point to the DVD, I can choose the files in either of the two folders, Audio_TS or Video_TS. When I choose the files in the Video_TS folder, VideoPad produces a VOB file and an MP4 file for each of the original VTS files, individually. I don't see how it can convert the entire movie to a single AVI file. Can you shed some light on the process you are using? Thanks, Gary
-
====================== Geoff, I now see the fly in the oitment. The Boilsoft program will record at a maximum frame rate of 15 fps, while the BBFlashBack Express program will let you choose a frame rate of 24 or higher. I just did a test of doing a screen capture of a YouTube movie trailer and there was a remarkable difference between the two programs. The BBFlashBack Express really showed a much better result. Gary
-
============================= Yes, I see what happened. I have the same Registration Code. But I noticed that the 'Registration Name' to be used is 'bitsdujour'. In the email with the Code, they show 'Registered Name' that is different, which I used (it was my name and my email address). I used the 'bitsdujour' and it worked. Thanks for clearing that up. Gary
-
==================================== Mike, As I just responded in another posting about screen capture, and I suggested that they try the BBFlashBack Express. It is free. You can export the screen recording to AVI and Flash. And, you can have two audio inputs at the same time, if you want (audio from your screen and audio from a microphone). I had been using the defaults when I have previously played around with it. I just tried to capture a YouTube video movie trailer but it did not look as good as the original. But, since you mentioned you wanted to copy a section of a movie, I went into the BBFlashBack Express program and I found that I could change the frame rate to 25. I did a test and it looked pretty good...same as the YouTube quality on the screen. So, maybe this might do it for you (?). http://www.bbsoftwar...ackExpress.aspx Gary
-
=================================== Yea...I had the same problem. I sent an email to their support people and I'll let you know if I get a response. In the meantime, you can try another free screen recorder that I think is pretty good and is free, the BBFlashBack Express. You can export the screen recording to AVI and Flash. And, if I remember right, you can have two audio inputs at the same time (audio from your screen and audio from a microphone). http://www.bbsoftware.co.uk/BBFlashBackExpress.aspx Gary
-
Copy/Paste a Rectangle gets strange results... [SOLVED]
goddi replied to goddi's topic in General Discussion
========================= Peter, Ok...I kinda get it. I played around with changing the size of the original rectangles and then doing a copy/paste as a child of the original rectangle and I sort of see what is going on. Since I have not made any really 'complicated animations of multiple objects', I have not needed this 'flexiblity'. But it is good to know it is operating correctly. It just threw me for a loop to see the results as a tall thin rectangle. I expected the result to be the child of the first rectangle but also the same size as first rectangle, not a different sized rectangle (thin and tall). Thanks.. Gary -
Copy/Paste a Rectangle gets strange results... [SOLVED]
goddi replied to goddi's topic in General Discussion
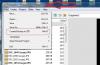
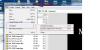
================================== Dave and Peter, See if these 3 screenshots answer your questions. Let me know if you need more info. Gary
-
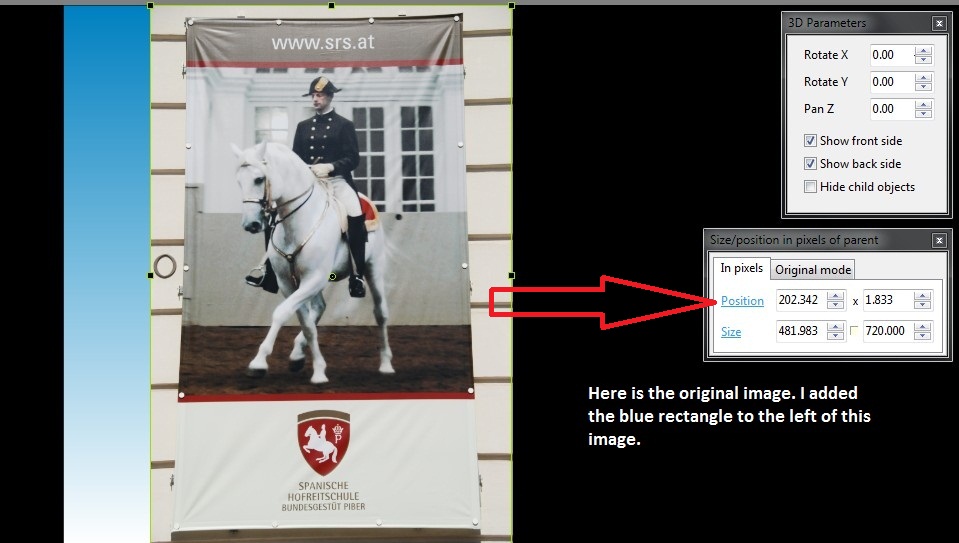
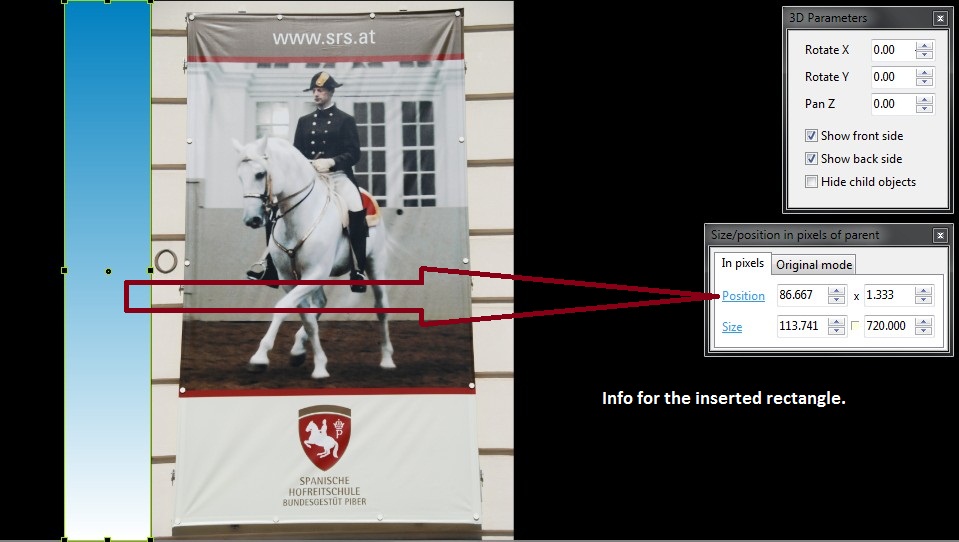
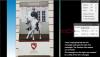
Greetings, I was inserting some rectangles in a slide and got a strange result. In O&A, I added a rectangle from its menu. I used the Shift/Left Mouse button to resize it. Normally, if I wanted to duplicate the rectangle in that slide, I'd be sure that the rectangle was highlighted first and then I'd do a Ctrl-C. Then I'd unhighlight the original rectangle and do a Ctrl-V and then move it to its location. However, I noted that if I did not unhighlight the original rectangle and did the Ctrl-V, the result would be a very tall thin rectangle. The top of the rectangle would extend to the top of the O&A window and the bottom would extend to the bottom of the O&A window. This might be the wrong proceedure but it does not seem to get any logical result. I am using 7.52 and it also happens in 6.5. Is this an expected result or not? Gary
-
How to create a new show using old show's .pte?
goddi replied to goddi's topic in General Discussion
========================= Dave, Ok... I got it. I am not sure why I did not 'get it' earlier. So there really is no difference in Creating a Zip and creating a Template, except that the you get a zip file with one, and the 'unzipped' folder with the other. At this point, I still prefer using the Create a Zip process than using the Template process. I feel like I have more control with the Zip file, but that is just me. But I will keep trying to use the Template, too. Thanks for the clarification. Gary -
How to create a new show using old show's .pte?
goddi replied to goddi's topic in General Discussion
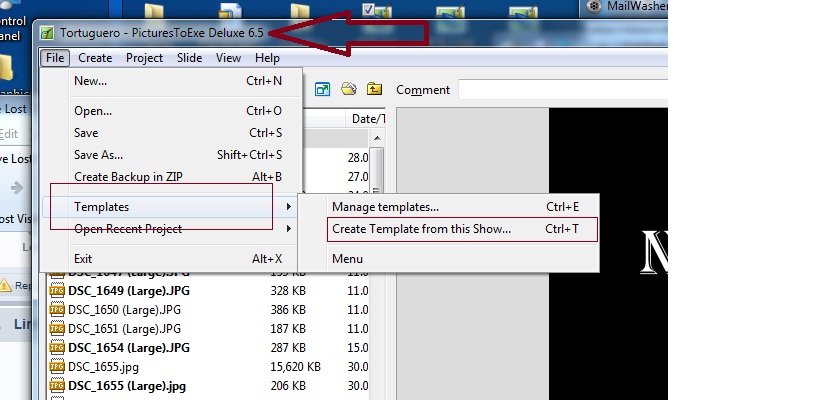
================================== Dave, I have not used 'Templates' because I just really don't understand how to use them. I went to the Users' Guide but it does not tell me how to use it. I just played around with it to see if I could figure it out. First thing I don't like is that the Template is saved to a location that, at first, is in a place I don't like. In order to set (re-set) the location where you want the Template to be saved, you have to know you have to go into Manage Templates/Template Folder. I prefer to have the template of a slideshow saved in the same folder of the slideshow from where it was made. Maybe in the future, have one Template folder makes sense. It defaults to a C:\Program.... folder that does not relate to the slideshow that I am making a template of. It would be more intuitive if, as you 'Create Template from this show', it shows you were it is being saved and will allow the choosing of a different folder you might want to save it in. Next, when I open a saved Template, the Slides View shows all the slides, etc., but the Files List has no bolded files. So I presume I am supposed to somehow put in new images...but I don't understand the next steps to replace the old images with new images. I have searched the Forum but I could not find a discussion on exactly how to go about Creating Templates. Can you shed a little light on this? I feel like I can't see the forest for the trees. :blink:/> Thanks... Gary -
How to create a new show using old show's .pte?
goddi replied to goddi's topic in General Discussion
I had a couple more shows that I wanted to re-make with higher res images without changing the structure of the old shows. I don't know what I did with the first shows that got everything messed up. But I finally found the steps that worked. Here is what I found works: -Make a New Folder -Create a Backup Zip file and save it to the New Folder -Extract the zipped files into the New Folder and do a Save As to the New Folder (the File List shows the Low Res images). The PTE show will run as it did in the previous location. -Copy/Paste the Hi Res image so they overwrite the Low Res images in the New Folder No big deal but when the brain is in a fog, you can mess it up....as I did. Gary -
How to create a new show using old show's .pte?
goddi replied to goddi's topic in General Discussion
====================== Peter, That makes sense. Give me some time and I will try to recreate the process and do a Save As. I know I have done it before with no problems so I must have missed doing something. Thanks. Gary -
Greetings, I have an old .pte show that I had created with somewhat lower resolution images than I now want. So I did a 'Created a Backup in Zip' of the old show. After unzipping the 'zipped backup' in a new folder, I then copied/pasted the higher resolution images into this folder, overwriting the lower res images. When I openned this 'new' show I expected everything to be the same, except it would be showing the higher res images. But it is not. Even though the File List is showing the high res images (and they are not bolded) in the new folder, the 'new' show's Slide List is still showing the low res images. I then went into the .pte file in the 'new' folder, and the references are still showing paths to the old folder. So, I've done something wrong. Can you tell me what the correct steps are? Do I have to go into the .pte file and change every old path to the new path manually????? Thanks... Gary P.S. I did not want to change my 'old' folder. I assume it would have worked out correctly if I just copied/pasted the high res images over the low res images in the old folder, but I wanted to keep the old folder as it was until the high res pte show worked. Later: I replaced all the paths for the images in the new .pte file to show the correct folder location. Now all the high res images show up in the File List and are bolded and in the Slide List. However, all of the text that had been in the slides, now are gone and replaced with 'Text'.
-
================== Lin, For a second or two, I thought you had snuck into the CES and stuffed one of your PTE projects into their audio/visual devices. Then, I came to my senses and figured you pulled a fast one on us!!!;)/> Great creativity! Gary
-
========================= Lin, Both, just too cool for words!!!! :D/> Gary
-
================================== Greetings, Just to add to the list of screen recorders, I have had CamStudio (free version) for a while and only today was I able to figure out how to get it to record audio off the screen. I had to search their Forum to find the workaround. Also, their tech person said it can not record audio off the screen AND from a microphone at the same time. They also said they might work on it to fix this problem. However, I then openned up my BB FlashBack Recorder program (free version) and discovered that I can record audio from two sources (off the screen and from a microphone) at the same time. This is good news to be able to create tutorials of PTE so you hear the inserted music and instructions from the microphone. Just some things I have just learned. Gary
-
=================== It seems you want to do a Backup In Zip. I happen to still have 6.5. Here is what Lin was referring to. One attachment is for creating a Template and the other for creating a Backup in Zip Gary
-
==================== Dave, Done. And thanks for getting into this question. I hope my other 'ideas and suggestions' will get some discussion going, too. :D/> Gary
-
====================== Dave, I gave your steps a try and, yes, I got the same results as you did. Gary
-
======================= Dave, I gave it a try and, yes, I got the same results. Gary
-
======================= Dave, I gave your suggestion a try. What I see is the problem with using KFSD with Scale is that the Keyframe that was placed at the precise end of the Slide Duration (beginning of the ending transition) gets moved to the end of the ending transition zone. And, if the last keyframe is placed just to the right of the beginning of the transition zone(just into the ending transition zone), and KFSD and Scale is applied with an increase in duration, this keyframe moves to the left of the beginning of the ending transition zone. My logic expects only the Keyframes that are in between the transition zones would be moved relatively (or scaled) when applying KFSD/Scaled. I follow most of this discussion, but I must admit that I do get a bit foggy with some of it. Gary
-
========================== Dave, I have been trying several ways; the last keyframe not in the ending transition zone; the last keyframe in the ending transition zone; and with and without KFSD clicked. Since I am not sure what the proper results should be, I think I can say that when the keyframe is within the ending transition zone, the results are confusing. Sometimes the keyframe is sent to the end of the transition zone; sometimes not. I can not explain what I am seeing but there seems to be something not consistent when the keyframe is within the ending transition zone and KFSD is applied with Scaled. Gary
-
======================= Nobeefstu, I see, said the blind man! Ok...there is a good reason for the different results. Thanks for clarifying the question. In an effort to fully understand what KFSD means, does it only just SHOW the Full Slide Duration (adding in the transition times)...it doesnt' really change any settings for the slide durations? Gary
-
======================= Lin, Interesting that we get different results. I am using Win7Pro/32bit. The text in the Users Guide, I agree, is correct, but the examples they show don't seem to be correct. How can the duration times be the same before and after the Scale, as show in the attached screenshots in my previous posting? What am I missing??? Gary
-
================================= Lin, I have been playing around with this Scaling. I see it does change the relationships of the Keyframes in a relative way, but the results are not exactly what I expect. I tried your example of putting in a Keyframe at 0:0, 2:0 and 4:0 for a slide with a duration of 8 seconds. Then, I changed the duration to 16, with the 'Scale' on. The results did not produce the expected exact timings of 0:0, 4:0 and 8:0. I got 0:0, 3.684 and 7:368. Close but not as expected. See attached. Maybe it has to do with the transition times, but I really don't know why. So do you agree that the User Guide is incorrect? Gary