Leaderboard
Popular Content
Showing content with the highest reputation since 12/29/2025 in Posts
-
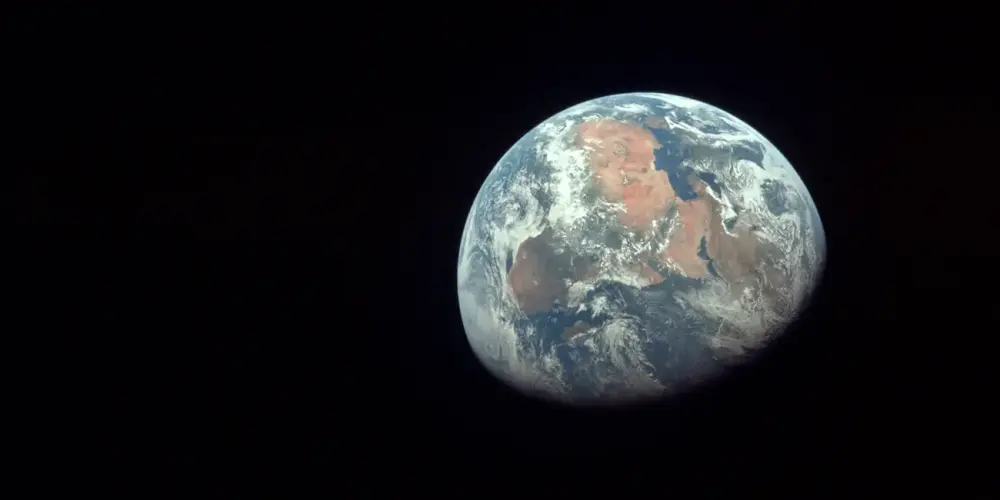
Hi, I wish you a happy New Year and good health! New creative ideas, new projects in PTE AV Studio, and new travels. Our planet is a small fragile house in the endless ocean of Space. One planet for all people. I dream about peace and cooperation among all people from all countries. Thanks for your support8 points
-
Transitions Broken Glass with Sound V.12 Camera Transitions_V12 Hi everyone, these are transitions I've modified for the new version of PTE 12 with sound; I'm leaving a link in case you want to try them. https://javier-pteavstudio.blogspot.com/6 points
-
Happy New Year to everyone. I hope 2026 brings us world peace and lots of photos to use in PTE 12. Rosemary6 points
-
6 points
-
Moscow's stunningly beautiful streets, squares, parks, and plazas, decorated for New Year and Christmas. Enjoy watching.5 points
-
5 points
-
5 points
-
Hi, We've already implemented 2 improvements in V12 Beta: 1. You can create a backup of a project in ZIP archive (or project template) that links files (images/audio/video) with the same file name (duplicate names) but in different folders. 2. Smart ZIP compression. Archive creation is now 3-5 times faster. We'll soon add support for creating project ZIP archives larger than 2 GB.4 points
-
Thank you so much for your congratulations! Igor, I wish you and the entire WnSoft team success and good luck in your endeavors, new endeavors, and victories! Happiness, joy, health, and love to your family and friends!4 points
-
Hi Frans, I recommend to use "Quality" mode in PTE AV Studio and choose the "High quality" preset (100% in Custom mode). This is the best choice for all types of content - animated slideshows or dynamic video footage. Video encoder automatically allocates bitrate, assigning high bitrate to dynamic scenes with video footage (or animated pictures) and low bitrate to static photos. The automatically calculated bitrate can vary from 0.7 Mbit to 60 Mbit. For example, the Sample Project at 1920x1080 (HD), 60p has an average bitrate of 8.6 Mbit. You don't waste bitrate unnecessarily - it increases only where needed, maintaining constant visual quality. This is similar to saving a JPEG file when you specify the desired compression quality, for example "9". The file size will differ depending on the complexity of the image details and its dimensions. If you still prefer to set the bitrate manually, use these values as a guideline: HD (1920 x 1080), 60p: 4-8 Mbit - for animated images 10-16 Mbit - for mixed content or dynamic video content 4K (3840 x 2160), 60p: 15-30 Mbit - for animated images 40-60 Mbit - for mixed content or dynamic video content Also avoid hardware encoders for best quality. Important note: Bitrates from video files recorded by professional cameras or smartphones should not be used as a reference. They use simplified hardware encoders (works in real time) that don't utilize bitrate as efficiently, so manufacturers compensate by significantly increasing the bitrate.3 points
-
Just as you define the External graphics editor, you can choose the external video editor and audio editor, both in version 12 and 11. I have it configured with Vegas for video and Audition for audio; you can choose Video Optimiser if you want.3 points
-
In PTE AV Studio 12 we have added a frame interpolation option (dissolve) when slowing down a video object. Objects and animation editor > Properties tab > Trim and Adjust speed button > Interpolate Frames. It works in real time, including in EXE shows and video export. Please see the example for 7% speed (0.07x) with frame interpolation and without: slo-mo.mp43 points
-
Captured throughout 2025, these images depict birds in their natural environments, shaped by the seasons, light, and their surroundings. Some frames celebrate the poetry of flight, where wings intersect with shifting light, while others rest in quiet observation. Together, they explore the artistic relationship between movement and illumination in the living landscape.3 points
-
Hi, I wrote a small free extension for Chrome browser. If your eyes get tired reading text on glossy monitors, or you find it hard to focus on smooth high-resolution screens (especially 4K displays) - this might help. The extension adds a barely visible pixel grain texture that gives your eyes something to focus on. Works great on Retina and high-DPI displays. It's completely free. I spent just one day making it during the weekend. Not related to PTE AV Studio, just sharing in case someone finds it useful. https://chromewebstore.google.com/detail/screengrain/amgkkiknaaofelhmokbhiidcganljcjh3 points
-
Happy new year for you Igor, your family and your team, and to all of us ! A good health of course, this is the most important ! And a well-deserved succes for PTE 12.3 points
-
Hello Igor, I also wish you and your team a very happy new year, first and foremost good health, and of course, continued success in providing us with high-quality software that we use to create beautiful things. PTE allows us to unleash our creativity and have a great time. Happiness and peace to all.3 points
-
Regarding the volume of the new special effects, I do have the impression that the volume is rather low, even at a setting of 200. Compared to the standard music volume (100), I think a sound effect should be audible above this volume. So, to be audible, the volume should be adjusted (setting higher than 200). Or the volume of the special sound effect should be at least as loud as the standard music volume (100), with the option of increasing it to 200, as is currently possible with the music. Greetings, Cor2 points
-
Beta 4 is available See the download links above. Sound library: normalized all audio files to -3 dB for consistent volume levels. Added new sounds. New slide style: Brush Strokes - Frosted Glass (Creative category). Fixed an issue with file replacement in Sound object - old file remained. Fixed an issue with incorrect video duration after trimming a video with changed speed. Updated Dutch translation.2 points
-
Hello Ghuyla Igor did not reply with the tutorial; another forum member did? Did I get this wrong? "Let's be pragmatic" to quote you. You have raised your concerns, several times about this and other matters. The developer (Igor) has responded with what seems to be valid coding/development reasons. I am not aware of any other application that has a forum led by the developer. For me, if the application does not meet my requirements, I would be looking for alternative practical solution or maybe develop your own application that suits your needs? In this instance the application certainly suits my needs, I appreciate the feedback from the developer and other forum members, even though I may not always agree with it, I appreciate and respect the POV of others. Cheers Mark2 points
-
Gary, We plan to add special two buttons to set start and end points for trimming according triangle cursor. It will appear in Beta 3 or 4. I'll publish a small tutorial soon. We need to add some improvements for this window, and then I'll write the tutorial. I recommend to try now a new "Interpolate frames" option. Use some video footage with fast motion scene (cars, train, waterfall). Set video speed between 5% and 20% and enable "Interpolate frames" option. Check the result. Real my demonstation here: https://www.pteavstudio.com/forums/topic/52571-frame-interpolation-for-slow-motion-video/2 points
-
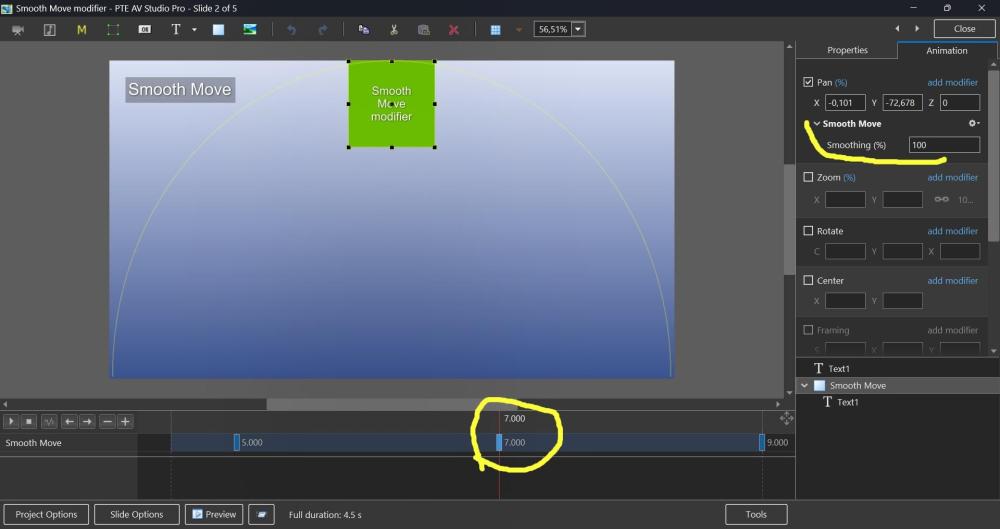
Hi, Smooth Move modifier was introduced in V11, but probably not everyone may know how useful it can be. This demo shows how the Smooth Move modifier improves animated panoramas when you change a direction of motion at a middle keyframe. Without the Smooth Move modifier, you'll see a sharp, unnatural break in the movement direction. With the Smooth Move modifier, the image smoothly changes trajectory with natural momentum, gently rounding the sharp corner. If you have 3 keyframes and a direction of motion changes at the 2nd keyframe (in the middle), you need to add the Smooth Move modifier to that 2nd keyframe. The "Smoothing (%)" parameter controls how much the motion is smoothed. I recommend to keep the default value 100%. Note that Smooth Move also creates smooth starts and stops, giving the motion a natural, momentum-based feel. If you're using simple motion between just 2 keyframes, use the Smooth speed modifier on the 1st keyframe instead. In this case, don't use Smooth Move. Download the demo project: Smooth Move modifier.zip Video example: Smooth Move modifier.webm Screenshot:2 points
-
The MP4 just contains the trimmed part. If you make an exe then it will contain the whole video but only show the trimmed part. Jill2 points
-
Google doesn't allow the use of any screen filters on some system pages, for example: a blank page, web store for Chrome extensions, preferences of Chrome, etc.2 points
-
Thanks, Igor! I found this effect surprisingly interesting. It's truly pleasing to the eye, even though my monitor isn't glossy. It's like reading a newspaper.2 points
-
Hi Mary, Thanks for sending me the sample video file and project! I've reproduced the issue with freezing on video encoding and strange speed. We'll check the code.1 point
-
1 point
-
Igor, I think there is a misunderstanding regarding the core of my proposal. I am not asking for a tutorial on the current interface (I have been using PTE for years!); I am discussing workflow architecture and development efficiency. Let’s be pragmatic. If Video Optimizer already handles complex tasks like two-pass stabilization and high-bitrate conversion perfectly, why reinvent the wheel inside PTE 12? Instead of spending years struggling with redundant code integration, you could solve the problem today with two simple moves: Logical Integration: Just as PTE allows us to define an external editor for images, add a "Send to Video Optimizer" command in the context menu. This would create a seamless bridge without bloating the PTE 12 core engine. Commercial Bundle: Offer PTE 12 and Video Optimizer as a single Pro Bundle. As users, we would much rather pay a fair premium for a unified, functional ecosystem than wait years for a built-in solution that we already have in a separate window. In 2026, a professional NLE is defined by its efficiency, not just its feature list. Let’s stop talking about how to use the current tools and start talking about how to integrate them properly. This approach saves your development time and our production time. It’s a win-win. As for the screenshots showing me basic settings or resolutions: I am perfectly aware of how the software looks and where the buttons are. The issue isn't knowing "where" to click, but the lack of a smart link between two tools that should already be working as one. Let's focus on the workflow logic rather than the interface basics. Thanks Ghulya1 point
-
Great demonstration Av's, well done. Appreciate you sharing. Thanks Mark1 point
-
I'm glad you like it. Thanks for commenting. There's no other option; the original is like this.1 point
-
Hi, Thanks, I reproduced the issue by replacing the Sound file. We'll fix it. Temporary workaround: remove the existing Sound object and add a new one.1 point
-
A selection of migratory shore birds that visit a local beach near my home from as far away as Siberia. All images taken in around 2 hours on Friday Janaury 9, 2026.1 point
-
Thank you, the best time is the rising tide in the morning. The birds are busy preening and feeding and a slow, gradual creep up allows me to get closer. If you move slowly, the larger birds are more accepting but the smaller birds are always more flighty. Cheers Mark1 point
-
I had a client who wanted me to put every line of a poem on a different slide, and animate it, I was doing that manually, but was wondering if it's possible to add a feature to automate it, as in, you give PTE your text, and tell it to map every line with a different slide/video in the slideshow as well as adding random transitions to the text.1 point
-
For me, the mask option looks like a workaround; blending modes typically are parameters of the objects, and Photoshop shows us a model that is compatible with trees of PTE-objects that are rendered independently.1 point
-
Hi Igor, I'm glad to hear you're working on this feature! It's a very important one. The mask option is perfectly fine for me; sometimes a mask is needed to use a specific area, but for full display there's always the built-in rectangle mask. But I wouldn't be opposed to other options as long as they're technically feasible within the program's capabilities. Thank you for your work on this feature!1 point
-
In my opinion, PTE shoul behave in a similar way as Photoshop (PS). In PTE we have nested structures using the Parent-Child-Construction. In PS we obtain nested structures of layers using (nested) Groups, and we have a kind of correspondence between the PTE-Parent-Objects and particular PS-Groups. It seems to me that PTE could use the PS blending mechanism. Regarding blending, groups of PS seem to be rendered independently if you avoid "Pass through". Furthermore, blending of parent objects in PTE and blending of the corresponding groups in PS should be the same. Perhaps, as a first step, you may study the situation where all groups and all parent objects have mode "Normal". Applying this method to your example above, Img2 would be multiplied with Img1 (overlapping parts) inside the Parent-Child-Group, but not with the black background image. It would just cover the background, provided that the blending mode of Img1 is "Normal".1 point
-
Mark. Thanks for the Flicker link, you have enough beautiful bird photos on that site to make an spectacular PTE show. Bert1 point
-
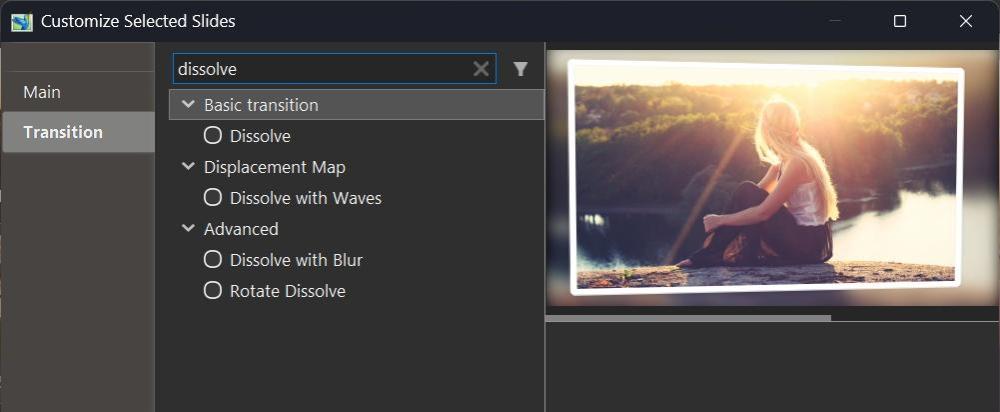
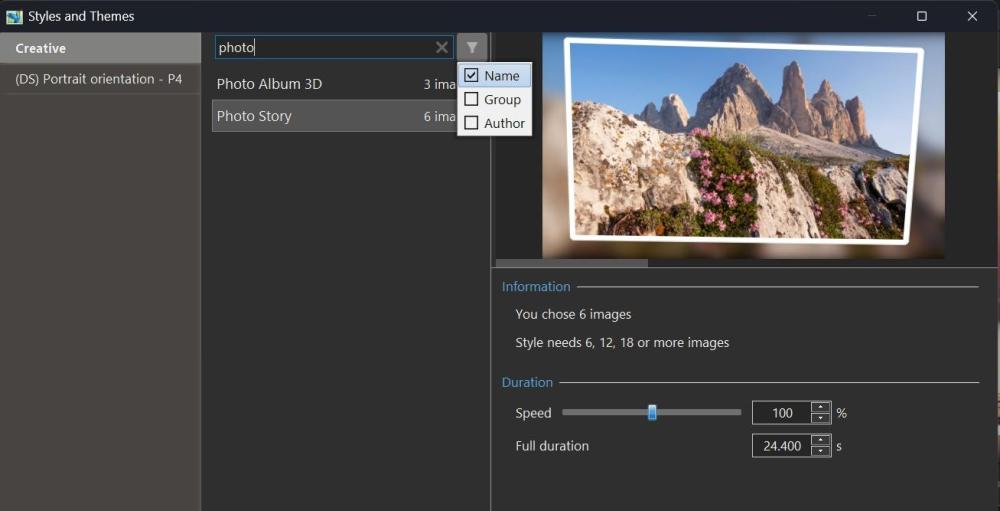
Hi, In PTE AV Studio 12, we've included a new function - Quick Search in the Slide Styles window and Transitions window. This allows you to quickly find or filter the desired transition or style by name, category, or author name. PTE AV Studio remembers your choice during the current session, independently for styles and transitions. You can hide the Quick Search bar in Preferences > Templates tab by unticking the "Search in styles and transitions" option.1 point
-
No, it's not ready for V12. Sorry. We've started the work on this code, but multiple slide tracks are still far from complete. It will a huge change for the interface, the project, and the entire PTE, this is why we've been working on it for so long.1 point
-
Sorry, but I stopped it after 30sec. To fast paste for my taste to enjoy seeing the birds. Bert1 point
-
Nice collection of bird images Dave I'd like to see your selected top bird images of 2025 produced in a slower format. (I'm not sure the music really worked with images. Might just be an issue with my watching it at 5am and my brain not fully functional) Jim1 point
-
1 point
-
Hello Igor, PTE developers, and forum members. Best wishes for a happy and wonderful 2026. Do what you like and if you cannot do that like what you do. Cheers Mark1 point
-
Thanks, Igor! I really liked it and found it useful. There are some parameter adjustments!1 point
-
Hi Pascal, I see this problem with different results after applying the same color filter(s) in V11 and V12. Thanks! We'll fix it in Beta 3.1 point
-
1 point
-
Hello all I’ve just tested this new feature in version 12, and it effectively replaces what I had probably somewhat clumsily called the “threshold effect.” This effect is based on the opacity of an image mask representing a grayscale pattern, where the opacity depends on the adjustment of black point and white point levels. The main drawback was that it required creating a key point for each gray value — up to 255 in order to cover the full range of shades. Several examples have been provided by different members on this forum (I’m probably not being exhaustive), for example: With the Gradient Map effect in v12, it is no longer necessary to create a large number of key points, since everything can now be controlled through the opacity parameter. This offers much greater flexibility in the adjustments, notably by allowing the use of animation speed settings, inverting the pattern (negative) to reverse the animation, and more. Below is an example of a transition made with the Gradient Map effect in version 12. Flying squares.pteeff Gradient map.mp4 Pascal.1 point
-
Is there any chance this may be implemented in version 12? I am working on projects where this would be very useful. Kieron1 point
-
1 point
-
1 point


