-
Posts
9,317 -
Joined
-
Days Won
58
Everything posted by davegee
-
If your intended output is mp4 and not exe then why resize at all? The size (in kb or mb) of images has no bearing on the eventual size of the mp4. Resizing images is only necessary for exe output where the size of the exe is dependant on the size of the images used. DG
-
Make sure that you are putting it in exactly as per the e-mail. Copy and paste from the email? Otherwise: https://www.wnsoft.com/en/support/ DG
-
Igor, This is weird! Earlier this afternoon I did a short project to test what Rosemary had reported and got the same result as she described. I shut down the computer and went back to the hospital and rebooted on my return. Now, I cannot reproduce the issue, even with the original project. I will try again tomorrow. DG P.S. Rosemary A and Aleina Show have both described the same weird issues so there must be some settings which are causing it.
-
If so, does Rosemary (and, I suspect, other people) also use these settings? Igor is going to look at it later. My test is repeatable. DG P.S. Windows 10 and latest pte versions.
-
There is an issue with transitions when a .pte created in a previous version is opened in Version 11. See I did a test as follows: 1. Open NEW Project in V10.5. 2. Add some images to the Slide List 3. Set Default Dissolve Transition. Preview and check then Save. 4. Close V10.5 and Open V11 5. Open the Test .pte and Preview. 6. Some Transitions will be changed to the new Displacement Map Transitions. DG
-
Does this help? https://docs.pteavstudio.com/en-us/11.0/hotkeys/main?s[]=sort#fileslide_list DG
-
Can you post (attach) one of your problematic png files? DG
-
if all assets are in the same folder then try REMOVING the path leaving just the file name. PTE will always look at the folder containing the .pte file first. becomes: DG
-
I would like to add my best wishes for the festive season to Igor and the PTE team and all forum members. DG
-

Differences between the Pro and Standard version 11.0
davegee replied to Igor's topic in PTE AV Studio 11 Beta
Thanks for clarifying that Igor. DG -
-

Add option for Inner or Outer to Border Property
davegee replied to tom95521's topic in Suggestions for Next Versions
Yes, your suggestion would probably be faster, DG -

Add option for Inner or Outer to Border Property
davegee replied to tom95521's topic in Suggestions for Next Versions
Tom, I have always argued for this. But you can achieve the same thing by using Image Crop and Border together. Example: Crop the Top, Bottom, Left and Right by 3 Pixels and add a 3 Pixel Border - It does what you suggest. It preserves the original AR of the Image. DG -
The change of colour indicates that it is a MAIN IMAGE.
-
You can record a screenshot using something like NVIDIA Geforce Experience in High Quality mp4. DG
-
Post a screen shot of the waveform in the timeline.
-
Which version did you purchase?? DG
-
Unzip or Extract the .pteeff file. Click on the AB button on a slide in the Slide View. In the Transitions Tab click on Manage Transitions and then Import Transition. Navigate to the extracted .pteeff file and click on Open. DG
-
This will be a very popular addition to Version 11! DG
-

Transitions - Can I change the Category & Transition Name
davegee replied to Xenofex2's topic in General Discussion
AB - the transition button on each slide in the slide list. DG -

Transitions - Can I change the Category & Transition Name
davegee replied to Xenofex2's topic in General Discussion
Click on the AB Button and choose the Transition. Right click and choose Change Transition Settings. Change the Category and Transition Name and click Enter. DG -

Custom text effect for each slide in a show - is it possible
davegee replied to Anthraquinone's topic in Styles & Templates
The Style below will do what you want - make your own based on your required Font etc. When applying to a single slide the Text can be changed in Options. When creating your Text right click on it and mark it as "Text Comment" in the dropdown menu. You can apply it to Multiple slides and change the Text in O&A. Note that the Style will cancel any existing animation in the Slide. Sample Text.ptestyle DG -
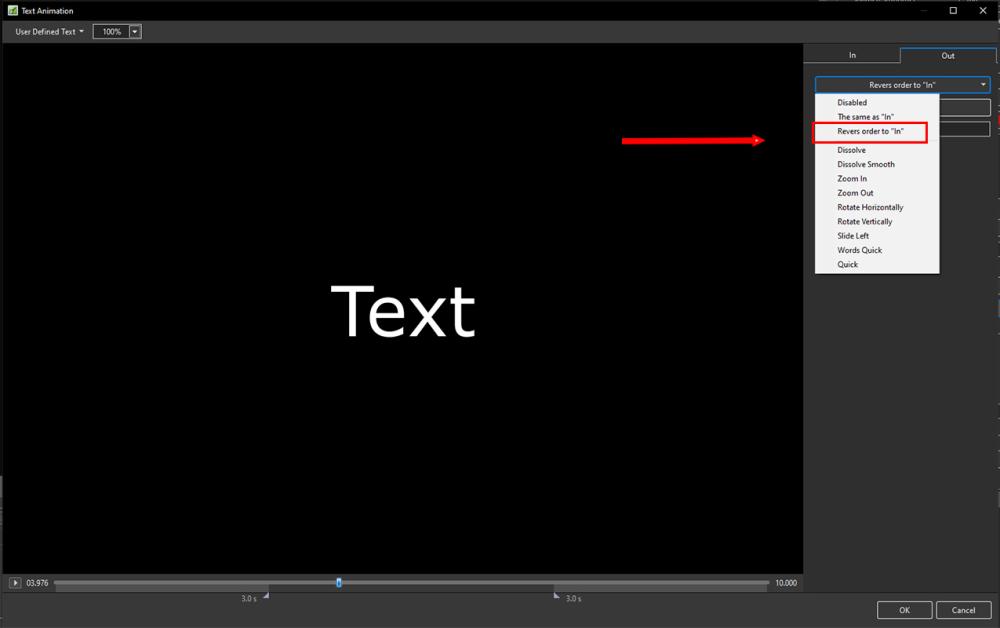
Igor. In the Text Animations dialogue OUT section options the word REVERSE is missing the final "e".
-
Try this: rectangle with border.ptestyle Once imported the style will be in a TEMPORARY category. DG P.S. Apply to a blank slide.
-
You can create a new Category while moving a Style. When it asks you for the name of the Category you want to move it too, just type in a New Category Name and it will create it for you. Choose a Style and then go to Tools / Change Style Category DG


