Leaderboard


Popular Content
Showing content with the highest reputation since 12/23/2025 in all areas
-
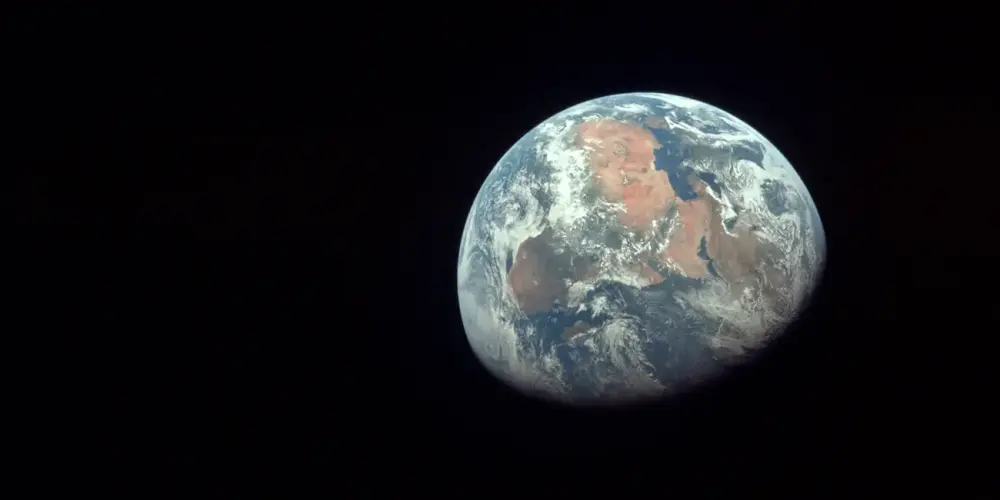
Hi, I wish you a happy New Year and good health! New creative ideas, new projects in PTE AV Studio, and new travels. Our planet is a small fragile house in the endless ocean of Space. One planet for all people. I dream about peace and cooperation among all people from all countries. Thanks for your support
 8 points
 -
Hi, We wish you a Merry Christmas and Peaceful New Year! Warm regards, Igor,8 points
-
Transitions Broken Glass with Sound V.12 Camera Transitions_V12 Hi everyone, these are transitions I've modified for the new version of PTE 12 with sound; I'm leaving a link in case you want to try them. https://javier-pteavstudio.blogspot.com/6 points
-
Happy New Year to everyone. I hope 2026 brings us world peace and lots of photos to use in PTE 12. Rosemary6 points
-
Happy New Year! May there be peace, prosperity, and good health for 2026!6 points
-
6 points
-
Moscow's stunningly beautiful streets, squares, parks, and plazas, decorated for New Year and Christmas. Enjoy watching.5 points
-
Happy New Year to all. Peace and health!5 points
-
Happy New Year! I wish everyone health, happiness, and peace!
 5 points
 -
Hi, PTE AV Studio 12 Pro (Beta) is available all members of this forum: Download For Windows: https://files.wnsoft.com/test/pte12abc/pteavstudio-setup.exe For Mac: https://files.wnsoft.com/test/pte12abc/PTE-AV-Studio.dmg PTE AV Player for Mac: https://files.wnsoft.com/test/pte12abc/PTE-AV-Player.dmg A free license key for the Beta version: D206I-01ZKI-GH8S2-HSS8X-E7N7D System Requirements Windows 10 or Windows 11. macOS 11 Big Sur - macOS 26 Tahoe (Apple Silicon or Intel chip). Important notes You can keep your existing version of PTE AV Studio 11.0 and use both versions together. We recommend to untick an option “Associate .pte projects...” when you install a Beta version. For new customers. If you purchase version 11.0 today or later, you'll get a free upgrade to a final version 12.0 when it's ready (in March, 2026). We continue to work on version 12.0 and plan to add new features and new slide styles before the final version. _________________________________________________ What's New in PTE AV Studio 12 Pro: Sound Object Create impressive slideshows and AV shows with impactful sound effects. The new Sound object lets you play short audio files to enhance your slideshows and AV shows. Add whoosh sounds for fast transitions, subtle clicks when images appear, or any other short audio effects that bring your slideshow to life. Adjust volume for individual video clips and sound objects with precision. Voice Recording on Mac Mac users can now record voice-overs directly in PTE AV Studio without external tools. Slow-Motion and Video Speed Control Take complete control over video playback. Adjust video speed using key points - speed up, slow down, or freeze the action exactly where you need it. Insert pauses inside your video clips to emphasize key moments. The new frame interpolation creates smooth slow-motion effects by blending frames together, eliminating jerky playback when slowing down your footage. Modern Video Formats and AV1 Encoder Create content for social media and the web. PTE AV Studio 12 adds full support for vertical video (9:16 for YouTube Shorts, TikTok, and Instagram Reels) and square format (1:1 for Instagram posts). New resolutions including 2560x1440, 1080x1920, 720x1280, and 1080x1080 cover all modern platforms. The "Auto" resolution preset automatically matches your project settings for quick exports. The revolutionary AV1 encoder produces videos up to 50% smaller than H.264 while maintaining the same visual quality - perfect for web publishing. The improved Video Export interface with "Show/Hide Advanced Options" keeps things simple yet powerful. The "Fast decode (web)" option creates optimized videos for quick loading and playback on your website. You can even pause video encoding and resume later. New Creative Effects Bring your slideshows to life with stunning visual effects. The Dynamic Gradient map creates color transformations and artistic looks. Chromatic Displacement map adds glitch effects and distortions for modern, eye-catching visuals. The Instant speed modifier disables interpolation between keyframes for snappy, precise animations. Blur and Unsharp mask can now be adjusted separately for parent and child objects. Quick Search. New Slide Styles and Transitions Find the perfect slide style or transition instantly. Type a keyword and PTE AV Studio will show you matching results immediately. No more scrolling through hundreds of options - just type "zoom", "push" or "fade" and get what you need. New transitions: Spots, Push Smooth, Rotating Linear Wipe. New slide style: Zoom Out with Fade. Faster Project Backups Backup your projects 2-3 times faster. The Create Backup in ZIP command now supports multiple files with the same name in different folders. Save precious time when archiving large projects with hundreds of high-resolution images and video clips. Other Improvements Export Slides to Images can now include transition effects Improved audio/video synchronization and smoother playback for variable frame rate videos HDR video support (Rec.2020 and HLG color spaces) Smaller executable show files (reduced by 3 MB) Transition group expand/collapse state is now remembered P.S. Click the "Follow" button at the top of this page to receive notifications about new Beta releases.4 points
-
Thank you so much for your congratulations! Igor, I wish you and the entire WnSoft team success and good luck in your endeavors, new endeavors, and victories! Happiness, joy, health, and love to your family and friends!4 points
-
Hi, Please share your impressions of version 12.0 Beta. If you find any problem, please start a new topic for each one. Happy Christmas! Igor,4 points
-
New transitions added in PTE AV Studio 12: Spots, Rotating Linear Wipe, Push Smooth Click to play video sample: New Transitions in V12.mp44 points
-
Absolutely love the sample project included with the new beta! Will be wonderful to explore many of the new features by going through those images and transitions. Much easier than aimlessly clicking buttons or printing out Igor's description sheet and looking for the updates. Great job and beautiful images, Barry Beckham! And I love the winking koala at the end! One of the changes that stands out to me so far is the ability to use a parent object to change the colors and opacity of it's associated children. Having to modify those settings for each one of those child images / objects in the past was a bit annoying.4 points
-
Just as you define the External graphics editor, you can choose the external video editor and audio editor, both in version 12 and 11. I have it configured with Vegas for video and Audition for audio; you can choose Video Optimiser if you want.3 points
-
In PTE AV Studio 12 we have added a frame interpolation option (dissolve) when slowing down a video object. Objects and animation editor > Properties tab > Trim and Adjust speed button > Interpolate Frames. It works in real time, including in EXE shows and video export. Please see the example for 7% speed (0.07x) with frame interpolation and without: slo-mo.mp43 points
-
Captured throughout 2025, these images depict birds in their natural environments, shaped by the seasons, light, and their surroundings. Some frames celebrate the poetry of flight, where wings intersect with shifting light, while others rest in quiet observation. Together, they explore the artistic relationship between movement and illumination in the living landscape.3 points
-
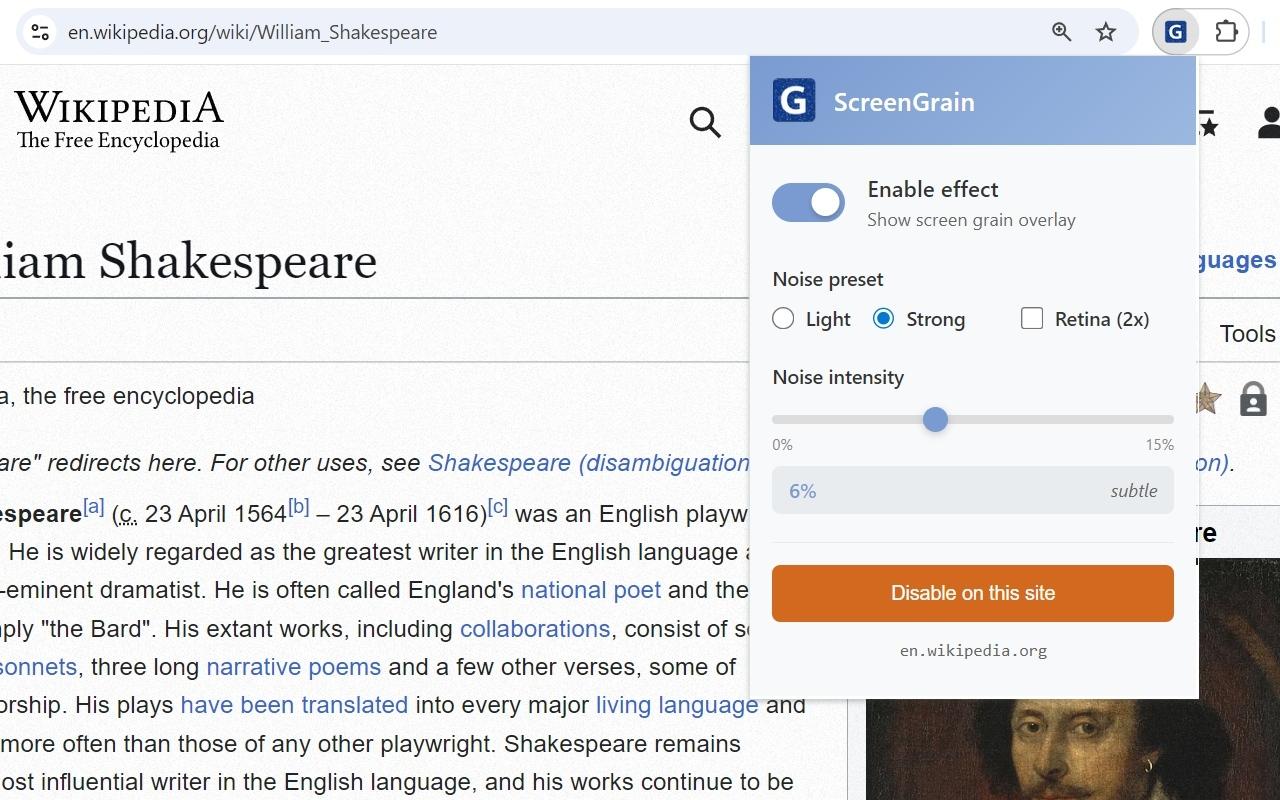
Hi, I wrote a small free extension for Chrome browser. If your eyes get tired reading text on glossy monitors, or you find it hard to focus on smooth high-resolution screens (especially 4K displays) - this might help. The extension adds a barely visible pixel grain texture that gives your eyes something to focus on. Works great on Retina and high-DPI displays. It's completely free. I spent just one day making it during the weekend. Not related to PTE AV Studio, just sharing in case someone finds it useful. https://chromewebstore.google.com/detail/screengrain/amgkkiknaaofelhmokbhiidcganljcjh

 3 points
 -
Happy new year for you Igor, your family and your team, and to all of us ! A good health of course, this is the most important ! And a well-deserved succes for PTE 12.3 points
-
Hello Igor, I also wish you and your team a very happy new year, first and foremost good health, and of course, continued success in providing us with high-quality software that we use to create beautiful things. PTE allows us to unleash our creativity and have a great time. Happiness and peace to all.3 points
-
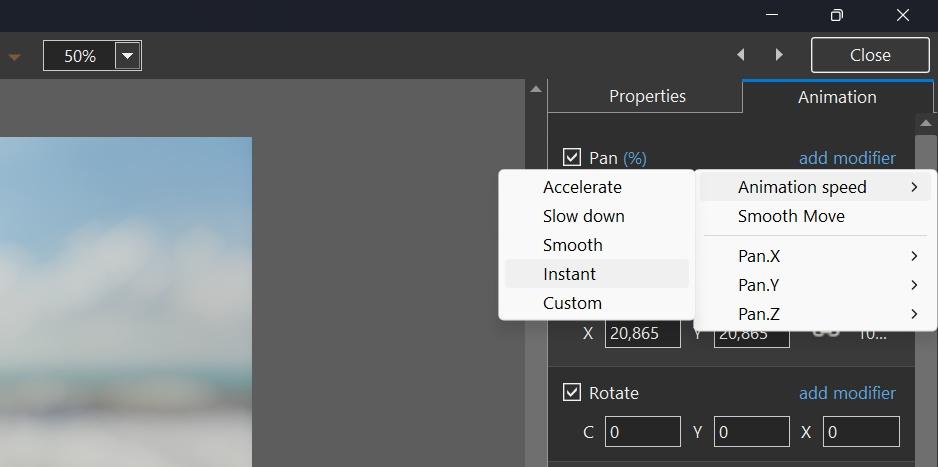
Hi, In PTE AV Studio 12 we added a new speed modifier - "Instant". It allows you to achieve an instant change of any animation parameter between 2 keyframes (without smooth interpolation).You can apply it to Pan, Zoom, Rotate, Opacity and other animation parameters. If you have 2 keyframes, add the "Instant" modifier to the 1st keyframe. Download a demo project: Instant Animation.zip Video example: Instant Animation.mp4 Screenshot:
 3 points
 -
I really want layer overlay effects in this program, at least Screen and the usual Bounce fade effect in modifiers. In motion modifiers, it's a good idea to add "Random Movement", as in ProShow, because when the same leaves are wobbling, there is no measured movement, there is randomness.3 points
-
Merry Christmas to you and your team Igor! Thanks for the early Christmas present! I look forward to working with this new exciting version!3 points
-
A collection of videos to wish you a Merry Christmas and Happy New Year 2026. All videos are themed around winter, Christmas, New Year, and Christmas miracles. Merry Christmas and Happy New Year to everyone! I wish you all good health, joy and happiness, love, kindness, success in all your endeavors and more frequent meetings with friends! Enjoy watching.3 points
-
Hello Ghuyla Igor did not reply with the tutorial; another forum member did? Did I get this wrong? "Let's be pragmatic" to quote you. You have raised your concerns, several times about this and other matters. The developer (Igor) has responded with what seems to be valid coding/development reasons. I am not aware of any other application that has a forum led by the developer. For me, if the application does not meet my requirements, I would be looking for alternative practical solution or maybe develop your own application that suits your needs? In this instance the application certainly suits my needs, I appreciate the feedback from the developer and other forum members, even though I may not always agree with it, I appreciate and respect the POV of others. Cheers Mark2 points
-
Regarding the volume of the new special effects, I do have the impression that the volume is rather low, even at a setting of 200. Compared to the standard music volume (100), I think a sound effect should be audible above this volume. So, to be audible, the volume should be adjusted (setting higher than 200). Or the volume of the special sound effect should be at least as loud as the standard music volume (100), with the option of increasing it to 200, as is currently possible with the music. Greetings, Cor2 points
-
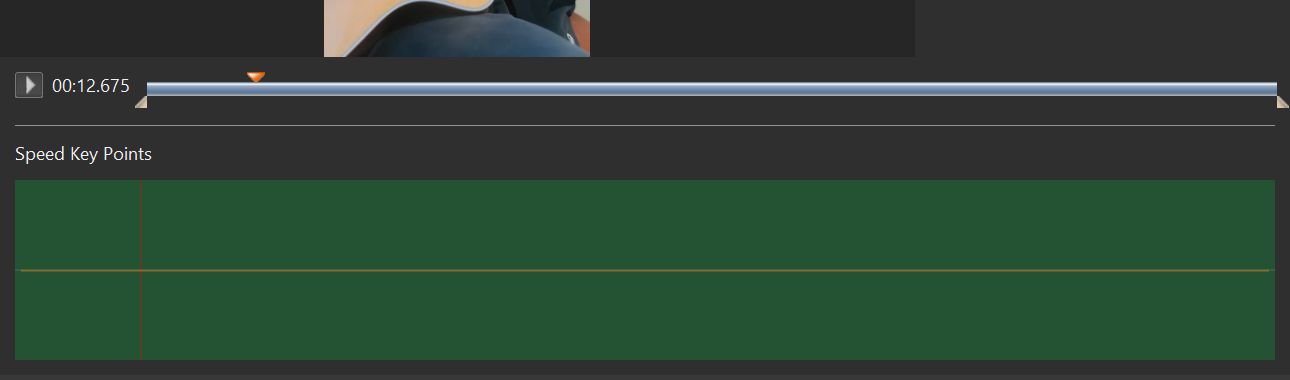
Gary, We plan to add special two buttons to set start and end points for trimming according triangle cursor. It will appear in Beta 3 or 4. I'll publish a small tutorial soon. We need to add some improvements for this window, and then I'll write the tutorial. I recommend to try now a new "Interpolate frames" option. Use some video footage with fast motion scene (cars, train, waterfall). Set video speed between 5% and 20% and enable "Interpolate frames" option. Check the result. Real my demonstation here: https://www.pteavstudio.com/forums/topic/52571-frame-interpolation-for-slow-motion-video/2 points
-
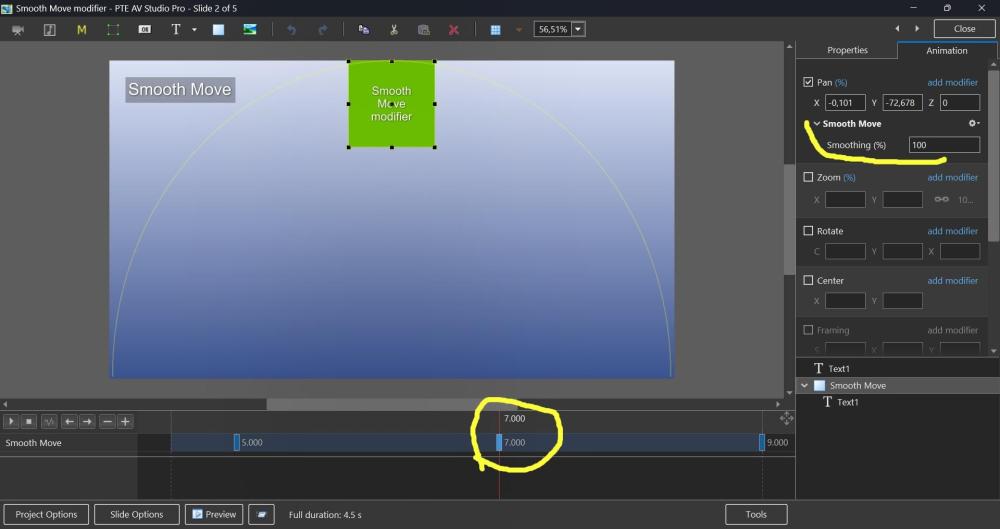
Hi, Smooth Move modifier was introduced in V11, but probably not everyone may know how useful it can be. This demo shows how the Smooth Move modifier improves animated panoramas when you change a direction of motion at a middle keyframe. Without the Smooth Move modifier, you'll see a sharp, unnatural break in the movement direction. With the Smooth Move modifier, the image smoothly changes trajectory with natural momentum, gently rounding the sharp corner. If you have 3 keyframes and a direction of motion changes at the 2nd keyframe (in the middle), you need to add the Smooth Move modifier to that 2nd keyframe. The "Smoothing (%)" parameter controls how much the motion is smoothed. I recommend to keep the default value 100%. Note that Smooth Move also creates smooth starts and stops, giving the motion a natural, momentum-based feel. If you're using simple motion between just 2 keyframes, use the Smooth speed modifier on the 1st keyframe instead. In this case, don't use Smooth Move. Download the demo project: Smooth Move modifier.zip Video example: Smooth Move modifier.webm Screenshot:
 2 points
 -
The MP4 just contains the trimmed part. If you make an exe then it will contain the whole video but only show the trimmed part. Jill2 points
-
Google doesn't allow the use of any screen filters on some system pages, for example: a blank page, web store for Chrome extensions, preferences of Chrome, etc.2 points
-
Thanks, Igor! I found this effect surprisingly interesting. It's truly pleasing to the eye, even though my monitor isn't glossy. It's like reading a newspaper.2 points
-
Thank you, Igor. I wish you and your team a Happy New Year. I’m looking forward to seeing what v12 has to offer.2 points
-
Happy New Year! Merry Christmas! May this year bring joy, happiness, and fulfillment of your wishes! The slide has been compiled. In the latest version PTE.2 points
-
Hello to all forum members. I bring to your attention a festive Christmas video. Description and download link for the YouTube video. Congratulations on the wonderful upcoming holidays. I wish you creative success and good health.2 points
-
Well, finally, we've finally got it! Thanks to Igor and the team for the pre-holiday surprise! I loved all the new features, each one is useful and improves the functionality of our favorite program! I especially appreciated the sound object, as it's been a long-awaited need. I think we'll get some interesting transitions with sound! I also really liked the ability to use video with keyframes, it's fantastic! I also really liked the RGB displacement effect (hello, glitches)! And you can definitely create something beautiful with the gradient map! Overall, thank you for your work! We'll try out all the new features and write more about them. Merry Christmas and Happy New Year!2 points
-
Merry Christmas and happy New Year to everyone! We wish peace, joy, and good health to all of you and your loved once! Alex55 The Link to the Project files provided2 points
-
Hi, Thanks for sharing!1 point
-
Greetings, Trying to figure the Trim function in this menu. As I play the video, I want to pause it to establish the beginning trim point. So the red triangle is at the point of the beginning trim position. How can I move the lower white triangle to where the red triangle is at? This has been the problem with the previous version. If I click on the white triangle to move it to the position of the red triangle, the red triangle will reposition back to the white triangle and I lose that set trim position. How do I get the white triangle to move to where I placed the red triangle? And I have no idea how to use the other items, like Interpolate Frames, Speed Key Points and Speed. Is there a video on how to use them? Gary
 1 point
 -
Nicely put together. Also nice the birds co-operated and stayed still long enough to get the images1 point
-
When creating a transition, the sound is set and running. You cannot replace an audio file from a folder or from a transition in documents. The audio file. 2 seconds. The pre-installed audio files work perfectly.1 point
-
I had a client who wanted me to put every line of a poem on a different slide, and animate it, I was doing that manually, but was wondering if it's possible to add a feature to automate it, as in, you give PTE your text, and tell it to map every line with a different slide/video in the slideshow as well as adding random transitions to the text.1 point
-
I'd like to be able to use blend modes to overlay images and videos onto other images. Any hope of this sneaking into an upcoming version?1 point
-
Hi Igor, I'm glad to hear you're working on this feature! It's a very important one. The mask option is perfectly fine for me; sometimes a mask is needed to use a specific area, but for full display there's always the built-in rectangle mask. But I wouldn't be opposed to other options as long as they're technically feasible within the program's capabilities. Thank you for your work on this feature!1 point
-
Hi Jill, Thanks for your opinion! Yes, it's possible to place one Mask container inside another Mask container with different mask modes.1 point
-
In my opinion, PTE shoul behave in a similar way as Photoshop (PS). In PTE we have nested structures using the Parent-Child-Construction. In PS we obtain nested structures of layers using (nested) Groups, and we have a kind of correspondence between the PTE-Parent-Objects and particular PS-Groups. It seems to me that PTE could use the PS blending mechanism. Regarding blending, groups of PS seem to be rendered independently if you avoid "Pass through". Furthermore, blending of parent objects in PTE and blending of the corresponding groups in PS should be the same. Perhaps, as a first step, you may study the situation where all groups and all parent objects have mode "Normal". Applying this method to your example above, Img2 would be multiplied with Img1 (overlapping parts) inside the Parent-Child-Group, but not with the black background image. It would just cover the background, provided that the blending mode of Img1 is "Normal".1 point
-
Sorry, but I stopped it after 30sec. To fast paste for my taste to enjoy seeing the birds. Bert1 point
-
Hello Igor, PTE developers, and forum members. Best wishes for a happy and wonderful 2026. Do what you like and if you cannot do that like what you do. Cheers Mark1 point
-
Hi Igor tested for me and it's OK
 1 point
 -
Beta 2 is available See the download links above. Updated Dutch, French, and Spanish translations. Added full support for dead keys (^, `, ´, ¨, ~) on international keyboard layouts - French, Spanish, German, Portuguese, Italian, Dutch, and others (Mac) Fixed an issue with sound objects being duplicated in custom transitions with multiple variants. Fixed an issue where Custom width and height fields were not visible in the New project window.1 point
-
Thanks to Igor and the whole team for the new version! I haven't yet figured out how to speed up and slow down video using keyframes. I'd be happy to see a tutorial on how to use this. I really like the AV1 format. The output file is about 1.5 times slower than MP4, but its size is twice (or more) smaller than H.264. Great! I wanted to ask if this version of the program will feature video looping (within a slide). We've been talking about this for a while now. Merry Christmas and Happy New Year! I wish you and the entire WnSoft team joy, happiness, love, health, and success in all your endeavors!1 point